The Different Types of Wall Cracks
Before diving into the repair process, it’s crucial to understand the different types of wall cracks you might encounter. Each type of crack can indicate different underlying issues, and the approach to repair can vary significantly based on the crack type.
Hairline Cracks
Characteristics and Causes
Hairline cracks are very thin, often less than 1mm in width. They are usually superficial and do not pose any structural threat. These cracks are often caused by minor settling of the building, fluctuations in temperature, or humidity levels. As the materials in your walls expand and contract, hairline cracks can form.
Common Areas Where They Appear
Hairline cracks are most commonly found in areas of your home that experience frequent temperature changes, such as near windows, doors, or corners of rooms. They can also appear on ceilings, especially in older homes with plaster walls. These cracks are often easy to repair but should still be addressed to prevent further deterioration.
Structural Cracks
How to Identify Structural Cracks
Structural cracks are more serious and can indicate underlying issues with your home’s foundation or overall structural integrity. These cracks are usually wider than hairline cracks and can be vertical, horizontal, or stair-step in nature. You might notice them in load-bearing walls, near windows or door frames, or in the foundation itself. The key indicators of structural cracks include width, direction, and location.
Potential Risks and Long-Term Impact
Ignoring structural cracks can lead to significant damage over time, including compromised structural integrity, moisture infiltration, and increased repair costs. Structural cracks can also affect the resale value of your home and may require extensive repairs, including foundation reinforcement or wall rebuilding.
Settling Cracks
Why Walls Settle and Develop Cracks
Settling cracks occur as a building naturally settles into its foundation over time. All buildings experience some degree of settling, especially within the first few years after construction. This process can cause minor shifts in the foundation, leading to cracks in the walls. Settling cracks are typically vertical and can appear suddenly or gradually over time.
Assessing the Severity of Settling Cracks
While many settling cracks are harmless, it’s important to assess their severity. Small, hairline cracks that appear after a building has settled are usually not a cause for concern. However, if you notice that these cracks are widening or if new cracks continue to appear, it may be a sign of a more serious issue, such as uneven settling or foundation problems, which should be addressed by a professional.
Other Common Crack Types
Vertical vs. Horizontal Cracks
Vertical cracks are often associated with settling and are generally less concerning than horizontal cracks. Horizontal cracks, especially those found in foundation walls, can indicate significant pressure on the wall from the outside, such as soil pressure or water damage. Horizontal cracks should be inspected by a professional, as they can be a sign of structural failure.
Drywall vs. Plaster Wall Cracks
The type of wall material can also influence the appearance and severity of cracks. Drywall is more flexible and prone to hairline cracks, especially in new homes as they settle. Plaster walls, commonly found in older homes, are more brittle and can develop larger, more noticeable cracks. Plaster cracks can be more challenging to repair and often require specific techniques and materials to restore.
Understanding the different types of cracks in your walls is the first step toward effective repair. By identifying the characteristics and causes of each crack type, you can better assess the necessary repairs and take action to maintain the integrity and appearance of your walls.
Preparing for Wall Crack Repair
Before you begin repairing cracks in your walls, it’s important to prepare properly. This preparation includes gathering the right tools and materials, taking necessary safety precautions, and ensuring the area is clean and ready for repair. Proper preparation will ensure that your repairs are effective and long-lasting.
Essential Tools and Materials
To successfully repair cracks in your walls, you’ll need to have the right tools and materials on hand. Here’s a list of essential items you’ll need:
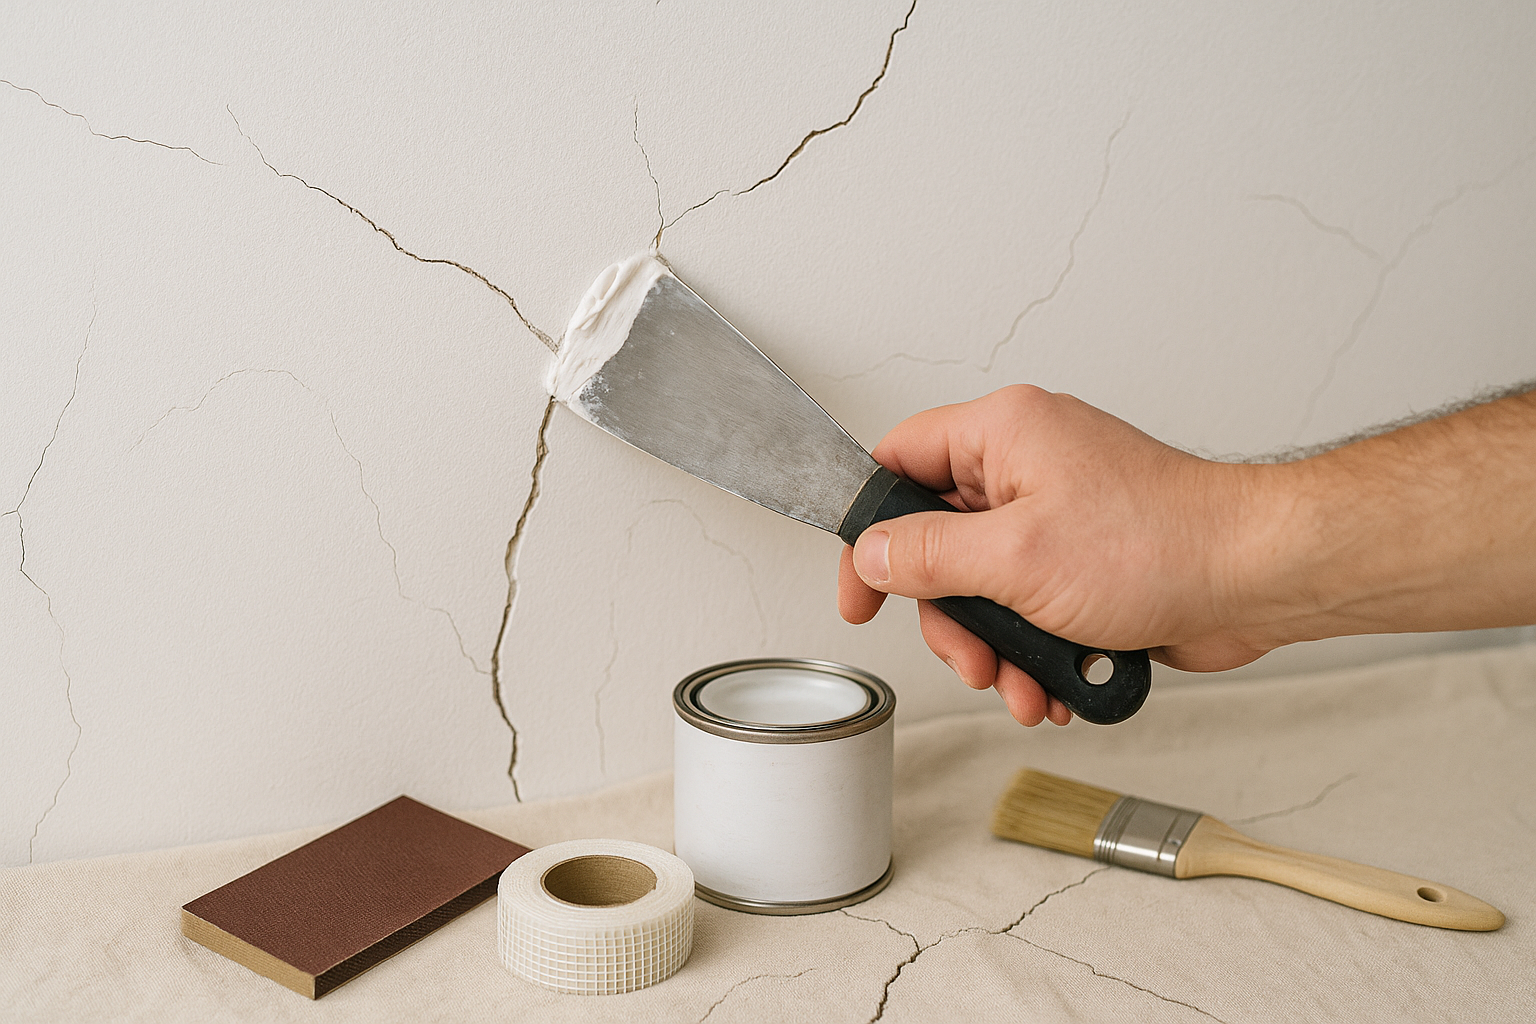
- Putty Knife: A flexible putty knife is essential for applying filler smoothly into cracks. It’s recommended to have a few different sizes to accommodate varying crack widths.
- Sandpaper: Sandpaper is used to smooth the surface of the wall after the filler has dried. A medium-grit sandpaper (around 120-150 grit) is usually sufficient for most repairs.
- Filler (e.g., Spackling Paste, Joint Compound): The type of filler you use depends on the crack and the wall material. Spackling paste is ideal for small, hairline cracks, while joint compound is better suited for larger cracks or cracks in drywall.
- Mesh Tape: For larger cracks, particularly structural ones, mesh tape can be used to reinforce the repair and prevent the crack from reopening.
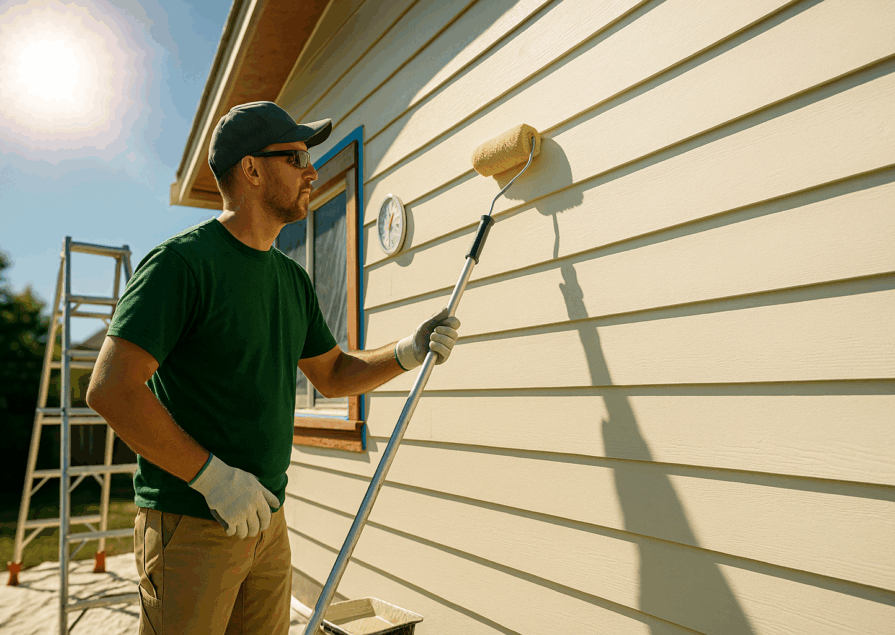
- Paint and Primer: Once the crack is repaired, you’ll need to repaint the area. Be sure to use a primer first, especially if the repaired area is larger or if you’re using a different color paint.
- Drop Cloths and Painter’s Tape: These will protect your floors and adjacent walls or fixtures from dust and paint.
Safety Precautions Before Starting
Repairing wall cracks involves handling tools and materials that can pose safety risks if not used correctly. Follow these safety precautions to ensure a safe repair process:
- Protective Gear to Wear:
- Safety Glasses: Protect your eyes from dust, debris, and any potential splatters from fillers or paint.
- Dust Mask: Wearing a dust mask is important when sanding walls, as fine particles can be harmful if inhaled.
- Gloves: Wear gloves to protect your hands from harsh chemicals in fillers or paint and to prevent skin irritation from dust.
- How to Safely Handle Materials:
- Proper Ventilation: Ensure the room is well-ventilated when working with fillers, primers, or paint, as fumes can be harmful.
- Careful Storage: Store all materials properly to prevent spills and accidents. Keep them out of reach of children and pets.
- Safe Tool Usage: Always use tools according to the manufacturer’s instructions. For example, use the putty knife at the correct angle to avoid damaging the wall further.
Cleaning and Prepping the Area
A clean and well-prepped surface is crucial for a successful repair. Dirt, dust, or debris can prevent fillers from adhering properly, leading to a weak repair.
- Steps to Clean the Area Before Repair:
- Remove Loose Debris: Use a small brush or vacuum to remove any loose debris from the crack. This is especially important for larger cracks where debris might accumulate.
- Wipe Down the Surface: Dampen a cloth with water or a mild cleaning solution and wipe down the area around the crack. This removes dust and grease that could interfere with the repair.
- Allow the Area to Dry: Make sure the wall is completely dry before applying any filler. Moisture can weaken the bond between the filler and the wall.
- Importance of Removing Debris and Dust:
- Improved Adhesion: Clean surfaces allow fillers to adhere better, ensuring a smoother and more durable repair.
- Smoother Finish: Removing dust and debris prevents lumps and imperfections in the final finish, leading to a more professional-looking repair.
By taking the time to properly prepare for your wall crack repair, you’ll set the stage for a successful project. Having the right tools, following safety precautions, and ensuring a clean work area are essential steps that can make a significant difference in the quality and durability of your repairs.
Step-by-Step Guide to Repairing Hairline Cracks
Repairing hairline cracks in your walls is a straightforward process, but it requires careful attention to detail to ensure a smooth, lasting finish. This section will guide you through each step, from cleaning the crack to applying filler, sanding, and repainting the wall.
Cleaning the Crack
Before you can repair a hairline crack, it’s essential to clean it thoroughly. Proper cleaning ensures that the filler will adhere well and that the repair will be durable.
How to Clean Hairline Cracks for Better Adhesion:
- Use a Small Brush or Vacuum: Start by using a small, stiff-bristled brush to remove any loose debris or dust from inside the crack. For very narrow cracks, you can use a soft-bristled toothbrush or a vacuum cleaner with a narrow attachment to suck out the dust. This step is crucial for removing any particles that could prevent the filler from bonding properly.
- Wipe the Area with a Damp Cloth: After brushing, use a damp cloth to gently wipe around the crack. This will remove any remaining dust on the surface that could interfere with the repair. Be sure to let the area dry completely before moving on to the next step.
Tools to Use for Cleaning:
- Small stiff-bristled brush or toothbrush
- Vacuum cleaner with a narrow attachment
- Damp cloth or sponge
Applying the Filler
Once the crack is clean and dry, you can begin applying the filler. Choosing the right filler and using the correct application techniques are key to achieving a smooth, professional-looking repair.
Choosing the Right Filler for Hairline Cracks:
- Spackling Paste: For hairline cracks, spackling paste is typically the best choice. It’s easy to apply, dries quickly, and sands smoothly. Make sure to choose a lightweight spackling paste designed for interior use.
- Acrylic Caulk: If the crack is in a high-moisture area, such as a bathroom, you might want to use an acrylic caulk instead, which provides a bit more flexibility and water resistance.
Techniques for Smooth Application:
- Apply in Thin Layers: Use a putty knife to apply the filler, starting with a small amount and spreading it over the crack in a thin, even layer. Press the filler into the crack and then smooth it out, removing any excess.
- Feather the Edges: To ensure that the repair blends seamlessly with the surrounding wall, feather the edges of the filler. This means using your putty knife to thin out the filler as you move away from the crack, creating a gradual transition.
- Allow to Dry Thoroughly: Let the filler dry completely before moving on to sanding. Drying times vary depending on the product, so check the manufacturer’s instructions.
Sanding and Finishing
Sanding is an essential step that ensures your repair blends smoothly with the surrounding wall. After the filler has dried, you’ll need to sand the area to achieve a professional finish.
How to Sand the Filled Area Properly:
- Use Fine-Grit Sandpaper: Start with a fine-grit sandpaper (around 120-150 grit) to gently sand the dried filler. Use light pressure and sand in a circular motion to smooth out any ridges or uneven areas.
- Check for Smoothness: Run your hand over the sanded area to check for smoothness. If you feel any bumps or ridges, continue sanding until the surface is completely smooth.
Tips for Blending the Repair with the Surrounding Wall:
- Feather the Sanding: Just as you feathered the edges when applying the filler, do the same when sanding. Gradually sand the area surrounding the crack repair to create a smooth transition that blends with the wall.
- Clean Up Dust: After sanding, use a damp cloth or a vacuum to remove all dust from the wall before painting.
Repainting the Wall
The final step in repairing hairline cracks is repainting the wall. Choosing the right paint and applying it correctly will ensure that the repair is invisible and your wall looks as good as new.
How to Choose the Right Paint:
- Match the Existing Paint: If you’re only repainting the repaired area, be sure to match the paint color and finish exactly to the existing wall. If you’re unsure of the color, consider repainting the entire wall or at least the entire section.
- Use a Quality Primer: Before applying paint, use a quality primer over the repaired area. This helps to seal the filler and ensures that the paint adheres well, providing a uniform finish.
Techniques for a Seamless Finish:
- Blend the Edges: When repainting the repaired area, start in the center and work your way outward, feathering the paint into the surrounding wall. This helps to avoid visible lines where the new paint meets the old.
- Apply Multiple Coats if Necessary: Depending on the color and type of paint, you may need to apply more than one coat to achieve full coverage. Be sure to let each coat dry completely before applying the next.
By following these steps carefully, you can repair hairline cracks in your walls and restore a smooth, flawless finish that blends seamlessly with the surrounding surface.
Repairing Structural Cracks
Structural cracks in your walls are a more serious concern than minor hairline cracks, as they can indicate deeper issues with the foundation or structural integrity of your home. Properly addressing these cracks requires a thorough assessment, the right materials, and precise techniques to ensure a durable repair.
Assessing the Damage
Before attempting to repair structural cracks, it’s essential to accurately assess the extent of the damage to determine whether a DIY approach is sufficient or if you need to call in a professional.
When to Call a Professional:
- Significant Cracks: If you encounter cracks wider than 1/4 inch or that appear suddenly and rapidly worsen, it’s best to consult a structural engineer or a professional contractor. Such cracks may indicate serious structural issues, such as foundation movement or severe settling, which require expert evaluation and repair.
- Cracks in Load-Bearing Walls: Cracks that appear in load-bearing walls or near structural elements like beams and columns are critical and should be assessed by a professional. These cracks can compromise the safety of your home if not addressed properly.
- Multiple Cracks in One Area: If you notice several cracks in one area or along the same wall, this could signal a more significant problem, such as a shifting foundation or poor construction. Professional intervention is advisable in these cases.
DIY Methods vs. Professional Repairs:
- DIY Repairs: For minor structural cracks, especially those in non-load-bearing walls, you may attempt repairs yourself using the methods outlined in this guide. These repairs can be effective for small cracks caused by natural settling or minor foundation shifts.
- Professional Repairs: Large structural cracks, cracks in load-bearing walls, or those caused by significant foundation issues should be repaired by professionals. These repairs often involve more extensive work, such as foundation underpinning, wall reinforcement, or the installation of support beams.
Reinforcing the Wall
For DIY repairs of minor structural cracks, reinforcing the wall before filling the crack is crucial to prevent the crack from reappearing and to add strength to the repaired area.
Using Mesh Tape for Added Strength:
- Mesh Tape Selection: Use a self-adhesive fiberglass mesh tape designed for drywall or plaster repairs. This tape helps to bridge the crack and provides additional support, reducing the likelihood of the crack reopening.
- Positioning the Tape: Apply the mesh tape directly over the crack, pressing it firmly against the wall. Ensure that the tape extends slightly beyond the crack on all sides to cover the entire damaged area.
How to Apply Reinforcement Correctly:
- Smooth Application: After positioning the tape, use a putty knife to press it into the crack and ensure it adheres firmly to the wall. Smooth out any wrinkles or bubbles in the tape to create a flat, even surface.
- Multiple Layers if Needed: For larger or deeper cracks, you may need to apply multiple layers of mesh tape, overlapping them slightly for added strength. Make sure each layer is securely adhered before moving on to the next step.
Filling and Finishing Structural Cracks
Once the crack is reinforced, it’s time to fill and finish it. This step involves using a suitable filler and following a careful application process to ensure a durable, smooth repair.
Types of Fillers Suitable for Structural Cracks:
- Hydraulic Cement: This is a common choice for structural cracks, especially in foundations. It expands as it dries, which helps to seal the crack tightly.
- Epoxy Resin: Epoxy is another strong option for structural cracks. It forms a rigid bond and is highly durable, making it ideal for repairing cracks in load-bearing walls or areas under significant stress.
- Joint Compound or Spackling Paste: For less severe structural cracks, a high-strength joint compound or spackling paste can be used. These are easier to work with for smaller cracks but may not be suitable for larger structural issues.
Step-by-Step Application Guide:
- Mix the Filler: Follow the manufacturer’s instructions to mix the chosen filler. For hydraulic cement or epoxy, be sure to mix only the amount you can use within the working time, as these materials can set quickly.
- Apply the Filler: Use a putty knife to apply the filler over the mesh tape and into the crack. Press the filler firmly into the crack, ensuring it fills the entire void. Smooth the surface with the putty knife, removing any excess material.
- Build Up in Layers: For deeper cracks, apply the filler in layers, allowing each layer to dry before applying the next. This ensures a stronger bond and reduces the risk of the filler shrinking or cracking as it dries.
- Smooth the Surface: Once the final layer of filler is applied, smooth it out with the putty knife, feathering the edges to blend with the surrounding wall. Let the filler dry completely before sanding.
- Sand the Repaired Area: After the filler has dried, sand the area with fine-grit sandpaper to achieve a smooth, even finish. Wipe away any dust before proceeding to painting.
Painting and Sealing the Repair
The final step in repairing structural cracks is to paint and seal the repaired area. This not only restores the appearance of your wall but also helps to protect the repair from future damage.
How to Choose the Right Paint for Structural Repairs:
- Use a High-Quality Primer: Before painting, apply a high-quality primer to the repaired area. This seals the filler and provides a uniform base for the paint, ensuring better adhesion and a more even finish.
- Match the Paint: Select a paint that matches the existing wall color and finish. If you’re unsure of the exact color, consider repainting the entire wall or section to achieve a seamless look.
Techniques for Sealing to Prevent Future Cracks:
- Apply Paint in Multiple Coats: Apply at least two coats of paint over the repaired area, allowing each coat to dry completely before applying the next. This provides added protection and ensures the repair is fully covered.
- Seal with a Protective Finish: In areas prone to moisture or stress, consider applying a clear protective sealant over the paint. This adds an extra layer of protection and helps to prevent future cracks.
By carefully assessing the damage, reinforcing the wall, applying the right filler, and properly finishing the repair, you can effectively address structural cracks and restore the integrity of your walls. Remember, for serious structural issues, it’s always best to consult a professional to ensure your home’s safety and stability.
Tips for Preventing Future Wall Cracks
Preventing future wall cracks is an important part of maintaining your home’s structural integrity and aesthetic appeal. By taking proactive steps to manage the environment within your home, performing regular inspections, and ensuring your foundation is in good condition, you can minimize the likelihood of cracks developing over time.
Maintaining a Stable Home Environment
The internal environment of your home plays a significant role in the development of wall cracks. Temperature fluctuations and humidity levels can cause materials to expand and contract, leading to stress on the walls.
How Temperature and Humidity Affect Walls:
- Temperature Fluctuations: Rapid changes in temperature can cause the materials in your walls to expand and contract. This movement, over time, can lead to the development of cracks, especially if the fluctuations are frequent or extreme.
- Humidity Levels: High humidity can cause walls, particularly those made of drywall or plaster, to absorb moisture. This can weaken the material, making it more prone to cracking. Conversely, extremely low humidity can dry out materials, causing them to shrink and crack.
Tips for Maintaining Stability:
- Use a Humidifier or Dehumidifier: Maintaining a consistent humidity level in your home, ideally between 40-60%, can help prevent moisture-related wall issues. In dry climates, a humidifier can add moisture to the air, while in humid climates, a dehumidifier can remove excess moisture.
- Control Indoor Temperature: Avoid drastic changes in your home’s temperature by using a programmable thermostat. Keeping your home at a steady temperature helps to reduce the expansion and contraction of wall materials.
- Ventilate Properly: Ensure your home is well-ventilated, especially in areas like kitchens and bathrooms where moisture levels can be high. Proper ventilation helps to disperse excess moisture and maintain stable humidity levels.
Regular Home Inspections
Performing regular inspections of your home’s walls and structure is key to catching small issues before they develop into larger, more costly problems.
What to Look for During Inspections:
- Check for Small Cracks: During your inspections, look for small hairline cracks in the walls, especially around windows, doors, and corners. Pay attention to areas where cracks have been repaired previously to ensure they haven’t reappeared.
- Inspect for Moisture Damage: Look for signs of moisture damage, such as discoloration, peeling paint, or soft spots on the walls. These issues can weaken the wall and lead to cracks over time.
- Examine the Foundation: Check for any cracks or shifts in the foundation, as these can directly impact the walls above. Foundation issues often manifest as cracks in the walls, especially in the basement or lower levels of the home.
Importance of Addressing Small Issues Before They Grow:
- Preventing Larger Problems: Small cracks or signs of damage can often be repaired easily and inexpensively if caught early. Ignoring these issues can lead to more significant damage that requires extensive repairs.
- Maintaining Home Value: Regularly addressing minor issues helps to maintain the value of your home. A well-maintained home with no visible cracks or damage is more attractive to potential buyers and appraisers.
Proper Foundation Care
The foundation of your home is critical to the overall integrity of the structure. Proper care and maintenance of the foundation can help prevent cracks from developing in the walls.
How the Foundation Impacts Wall Integrity:
- Foundation Settling: Over time, the foundation of your home can settle, causing shifts that may lead to cracks in the walls. Ensuring your foundation is stable and well-supported helps prevent these issues.
- Water Damage: Water pooling around the foundation can weaken it, leading to shifts and cracks. Ensuring proper drainage and moisture control around the foundation is essential to maintaining its integrity.
Tips for Foundation Maintenance:
- Ensure Proper Drainage: Make sure that your home’s gutters and downspouts are directing water away from the foundation. If necessary, install a drainage system to prevent water from pooling around the foundation.
- Monitor Foundation Movement: Keep an eye on any small cracks in the foundation, as these can be early signs of more significant movement. If you notice widening cracks or if the foundation appears to be shifting, consult a professional.
- Keep Vegetation in Check: Large trees and plants near the foundation can cause issues with root growth affecting the foundation. Ensure that vegetation is planted at a safe distance to avoid root interference.
When to Seek Professional Help
While many minor cracks can be repaired by homeowners, there are times when it’s crucial to seek professional help to ensure the safety and stability of your home.
Signs of Serious Structural Issues
Identifying serious structural problems early can prevent catastrophic damage and costly repairs. Knowing what to look for can help you determine when it’s time to call in a professional.
How to Identify Serious Structural Problems:
- Wide or Expanding Cracks: Cracks wider than 1/4 inch or those that are growing in size over time are signs of potential structural problems. These cracks are often found near load-bearing walls, foundations, or areas under significant stress.
- Stair-Step Cracks: Cracks that form a stair-step pattern along brick or block walls are usually indicative of foundation movement. These cracks often require professional assessment to determine the underlying cause.
- Cracks Accompanied by Other Issues: If you notice cracks along with other issues such as doors or windows that won’t close properly, sloping floors, or gaps between walls and ceilings, these could be signs of a serious structural problem that needs immediate attention.
Importance of Professional Assessment:
- Accurate Diagnosis: A professional can accurately diagnose the cause of the cracks and determine the most appropriate repair method. This prevents further damage and ensures the safety of your home.
- Comprehensive Repairs: Structural repairs often involve complex techniques that require professional expertise. Professionals can provide comprehensive solutions that address the root cause of the problem, not just the visible symptoms.
Professional Repair Options
When structural issues are identified, professionals offer a range of repair options to stabilize and reinforce your home.
Overview of Professional Repair Techniques:
- Foundation Underpinning: This technique involves reinforcing the foundation by extending its depth or breadth to better support the structure. It’s commonly used to address issues caused by settling or shifting foundations.
- Wall Reinforcement: Professionals may install steel beams, carbon fiber straps, or wall anchors to stabilize walls that have cracked due to structural pressure. These methods add strength to the wall and prevent further movement.
- Epoxy or Polyurethane Injection: For certain types of cracks, professionals may inject epoxy or polyurethane into the crack to seal it and prevent water infiltration. This method is often used for cracks in concrete walls or foundations.
Cost Considerations:
- Varies by Severity: The cost of professional repairs can vary widely depending on the severity of the structural issue and the repair method needed. Minor repairs may cost a few hundred dollars, while more extensive foundation work can run into thousands of dollars.
- Investment in Safety: While professional repairs can be costly, they are an investment in the safety and longevity of your home. Proper repairs can prevent future damage, which could be far more expensive to fix.
By understanding the signs of serious structural issues and knowing when to seek professional help, you can protect your home from further damage and ensure that any necessary repairs are done correctly and efficiently.
Conclusion
Recap of Key Steps
Repairing wall cracks is a straightforward process, but it requires careful attention to detail to ensure lasting results. The key steps in the repair process include:
- Assessing the Crack: Start by identifying the type of crack you’re dealing with—whether it’s a minor hairline crack, a settling crack, or a more serious structural crack. This will determine the appropriate repair method.
- Gathering Essential Tools and Materials: Make sure you have all the necessary tools, such as a putty knife, sandpaper, and the right filler material. Using the correct materials is crucial for achieving a durable repair.
- Cleaning and Prepping the Area: Thoroughly clean the crack and surrounding area to remove any dust or debris that could interfere with the adhesion of the filler. Proper preparation is vital for a smooth finish.
- Applying Filler and Reinforcement: Depending on the crack, apply the appropriate filler and, if necessary, reinforce the area with mesh tape. Follow the application process carefully to ensure the repair is strong and seamless.
- Sanding and Repainting: Once the filler has dried, sand the area smooth and apply paint to match the surrounding wall. Proper sanding and painting techniques are essential for blending the repair with the existing wall surface.
The importance of thorough preparation and the use of proper materials cannot be overstated. These elements are the foundation of a successful repair, ensuring that the cracks are not only filled but also that they do not reappear.
Final Thoughts
Taking timely action on minor wall cracks can prevent them from developing into more significant issues that require extensive and costly repairs. By addressing cracks early, you can maintain the integrity and appearance of your home.
However, it’s also important to recognize when a crack may indicate a more serious structural issue. In such cases, seeking professional help is crucial to ensure your home’s safety and stability.
Regular maintenance and inspections play a key role in preventing wall cracks. By keeping an eye on your home’s condition and addressing any small issues as they arise, you can avoid larger problems down the line, protecting both your investment and your peace of mind.
FAQs
How do I know if a crack is serious?
A crack is considered serious if it is wider than 1/4 inch, is growing over time, or is located in a load-bearing wall or near the foundation. Other signs of serious cracks include stair-step patterns in brick or block walls and cracks accompanied by other issues such as doors or windows that won’t close properly. If you notice any of these signs, it’s best to consult a professional for an assessment.
Can I use regular spackling paste for all cracks?
Regular spackling paste is suitable for small, non-structural cracks, such as hairline cracks in drywall. However, it is not recommended for larger cracks, structural cracks, or cracks in areas subject to significant stress or moisture. For these, you should use more durable materials like joint compound, epoxy resin, or hydraulic cement.
How long should I wait before repainting after repair?
You should wait until the filler has completely dried before sanding and repainting. The drying time can vary depending on the type of filler used and the thickness of the application, but it typically takes 24 hours. Follow the manufacturer’s instructions for drying times to ensure the repair is fully set before painting.
What are the signs that a repaired crack is reappearing?
If a previously repaired crack begins to widen, develop new lines, or show signs of movement, it may be reappearing. Additionally, if the paint over the repair starts to crack or bubble, it could indicate that the underlying issue was not fully resolved. If you notice these signs, it might be necessary to re-evaluate the cause of the crack and consider a more comprehensive repair.
How can I prevent cracks from reappearing after repair?
To prevent cracks from reappearing, ensure that the underlying cause of the crack is addressed. This might include stabilizing your home’s foundation, controlling indoor humidity, or reinforcing the wall with mesh tape during the repair. Additionally, using high-quality materials and following proper repair techniques will help create a durable repair that is less likely to fail. Regular maintenance and inspections can also help catch any new issues early, before they cause the repair to fail.