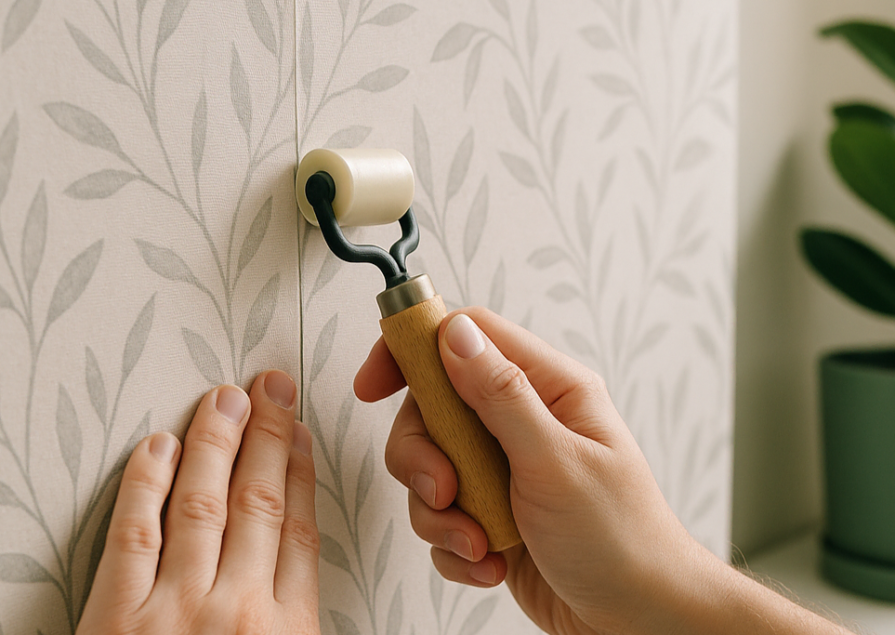
Let’s face it – staring at that outdated wallpaper is driving you bonkers. Whether it’s the floral nightmare from the 80s or that “trendy” geometric pattern that’s definitely not trendy anymore, it’s time to show that paper who’s boss.
Here’s the kicker: Professional wallpaper removal can cost you $200-800 per room. But rolling up your sleeves and doing it yourself? You’re looking at $50-100 in supplies max. That’s money in your pocket and bragging rights at the next neighbourhood barbecue.
This guide will walk you through everything – from identifying what type of wallpaper is mocking you from your walls to getting every last bit of stubborn adhesive off. No fluff, no generic advice that doesn’t work. Just real-world techniques that actually get the job done.
💡 Pro Insider Tip: Most homeowners think wallpaper removal is a nightmare because they skip the prep work. Spend 30 minutes prepping, save yourself hours of headaches later.
Before You Start: Essential Wallpaper Removal Preparation
How to Identify Your Wallpaper Type
Not all wallpaper is created equal, and your removal strategy depends entirely on what you’re dealing with. Here’s how to figure out what’s stuck to your walls:
The Quick Identification Test:
- Pick a corner (preferably near a window or door trim)
- Use your fingernail to lift a small section
- Pull gently and see what happens
| Wallpaper Type | What Happens When You Pull | Removal Difficulty |
| Vinyl | Peels off in large sheets, backing stays | ⭐⭐ Easy |
| Traditional Paper | Tears easily, comes off in small pieces | ⭐⭐⭐ Moderate |
| Fabric-Backed | Feels thick, tears irregularly | ⭐⭐⭐⭐ Hard |
| Paintable/Prepasted | Barely budges, feels plasticky | ⭐⭐⭐⭐⭐ Very Hard |
Vinyl wallpaper is your best friend – it often peels off like a bad sunburn. Traditional paper is trickier but manageable. Fabric-backed means you’re in for some elbow grease. Paintable wallpaper? That’s when you start questioning your life choices.
🔍 Fun Fact: Vinyl wallpaper was invented in 1947 as a “washable” alternative to traditional paper. Ironically, it’s often the easiest to remove because it doesn’t bond as permanently with wall adhesive.
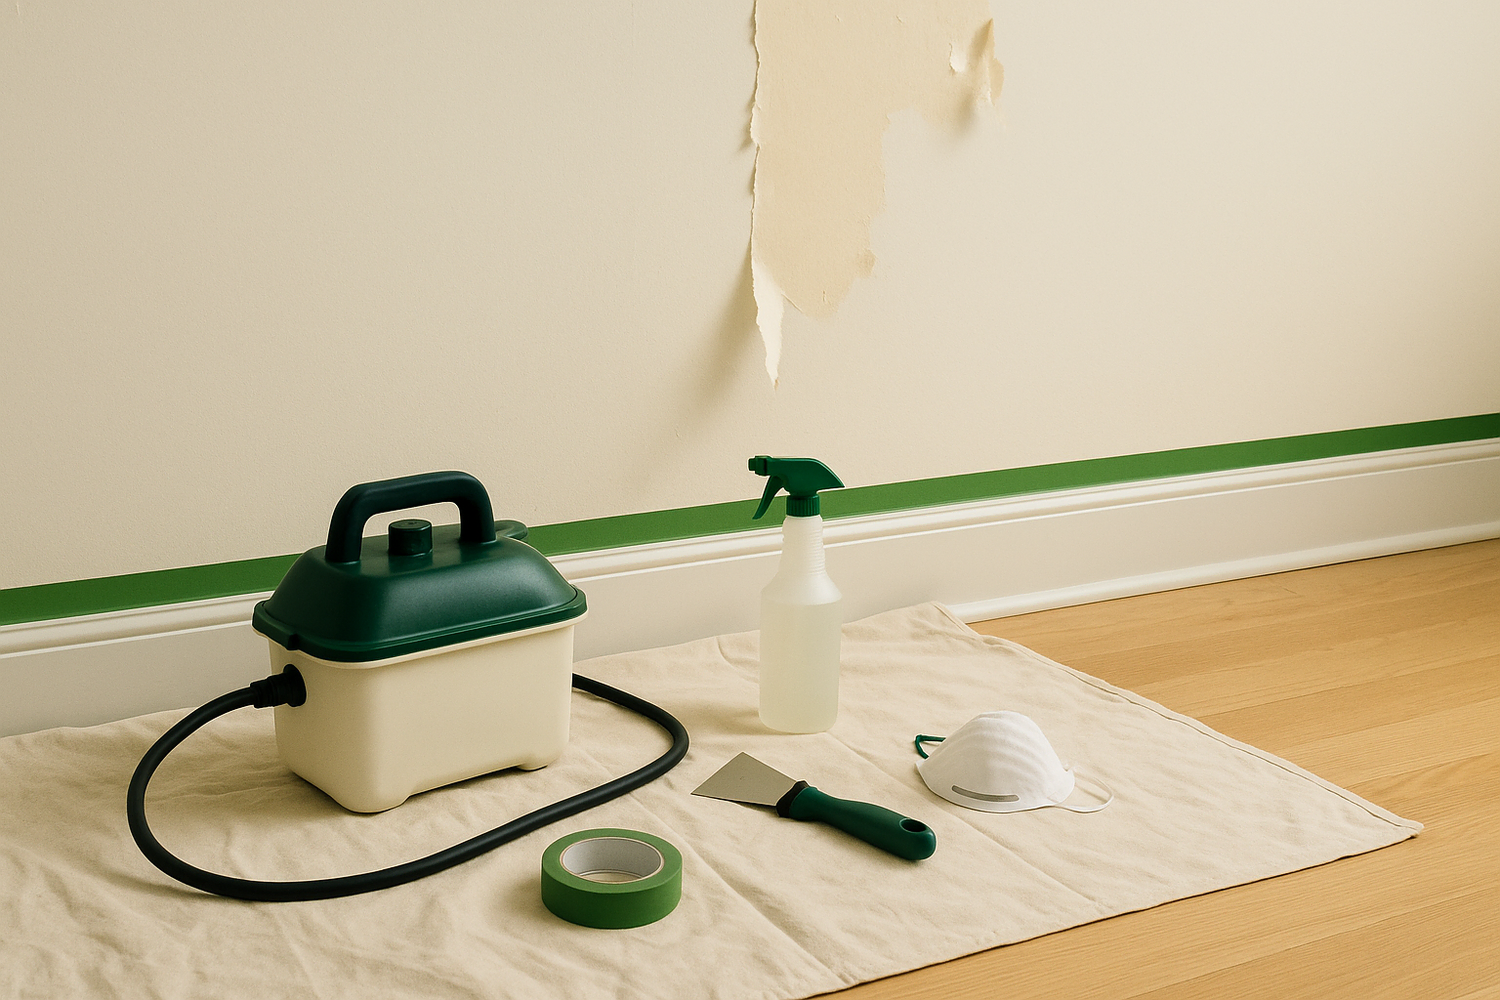
Essential Tools and Materials Checklist
Don’t be that person who starts a project only to realize you’re missing the one tool that makes everything easier. Here’s your shopping list:
The Non-Negotiables:
- Scoring tool (wallpaper scorer or utility knife)
- Wide putty knife (4-6 inches)
- Plastic scraper (won’t gouge your walls)
- Spray bottles (at least 2)
- Drop cloths (canvas, not plastic – trust me on this)
The Game-Changers:
- Liquid fabric softener (the secret weapon most pros won’t tell you about)
- Commercial wallpaper remover (Zinsser DIF is solid)
- Steam iron or wallpaper steamer rental
- Rubber gloves (your hands will thank you)
The Nice-to-Haves:
- Heat gun (for stubborn adhesive)
- Sponges and rags (lots of them)
- Plastic sheeting (protect your floors)
- Small ladder or step stool
Cost Breakdown:
- Basic tools: $25-40
- Chemical solutions: $15-25
- Protective gear: $10-15
- Total investment: $50-80
Compare that to paying a pro $300+ and you’re laughing all the way to the bank.
Room Preparation and Safety Setup
Skip this step and you’ll spend more time cleaning up than actually removing wallpaper. Here’s how to prep like a pro:
Furniture and Protection:
- Move everything out (seriously, everything)
- Cover floors with canvas drop cloths
- Remove outlet covers and switch plates
- Cover electrical boxes with masking tape
Safety First (Because Hospital Bills Suck):
- Turn off electricity to the room at the breaker
- Open windows for ventilation
- Wear safety glasses (wallpaper bits love to fly around)
- Keep kids and pets out until you’re done
⚠️ Safety Reality Check: Chemical wallpaper removers contain solvents that can cause headaches and respiratory irritation. Good ventilation isn’t optional – it’s mandatory.
The Complete Wallpaper Removal Process
Step 1 – Test Your Wallpaper for Easy Removal
Before you go crazy with chemicals and tools, do this simple test that could save you hours:
The Corner Test:
- Pick a bottom corner near the baseboard
- Use your fingernail to lift about 2 inches
- Pull slowly at a 45-degree angle
- See what happens
If it peels off cleanly: You’ve hit the jackpot! This is dry-strippable wallpaper. Keep peeling carefully and you might be done in 30 minutes.
If it tears immediately: You’re dealing with traditional wallpaper that needs the full treatment.
If nothing happens: Welcome to the world of vinyl or painted-over wallpaper. Buckle up.
Step 2 – Score the Wallpaper (When Necessary)
Scoring creates tiny holes that let your removal solution penetrate the wallpaper. But here’s the thing – you don’t always need to score.
Skip scoring if:
- Your corner test showed easy peeling
- You’re dealing with unpasted wallpaper
- The wallpaper is already coming off in sheets
Score when:
- Wallpaper won’t budge during corner test
- You’re dealing with vinyl or coated papers
- Previous attempts without scoring failed
Proper Scoring Technique:
- Start at the top of the wall
- Roll the scoring tool in overlapping circles
- Apply light pressure (you want to puncture paper, not drywall)
- Work in 3-foot sections
🚨 Common Mistake Alert: Over-scoring will damage your drywall. The scoring tool should feel like you’re writing with a pen, not carving wood.
Step 3 – Apply Removal Solution
This is where the magic happens. Your removal solution breaks down the adhesive bond, making the wallpaper slide off like butter.
The Fabric Softener Method (My Personal Favourite):
- 1 part liquid fabric softener
- 2 parts warm water
- Mix in spray bottle
Why fabric softener? It’s designed to break down bonds in fabric, and wallpaper adhesive reacts the same way.
Commercial Remover Method:
- Follow package directions (usually 1:4 ratio with water)
- DIF Wallpaper Stripper is reliable
- More expensive but stronger for stubborn papers
Steam Method (For the Really Stubborn Stuff):
- Rent a wallpaper steamer from Home Depot ($30-40/day)
- Hold steamer plate against wall for 30 seconds
- Move to adjacent section while scraping steamed area
| Solution Type | Mix Ratio | Best For | Cost per Room |
| Fabric Softener | 1:2 with water | Most wallpapers | $3-5 |
| Commercial Remover | 1:4 with water | Vinyl, stubborn adhesive | $8-12 |
| Steam Only | N/A | Multiple layers, painted-over | $30-40 (rental) |
Application Technique:
- Spray from top to bottom in 4-foot sections
- Soak thoroughly – you want it dripping slightly
- Work systematically – don’t jump around the room
- Re-spray if solution dries before you can scrape
Step 4 – Wait Time and Penetration
Patience, grasshopper. This is where most DIYers mess up – they don’t let the solution do its job.
Timing by Wallpaper Type:
- Traditional paper: 10-15 minutes
- Vinyl (scored): 20-30 minutes
- Fabric-backed: 30-45 minutes
- Multiple layers: 45+ minutes
Signs the Solution Has Worked:
- Paper looks darker/saturated
- Edges start curling slightly
- You can smell the solution (fabric softener scent)
- Small sections peel when gently lifted
When to Re-Apply:
- Solution has dried completely
- Paper still firmly adhered after maximum wait time
- Only partial penetration visible
⏰ Time-Saving Truth: Rushing this step costs you time later. Better to wait an extra 10 minutes than spend an hour fighting stubborn adhesive.
Step 5 – Remove Wallpaper Sections
Now for the satisfying part – watching that ugly wallpaper come off your walls.
Starting Strategy:
- Begin at a seam or corner where you did your test
- Work from top to bottom (gravity is your friend)
- Peel at a shallow angle (30-45 degrees)
- Go slow and steady – fast pulls cause tears
Scraping Technique:
- Use plastic scrapers first (metal gouges drywall)
- Keep scraper at 30-degree angle to the wall
- Push, don’t pull the scraper
- Overlap your strokes slightly
When Paper Tears:
- Stop and re-spray the torn section
- Wait another 10 minutes for better penetration
- Use a smaller scraper for detail work
- Don’t force it – patience saves your walls
Working in Sections:
- Complete one wall before moving to the next
- Keep a damp rag handy for cleaning your tools
- Take breaks – your arms will get tired
Step 6 – Clean Adhesive Residue
The wallpaper’s off, but you’re not done yet. That sticky residue left behind will show through paint and cause new wallpaper to fail.
Residue Identification:
- Light residue: Slightly tacky, comes off with damp cloth
- Medium residue: Visible glue spots, needs chemical removal
- Heavy residue: Thick, gummy, requires scraping
Cleaning Solutions (In Order of Intensity):
- Warm water and dish soap (try this first)
- Fabric softener solution (same mix as removal)
- Commercial adhesive remover (Goo Gone)
- Heat gun and scraper (last resort)
Cleaning Process:
- Apply cleaning solution with sponge
- Let it sit for 5-10 minutes
- Wipe with circular motions using clean rag
- Rinse with clean water to remove residue
- Dry completely before next steps
🧼 Cleaning Reality: If you can run your hand over the wall and it feels smooth, you’re good. If it feels slightly tacky anywhere, keep cleaning. Paint and new wallpaper will not stick properly to residue.
Advanced Removal Techniques for Difficult Wallpaper
Removing Multiple Wallpaper Layers
Found wallpaper under your wallpaper? Welcome to the “what were they thinking?” club. Here’s how to handle this special kind of hell:
Layer Assessment:
- Count the layers by examining a peeled section
- Identify each type (some might peel easier than others)
- Plan your attack – sometimes you can get multiple layers at once
Sequential Removal Strategy:
- Remove top layer first using standard technique
- Assess what’s underneath – might be different type
- Adjust your solution for the next layer
- Be patient – this takes 2-3x longer
Time-Saving Technique: Sometimes the bottom layer will come off with the top layer if you get the right angle and the adhesive has failed on both layers. Test this on a small section first.
Dealing with Painted-Over Wallpaper
Someone painted over wallpaper? That person clearly hated future homeowners. Here’s how to deal with this nightmare:
Detection Methods:
- Seams visible through paint
- Texture patterns show through
- Bubbling or peeling paint in spots
- Different wall texture in sections
Removal Approach:
- Score through the paint more aggressively
- Use stronger chemical solutions (commercial removers)
- Apply heat with hair dryer while scraping
- Expect wall damage – budget for repairs
🎨 Painted Wallpaper Truth Bomb: Removing painted-over wallpaper almost always damages the wall underneath. Plan on doing some drywall repair and factor that time and cost into your project.
Steam Removal Method for Stubborn Cases
When chemicals fail, it’s time to bring out the big guns. Steam removal is the nuclear option – effective but requires caution.
When to Use Steam:
- Chemical methods have failed
- Multiple layers present
- Vinyl wallpaper won’t budge
- Time is more important than cost
Equipment Options:
- Rent from Home Depot: $30-40/day
- Buy basic unit: $50-80 at Canadian Tire
- DIY with clothes iron: Risky but possible
Steam Technique:
- Fill steamer with distilled water (prevents mineral buildup)
- Heat steamer for 10 minutes before starting
- Hold plate against wall for 30-45 seconds
- Move to next section while scraping steamed area
- Work in 2-foot sections maximum
Safety with Steam:
- Wear long sleeves (steam burns are serious)
- Keep kids and pets away (hot steam travels)
- Watch for electrical hazards (water + electricity = bad day)
- Take frequent breaks (prevents overheating)
Troubleshooting Common Wallpaper Removal Problems
Fixing Wall Damage During Removal
Let’s be honest – some wall damage is almost inevitable, especially with older homes. Here’s how to fix the most common problems:
Minor Dings and Scratches:
- Spackle small holes immediately while you remember where they are
- Sand smooth once dry (usually 2-4 hours)
- Prime before painting – essential step most people skip
Drywall Paper Tears: This is the big one. That paper facing on drywall comes off sometimes, leaving fuzzy brown paper underneath.
Tear Repair Process:
- Don’t panic – this is fixable
- Cut away loose paper with utility knife
- Apply thin coat of joint compound over damaged area
- Sand smooth when dry (24 hours)
- Prime with high-build primer before painting
When to Call Professionals:
- Large areas of damage (more than 25% of wall)
- Plaster walls showing significant cracking
- Structural issues discovered behind wallpaper
- Mould or water damage found
🔧 Repair Reality Check:Budget 1-2 extra days for wall repairs. Trying to paint over damaged areas without proper prep looks terrible and you’ll end up redoing it anyway.
Removing Stubborn Adhesive Residue
Sometimes that adhesive just won’t quit. Here’s your escalation ladder:
Level 1: Gentle Persuasion
- Warm water and dish soap
- Soft sponge in circular motions
- Patience and elbow grease
Level 2: Chemical Warfare
- Goo Gone or similar products (available at Home Hardware)
- Apply, wait 10 minutes, scrape gently
- Always test in inconspicuous area first
Level 3: Heat Treatment
- Hair dryer on low heat
- Warm (not hot) to touch
- Scrape while warm with plastic tool
Level 4: Nuclear Option
- Fine sandpaper (220 grit)
- Light pressure only
- Last resort – you’ll need to prime after
Dealing with Moisture-Damaged Areas
Found some unpleasant surprises behind that wallpaper? Here’s how to handle water damage and potential mould:
Identifying Water Damage:
- Discoloured drywall (yellow, brown, or black stains)
- Soft or crumbly wall material
- Musty odours when wallpaper comes off
- Visible mould growth (black, green, or white patches)
Immediate Actions:
- Stop removal in affected area
- Increase ventilation dramatically
- Photograph damage for insurance purposes
- Test for mould if you suspect it
Treatment Approach:
- Small areas (<10 sq ft): DIY with proper safety gear
- Large areas or black mould: Call professionals
- Structural damage: Stop and call contractor
🦠 Mould Safety Warning: Don’t mess around with mould. If you see significant growth, especially black mould, stop work and call professionals. Your health isn’t worth the DIY savings.
Post-Removal Wall Preparation
Wall Assessment and Minor Repairs
Your wallpaper is gone, but your walls probably look like they’ve been through a battle. Time for some TLC:
Damage Assessment Checklist:
- Small nail holes (easily filled)
- Scratches and gouges (need sanding)
- Drywall paper damage (needs compound)
- Adhesive residue (needs cleaning)
- Texture issues (might need re-texturing)
Repair Priority Order:
- Clean all residue first (everything else sticks better to clean walls)
- Fill holes and cracks with appropriate filler
- Sand everything smooth (don’t skip this step)
- Prime all repaired areas before final coating
Filling Compounds by Damage Type:
- Nail holes: Lightweight spackle
- Larger holes: Self-adhesive mesh patches + compound
- Cracks: Flexible acrylic caulk for small, compound for large
- Texture matching: Spray texture or brush techniques
Primer Application After Wallpaper Removal
Here’s where most DIYers screw up – they think they can skip primer. Wrong. Primer after wallpaper removal isn’t optional.
Why Primer is Essential:
- Seals adhesive residue that you missed
- Prevents bleed-through of stains
- Ensures even paint coverage
- Helps new wallpaper adhere properly
Primer Selection:
- Oil-based primer: Best adhesive blocking, longer dry time
- High-build primer: Covers minor imperfections
- Stain-blocking primer: For water stains or residue issues
Application Technique:
- Clean walls thoroughly with tack cloth
- Apply primer with quality roller (3/8″ nap minimum)
- Cut in edges with brush first
- Allow full cure time (usually 24 hours)
🎨 Primer Pro Tip: Skipping primer to save $30 in materials will cost you $200+ in redo work when your paint looks blotchy or your new wallpaper fails.
Time, Cost, and Effort Breakdown
Project Timeline by Room Size
Let’s get real about how long this actually takes. These are realistic timeframes for average DIYers, not the optimistic estimates you see elsewhere:
Small Room (8×10 feet):
- Easy wallpaper (vinyl, peels well): 4-6 hours
- Standard wallpaper (needs solution): 8-12 hours
- Difficult wallpaper (multiple layers, painted): 16-20 hours
Medium Room (12×12 feet):
- Easy wallpaper: 6-10 hours
- Standard wallpaper: 12-18 hours
- Difficult wallpaper: 20-30 hours
Large Room (15×20 feet):
- Easy wallpaper: 12-16 hours
- Standard wallpaper: 20-30 hours
- Difficult wallpaper: 35-50 hours
Factors That Slow You Down:
- High ceilings (add 50% to time)
- Lots of trim work (add 25% to time)
- Multiple electrical outlets (add 10% to time)
- Your experience level (first-timers add 100% to estimates)
⏰ Time Management Reality: Most people underestimate wallpaper removal time by 50-75%. Plan for longer than you think, and you’ll be pleasantly surprised instead of frustrated.
Total Cost Analysis: DIY vs Professional
Here’s the brutal math that makes or breaks your decision:
DIY Costs:
- Basic tools: $30-50
- Chemical solutions: $15-30
- Protective materials: $10-20
- Wall repair supplies: $20-40
- Primer and prep: $25-50
- Your time: Priceless (or $15-25/hour if you value it)
Total DIY Investment: $100-190 + your time
| Room Size | DIY Cost | Professional Cost | Time Savings | Skill Required |
| Small (100 sq ft) | $75-125 | $200-400 | 1-2 days | Beginner |
| Medium (200 sq ft) | $100-175 | $400-600 | 2-3 days | Intermediate |
| Large (400 sq ft) | $150-250 | $600-1000 | 3-5 days | Experienced |
When Professional Makes Sense:
- Your time is worth more than the savings
- Extensive wall damage expected
- Historical home with plaster walls
- Health concerns (asbestos, lead paint)
- Multiple difficult rooms to do
When DIY Makes Sense:
- Budget is tight and time is available
- You enjoy projects and learning new skills
- Standard drywall walls in good condition
- Modern wallpaper (post-1990s)
Final Tips for Professional Results
Quality Check and Touch-Up Process
You’re almost done, but don’t blow it in the final stretch. Here’s your quality checklist:
Final Inspection Process:
- Run your hands over all walls – should feel completely smooth
- Check all corners and edges – common spots for missed adhesive
- Look at walls from different angles – low lighting reveals imperfections
- Use a bright flashlight to spot residue you missed
Common Missed Spots:
- Behind switch plates and outlet covers
- Top 6 inches near ceiling (hard to reach)
- Corner seams where walls meet
- Around door and window trim
Touch-Up Techniques:
- Spot clean missed adhesive with original solution
- Sand any rough spots with fine sandpaper
- Fill any discovered holes with spackle
- Wipe down everything with clean, damp cloth
Cleanup and Tool Maintenance
Don’t be that person who ruins $50 worth of tools to save 20 minutes of cleanup time.
Immediate Cleanup (Do This Right Away):
- Clean all scrapers while solution is still wet
- Rinse spray bottles thoroughly
- Wash all rags before solution dries
- Store chemical solutions properly (check labels)
Tool Maintenance:
- Sharpen scrapers with fine file if needed
- Oil metal tools lightly to prevent rust
- Store scoring tools carefully (those wheels break easily)
- Keep spray bottles – you’ll use them for other projects
Waste Disposal:
- Check local regulations for chemical disposal
- Bag wallpaper scraps for regular garbage
- Separate metal tools for recycling if damaged
- Don’t pour chemicals down drains
🧹 Cleanup Truth: Spending 30 minutes properly cleaning your tools saves buying new ones for the next project. Good tools are an investment, not an expense.
Frequently Asked Questions
How long should I wait after wallpaper removal before painting or applying new wallpaper?
Minimum wait time is 24-48 hours, but here’s what really matters: moisture content and wall condition.
If you used a lot of water or steam, your walls need to dry completely. In humid conditions or poor ventilation, this can take up to a week. Use a moisture meter if you’re unsure – walls should read below 12% moisture content.
For painting, apply primer first and let it cure for 24 hours minimum. For new wallpaper, ensure walls are completely smooth and any repairs are fully cured (joint compound needs 24-48 hours depending on thickness).
Can I remove wallpaper from textured walls without damaging the texture?
Yes, but it requires extra care and the right technique.
Textured walls are tricky because aggressive scraping will flatten or remove the texture. Here’s the approach:
- Use only plastic scrapers – never metal
- Apply more solution and wait longer for it to penetrate
- Work at shallow angles (15-20 degrees maximum)
- Consider steam removal – often gentler on texture
- Accept that some touch-up may be needed
Orange peel and knockdown textures are easier to preserve than popcorn or heavy hand-troweled textures. Budget for some texture repair/matching in difficult areas.
What should I do if I discover asbestos or lead paint under old wallpaper?
Stop work immediately and call professionals. This isn’t a DIY situation.
Homes built before 1978 may contain lead paint, and homes built before 1980 may have asbestos in joint compounds or textured finishes. Your health is worth more than any DIY savings.
Contact your local health department for testing recommendations, or hire a certified inspector. If hazardous materials are confirmed, you’ll need licensed remediation specialists.
Never try to remove these materials yourself – disturbing them creates dangerous dust and particles.
Is it possible to remove wallpaper in sections over several days, or must it be done all at once?
You can absolutely work in sections, and for large rooms or multiple rooms, it’s actually recommended to prevent burnout.
Best sectioning strategies:
- Complete one full wall before starting another
- Work in 4-foot vertical strips if doing partial walls
- Always finish scraping any area you’ve applied solution to
- Don’t leave solution on walls overnight – it can damage drywall
Avoid starting removal on multiple walls and leaving them half-done. Partially removed wallpaper is harder to restart than untouched sections.
How do I remove wallpaper from corners and around electrical outlets safely?
Corners and outlets require special techniques and extra safety precautions.
For corners:
- Score lightly in corner seams where walls meet
- Apply solution with small brush instead of spraying
- Use narrow putty knife (1-2 inches) for detailed work
- Work from one side to the other rather than trying to do both walls simultaneously
For electrical outlets:
- Turn off power at breaker before starting (non-negotiable)
- Remove outlet covers completely
- Cover electrical boxes with plastic and tape
- Use small brush to apply solution around outlets
- Never spray directly into electrical areas
- Keep moisture away from wiring and connections
Consider having an electrician check outlets if you discover any water damage or corrosion behind the wallpaper.