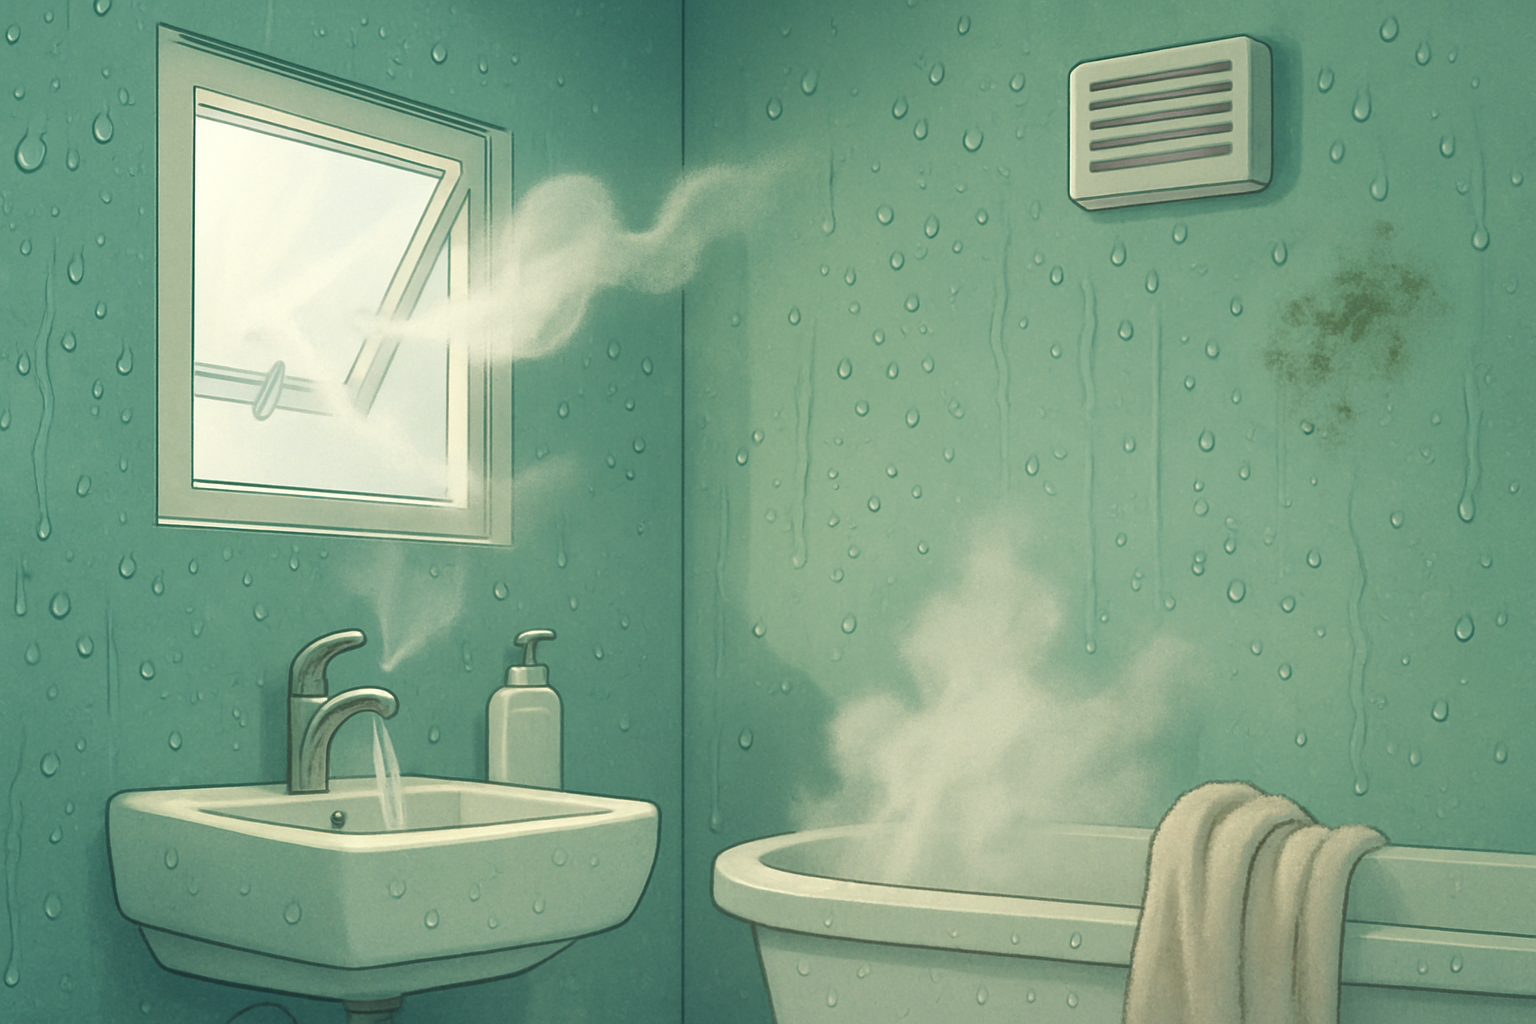
If you use the wrong paint, your bathroom will tell you fast: peeling, bubbling, mould spots in the corners, shiny streaks where condensation runs down the wall. The good news is that the right paint can handle all of it.
This guide walks you through exactly what to use on bathroom walls, ceilings, and trim, plus how to prep so the paint job actually lasts.
Bathroom Challenges: Why Bathrooms Are Tough on Paint
Bathrooms combine three paint killers in one small space:
- High humidity from showers
- Direct water contact around tubs, showers, and sinks
- Frequent cleaning with chemicals and scrubbing
Moisture gets into tiny gaps in paint. Over time, that leads to:
- Peeling and flaking, especially on ceilings above the shower
- Mould and mildew growth in corners and along caulk lines
- Blistering where steam gets behind the paint film
- Stains that bleed through lighter colours
Key takeaway: Bathrooms need paint that can handle moisture, block mould, and survive scrubbing, not just regular interior wall paint.
That is why bathroom paint is usually labelled as:
- Kitchen & Bath
- Bath & Spa
- Moisture and Mildew Resistant
- Scrubbable / Washable
These products are designed to form a tighter film, resist mould, and hold up under repeated cleaning.

Understanding Bathroom Challenges in a Bit More Detail
1. Moisture and Steam
When you shower, warm steam hits cold walls and ceilings. That creates condensation, tiny water droplets that sit on the surface.
If the paint is too flat, cheap, or not meant for moisture:
- Water slowly penetrates the paint film
- The bond between paint and surface weakens
- You get bubbling, cracking, or peeling
Ceilings are hit hardest because steam rises. This is why bathroom ceilings are often the first place paint fails.
2. Mould and Mildew
Bathrooms stay damp longer than other rooms. Poor ventilation makes it worse.
Mould spores love:
- Warmth
- Moisture
- Soap residue
They show up as grey or black spots on paint, especially in corners, above showers, and near vents.
Modern bathroom paints often contain mildew resistant additives that slow growth so your walls stay clean longer.
Fun fact: Mould can start growing in as little as 24 to 48 hours on damp surfaces with poor air circulation.
3. Cleaning and Scrubbing
To remove soap scum or mould stains, we scrub:
- With sponges, microfibre cloths, or scrub brushes
- Using bathroom cleaners, bleach, or vinegar solutions
Low quality or low sheen paints can burnish (go shiny), scuff, or literally wipe off under that kind of abuse. Bathroom paints are formulated to be:
- Scrubbable
- Stain resistant
- Harder wearing than standard wall paint
Paint Finishes and Sheens
The sheen you choose matters almost as much as the type of paint. In general, a higher sheen gives higher moisture resistance and easier cleaning.
Table of Bathroom Paint Finishes
| Finish | Look | Moisture resistance | Cleanability | Typical bathroom use |
|---|---|---|---|---|
| Flat | No shine, very matte | Low | Poor to fair | Ceilings in low humidity baths only |
| Eggshell | Soft, low sheen | Medium | Fair to good | Walls in half baths or well ventilated baths |
| Satin | Soft sheen, subtle glow | Medium to high | Good | Most bathroom walls |
| Semi gloss | Noticeable shine | High | Very good | Trim, doors, high splash areas |
| Gloss | Very shiny, reflective | Very high | Excellent | Accent trim or specialty areas |
For most bathrooms:
- Walls: Satin (best balance) or eggshell in powder rooms
- Trim and doors: Semi gloss
- Ceilings: Flat or matte in a moisture resistant formula
Key takeaway: When in doubt for bathroom walls, choose satin. It handles moisture better than eggshell but does not highlight every wall flaw like semi gloss.
Paint Bases: Acrylic / Latex vs Oil Based
Acrylic / Latex Paints
Modern acrylic or latex paints are usually the best choice for bathrooms.
Pros:
- Low odour and low VOC options
- Fast drying, you can recoat in a few hours
- Easy to clean up with soap and water
- Flexible film that resists cracking
- Available in bathroom specific, mildew resistant formulas
Cons:
- Surface prep really matters
- Cheap versions may not be as scrubbable
Oil Based Paints
Oil based paints used to be the go to for high moisture, high abuse areas. They are less popular now.
Pros:
- Hard, durable finish
- Excellent adhesion
- Very smooth on trim and doors
Cons:
- Strong odour and higher VOCs
- Longer drying time
- Requires mineral spirits or paint thinner for clean up
- Many regions restrict or phase out certain oil based products
For most homeowners today:
- Use high quality acrylic or latex paint designed for bathrooms
- Reserve oil based products for specific situations where local regulations allow, such as older trim with heavy previous oil layers when you do not want to fully strip
Mildew Resistant Formulations
Look for phrases such as:
- Mould and mildew resistant
- Bath and spa
- Kitchen & bath enamel
These paints often include mildewcides in the formula that help prevent growth on the dried paint film.
Quality is not an act, it is a habit.
– Aristotle
In bathroom world, that habit is choosing mildew resistant paint every time, especially for full baths with showers.
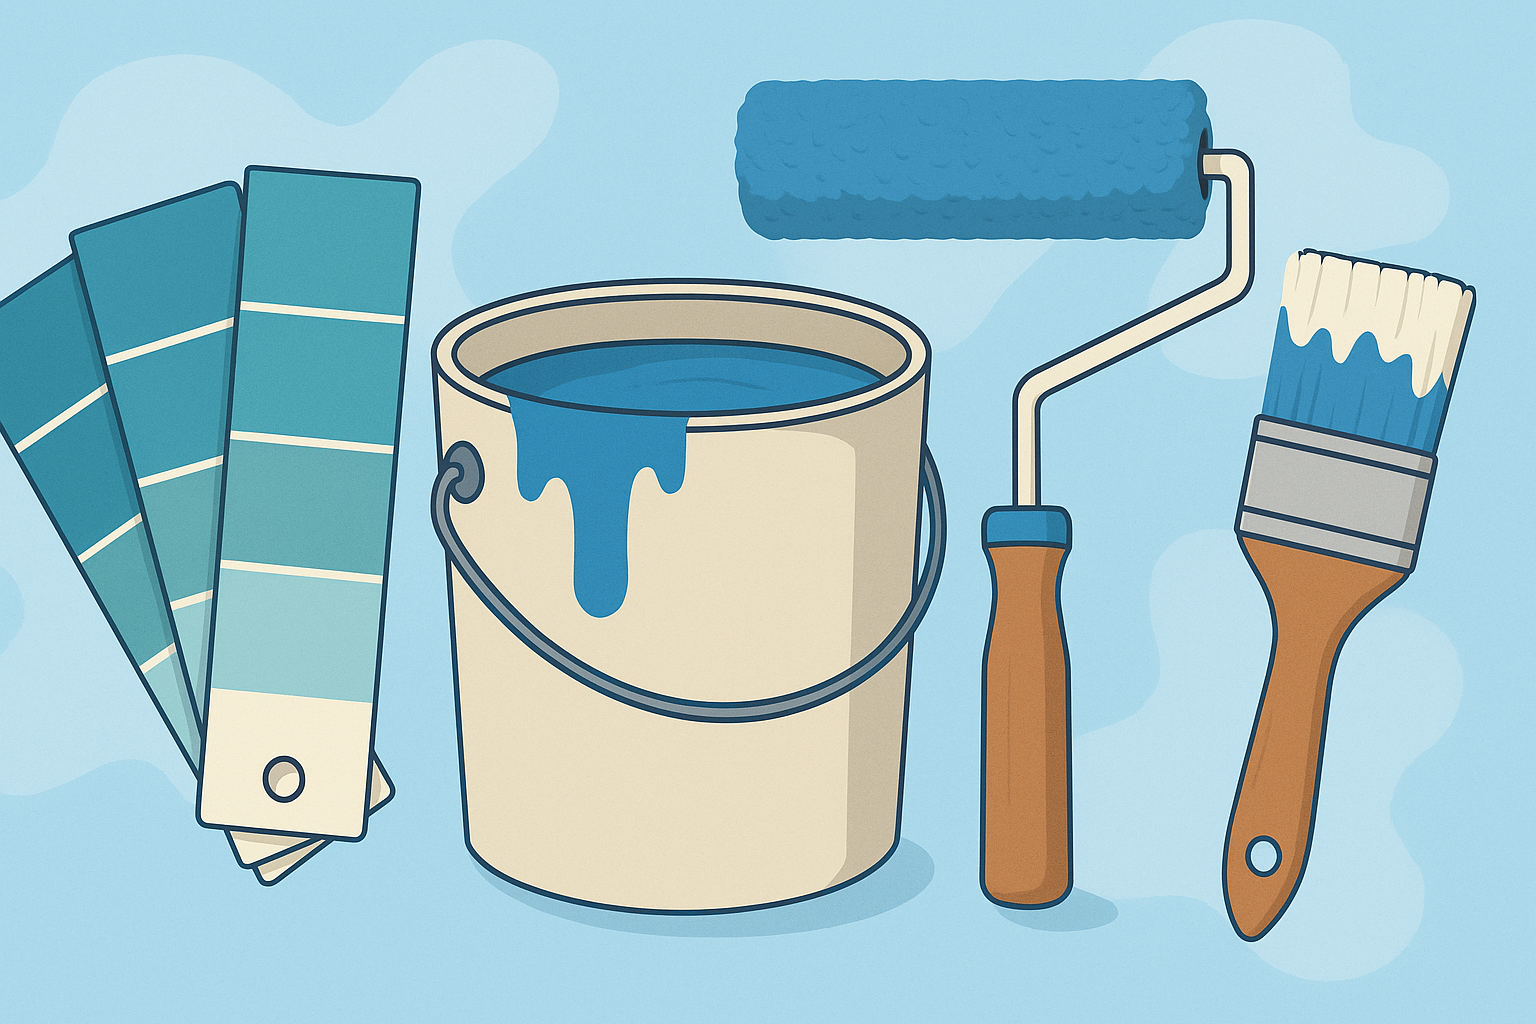
 A quality roller and bathroom specific paint help create an even, durable finish.
Choosing Colours for Bathroom Walls
Colour is not just about style. In bathrooms, it can change the perceived size and mood of the space.
Light Colours: Make Small Bathrooms Feel Bigger
Light, cool tones can make a small bath feel more open:
- Soft whites
- Pale greys
- Light blues
- Gentle greens
These colours reflect more light. That makes the walls visually recede and helps low light bathrooms feel brighter.
Use light colours if:
- The bathroom is small or windowless
- The ceiling is low
- You want a clean, airy, hotel bathroom feel
You can still add contrast with:
- Dark vanity cabinets
- Black or brass hardware
- Patterned floor tiles
Dark Colours: Create a Spa Like Vibe
Deep, saturated hues can feel rich and calming:
- Charcoal
- Deep navy
- Forest green
- Moody teal
They work especially well when:
- The bathroom has a window or good lighting
- Fixtures and tile are light, such as a white tub, white tile, and light counters
- You want a cosy, spa like atmosphere
Tip: Pair dark walls with:
- Crisp white trim in semi gloss
- Warm wood accents
- Soft lighting rather than harsh blue toned bulbs
Key takeaway: Use light colours to visually enlarge the space. Use darker hues to create a cocoon like, spa feeling. Keep trim and ceilings lighter so the room does not feel heavy.
Ceiling and Trim Considerations
Ceilings and trim are often painted on autopilot. In bathrooms, they deserve special attention.
Ceilings: Flat, But Make It Moisture Smart
For ceilings, a flat or matte finish is usually best.
Why flat?
- Hides surface imperfections
- Reduces glare from vanity lights
- Helps the ceiling disappear visually
But here is the key:
- Choose a moisture and mildew resistant flat paint
- Use white or very light colours so the room feels taller
If your ceiling is directly above a shower or gets lots of steam:
- Consider a specialty bath ceiling paint
- Or use a matte version of your bathroom wall paint that still has moisture resistance
Trim, Doors, and Cabinets: Semi Gloss Is Your Friend
Trim, doors, and cabinets take a beating:
- Wet hands closing doors
- Damp towels tossed on hooks
- Hair tools and products resting against cabinet fronts
Use semi gloss for:
- Door and window trim
- Baseboards and casing
- Vanity and built in cabinets
Why semi gloss?
- Harder, more durable finish
- Easier to wipe clean
- Better resistance to water splashes
Key takeaway: Flat or matte for ceilings, semi gloss for trim and doors, satin for most walls. That combination covers the vast majority of bathrooms beautifully.
Preparation and Application
The best paint in the world will fail if the surface is dirty, glossy, or damp. Prep is where your bathroom paint job wins or loses.
Step 1: Clean the Surfaces Thoroughly
You must remove:
- Soap scum
- Body oils
- Hairspray and product residue
- Mould or mildew
How to clean:
- Mix warm water with a degreasing cleaner or TSP substitute.
- Wash walls, ceilings, and trim with a sponge.
- For mould or mildew:
- Use a cleaner designed for mould, or a diluted bleach solution.
- Rinse well with clean water.
- Let everything dry completely.
Key takeaway: Paint does not stick to soap scum, grease, or mould. Cleaning is not optional; it is your insurance policy.
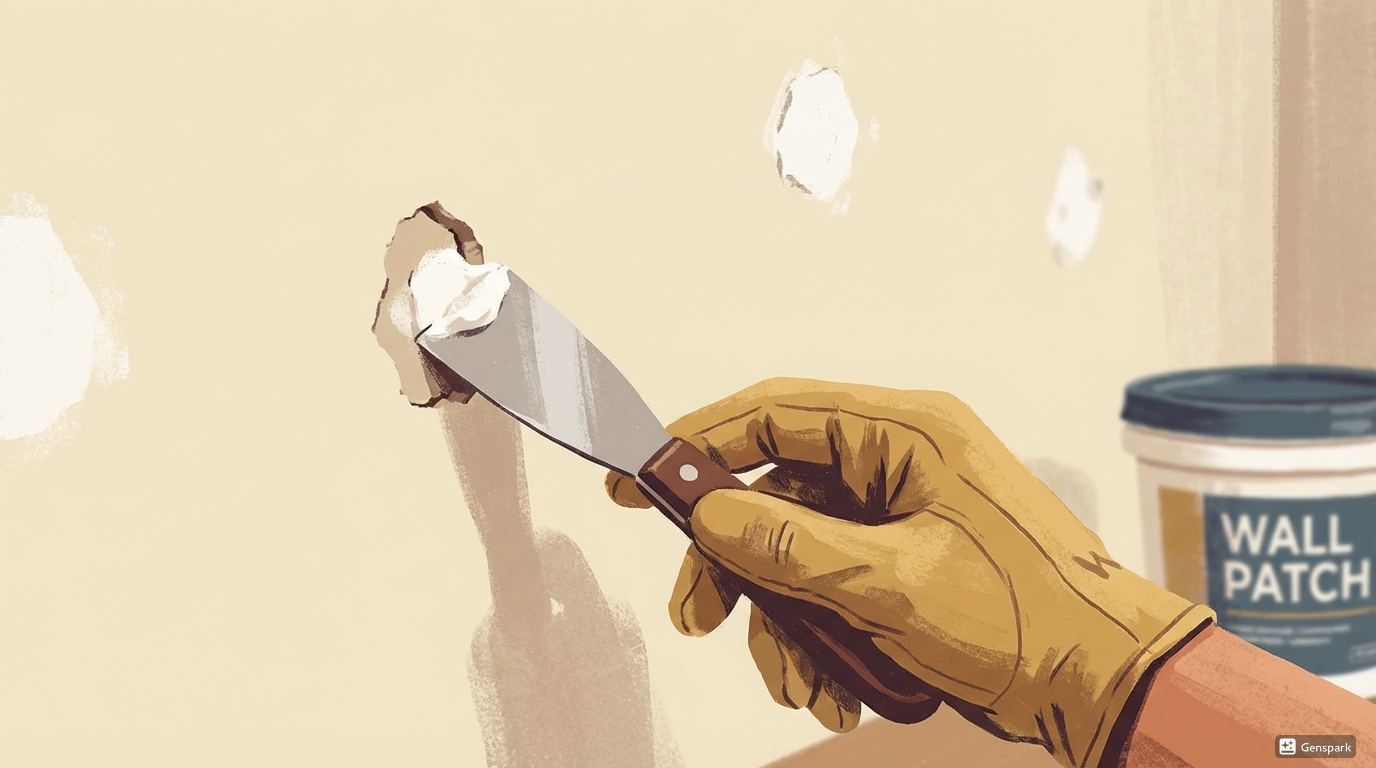
Step 2: Repair and Sand
Once everything is dry:
- Scrape any loose or peeling paint.
- Fill holes and dents with a suitable filler.
- Sand patched areas smooth using 120 to 220 grit sandpaper.
- Lightly sand glossy areas so the new paint can grip.
- Vacuum or wipe away dust with a damp cloth.

Step 3: Prime (Yes, In Bathrooms You Usually Should)
Primer helps with:
- Stain blocking
- Adhesion
- Sealing patched or bare areas
- Colour coverage when going from dark to light or light to dark
In bathrooms, use:
- A moisture and mould resistant primer, especially on ceilings and shower adjacent walls.
- A stain blocking primer if you have old water stains, smoke, or heavy mould marks.
Step 4: Cut In and Roll
- Cut in around edges, corners, and along trim with a good quality angled brush.
- Use a microfibre or high quality roller suitable for your wall texture.
- Roll from top to bottom, keeping a wet edge to avoid lap marks.
- For ceilings, work in small sections so you can maintain that wet edge.
Most bathroom paints will call for:
- Two coats for full coverage and protection
- Proper drying time between coats (check the can, bathroom paints often dry faster, but humidity slows that down)

Step 5: Ventilation While Painting
Bathrooms are small. Fumes can build up fast.
Do this while painting:
- Turn on the bathroom fan.
- Open windows if possible.
- Keep the door open between coats.
- Consider a mask if you are sensitive to odours, even with low VOC paint.
After painting:
- Run the fan regularly to keep moisture down.
- Encourage good airflow until the paint has fully cured.
Fun fact: Most paints feel dry in a few hours, but can take up to 30 days to fully cure. During that time, avoid harsh scrubbing.
Frequently Asked Questions
1. Do I Really Need a Primer in a Bathroom?
Short answer: almost always, yes.
Use primer if:
- You have new drywall, bare plaster, or patched areas.
- There is existing mould or water stains.
- You are changing from dark to light or light to dark.
- The old finish is semi gloss or gloss.
You can sometimes skip a separate primer if:
- The existing paint is sound, not glossy, and a similar colour.
- Your new paint is a paint and primer in one designed for bathrooms.
However, for ceilings and shower zones, a dedicated mould resistant primer is a smart move.
Key takeaway: In bathrooms, primer is less optional extra and more cheap insurance against peeling, stains, and mould.
2. How Many Coats of Paint Do Bathroom Walls Need?
Most bathroom projects need:
- Two coats of primer and paint total at minimum
Often you will use:
- One coat of primer and two coats of paint for:
- Dark to light changes
- Light to dark changes
- Brand new drywall
- Heavy repairs
General rule:
- If you can still see patchiness, previous colour, or uneven sheen after two coats of paint, apply a third.
- Follow the recoat time on the can.
- Allow a bit more time if humidity is high.
3. Can I Use Flat Paint on Bathroom Walls?
You can, but you probably should not in most full bathrooms.
Flat paint:
- Hides imperfections well
- Has lower moisture resistance
- Is harder to clean
Flat or matte works better for:
- Ceilings
- Low humidity powder rooms with no shower
For full baths with showers:
- Use satin on walls for the best balance of durability, moisture resistance, and appearance.
Quick Bathroom Paint Cheat Sheet
Use this as your grab and go summary before you head to the paint aisle.
Walls (Full Bath)
- Finish: Satin
- Type: High quality acrylic or latex, kitchen and bath or moisture resistant
Walls (Powder Room)
- Finish: Eggshell or satin
- Type: Good quality acrylic or latex
Ceiling
- Finish: Flat or matte
- Type: Mould and moisture resistant ceiling or bath specific paint
Trim, Doors, Cabinets
- Finish: Semi gloss
- Type: Durable acrylic or latex enamel, preferably labelled for trim or cabinets
With the right combination of sheen, base, and prep, your bathroom will look fresh, resist mould, and survive steamy showers and weekly cleaning without peeling, bubbling, or giving you a reason to repaint again next year.