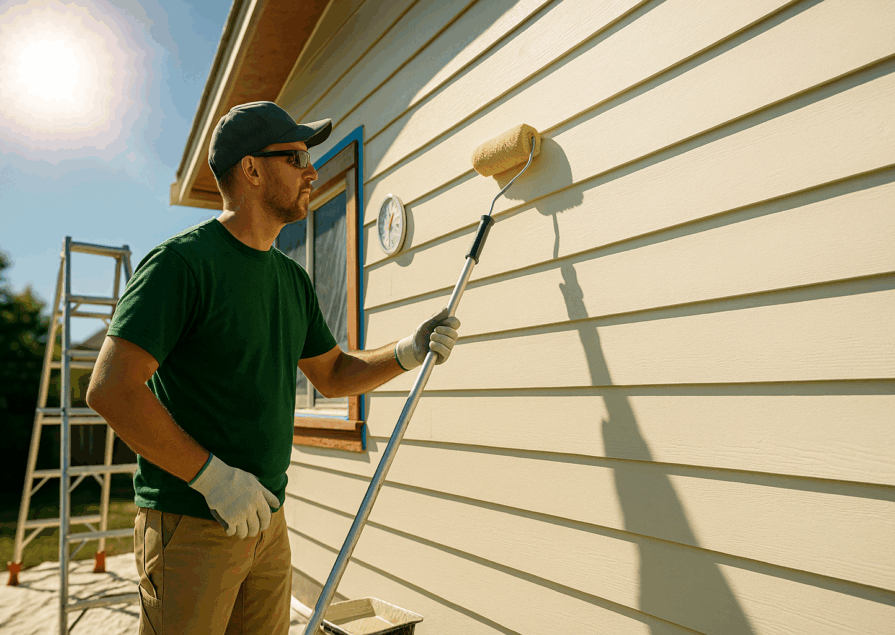
When it comes to painting a room, the quality of the finished look heavily depends on the preparation work. One of the most critical aspects of this preparation is fixing surface imperfections. Whether you’re dealing with minor dents or more significant issues like cracks and peeling paint, addressing these imperfections is essential to achieving a smooth, flawless finish. Ignoring them can result in an uneven surface, causing the paint to highlight flaws rather than conceal them. Properly repairing surface imperfections not only enhances the appearance of your walls but also ensures the longevity of the paint job, protecting your investment for years to come.
Surface imperfections can come in many forms, each requiring a different approach to repair. From tiny pinholes to extensive cracks, understanding the type of imperfection you’re dealing with is the first step toward effective repair. Common surface imperfections include cracks, holes, dents, blistering, and peeling. Each of these issues can compromise the integrity of your wall surface if not addressed correctly.
Surface Imperfections Overview
Types of Surface Imperfections
- Cracks: Cracks are one of the most common surface imperfections and can occur in various sizes, from hairline fractures to larger splits. They often appear in plaster or drywall due to settling or structural movement.
- Holes: Holes can range from tiny pinholes left by nails to larger gaps caused by accidental damage. Small holes are relatively easy to fix, while larger ones may require patching or even replacing sections of drywall.
- Dents: Dents are shallow depressions in the wall surface, often caused by furniture, doorknobs, or other impacts. Although they may seem minor, dents can be noticeable under a new coat of paint if not properly filled and smoothed out.
- Blistering: Blistering occurs when paint lifts from the surface, creating bubbles or blisters. This is usually caused by moisture or heat and requires the removal of the affected paint before repairs can be made.
- Peeling: Peeling paint is a common issue in older homes or areas with high humidity. It often indicates underlying problems with moisture or inadequate surface preparation, requiring thorough scraping and priming before repainting.
Causes of Surface Imperfections
- Moisture Damage: Excess moisture is a leading cause of surface imperfections like blistering and peeling. Leaky pipes, high humidity, and poor ventilation can all contribute to moisture damage, leading to compromised surfaces that need repair.
- Structural Movement: Over time, buildings naturally settle, causing minor shifts in the structure. This movement can lead to cracks in walls, particularly in older homes or those with poor foundation work.
- Poor Initial Surface Preparation: Skipping steps during the initial surface preparation, such as failing to prime the walls or improperly cleaning the surface, can lead to various imperfections down the line. Paint may not adhere correctly, leading to issues like peeling and blistering.
Properly identifying and understanding these types of surface imperfections and their causes is crucial to effectively repairing them. By addressing the root causes and applying the correct repair techniques, you can ensure a smooth, durable surface that’s ready for painting.
Tools and Materials Needed
Essential Tools
To effectively fix surface imperfections, you’ll need a set of essential tools that will help you achieve a smooth, professional finish. These tools are the foundation of any successful repair job:
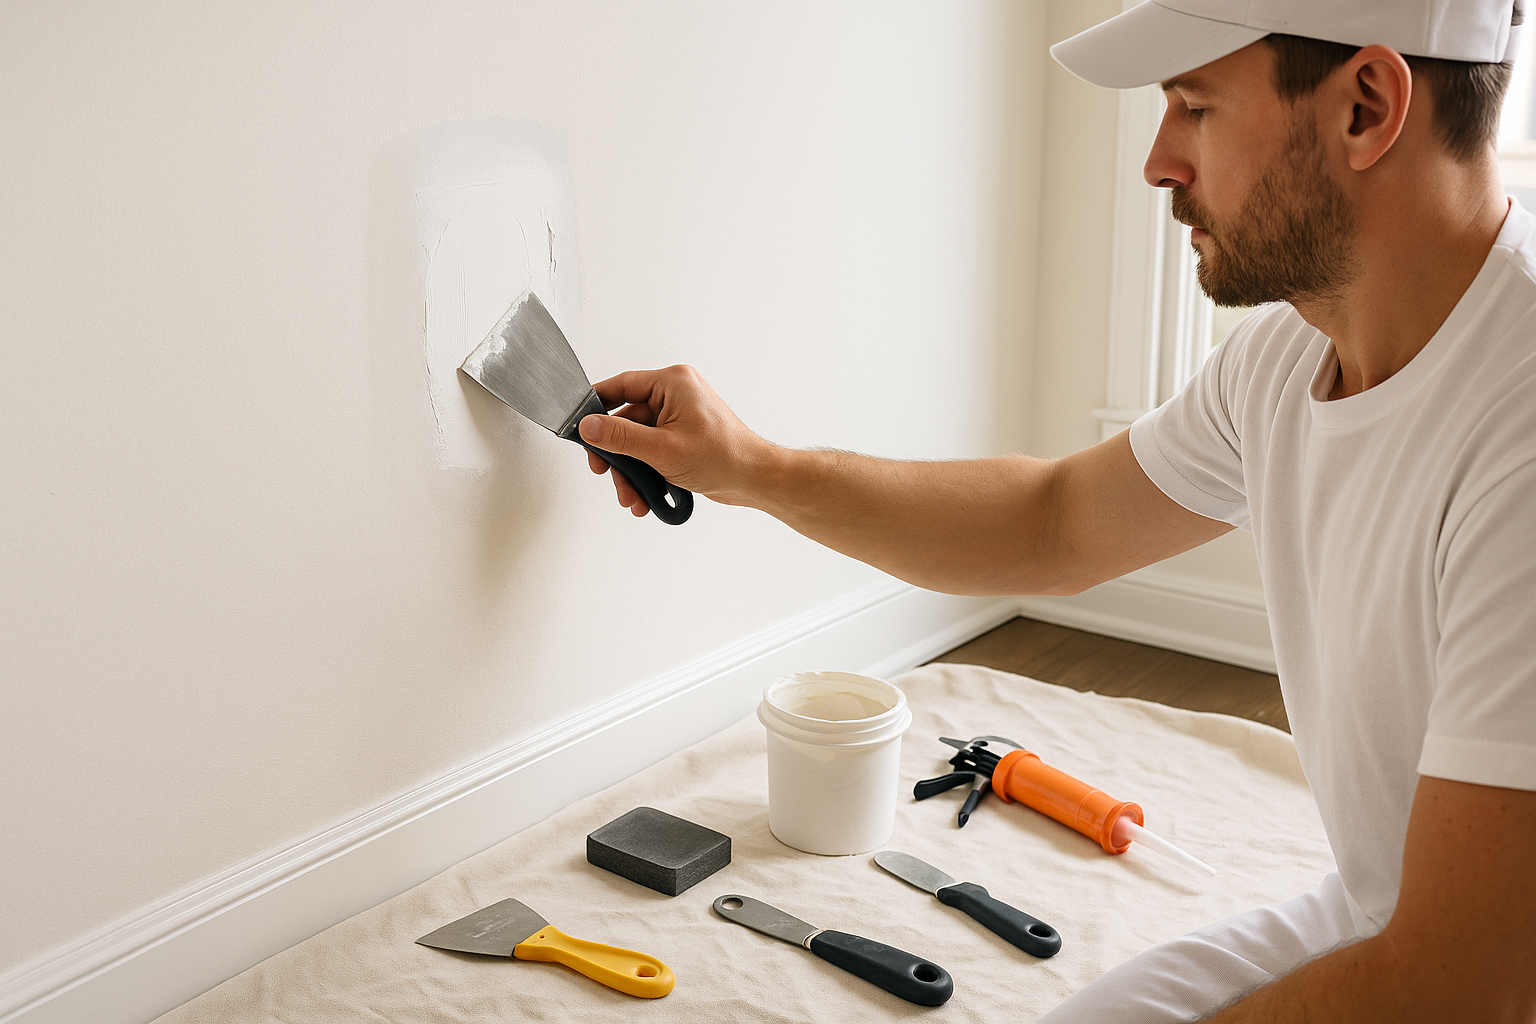
- Putty Knife: A putty knife is an indispensable tool for applying and smoothing spackling paste or joint compound over cracks, holes, and dents. Choose a flexible blade for better control and a wider blade for covering larger areas.
- Sanding Block: Sanding is a crucial step in achieving a smooth surface. A sanding block allows you to apply even pressure and sand down repairs without creating further imperfections. It’s particularly useful for leveling spackling paste or joint compound.
- Scraper: A scraper is used to remove loose or peeling paint, as well as any debris or rough patches on the wall. A sturdy scraper with a comfortable handle makes it easier to prepare the surface for repair.
- Caulk Gun: For cracks and gaps that require filling with caulk, a caulk gun is essential. It allows for precise application of caulk, ensuring that cracks are thoroughly sealed and ready for painting.
Recommended Materials
Along with the essential tools, you’ll need specific materials to fill, smooth, and prime the surface imperfections. These materials are chosen for their effectiveness and ease of use:
- Spackling Paste: Spackling paste is a lightweight compound used to fill small cracks, holes, and dents. It dries quickly and sands easily, making it perfect for minor repairs before painting.
- Joint Compound: For larger cracks and more extensive surface damage, joint compound is the go-to material. It’s thicker than spackling paste and provides a durable repair for bigger imperfections. It can also be used in multiple layers to build up and level deep repairs.
- Sandpaper (Various Grits): Sandpaper is essential for smoothing out repairs. Start with a coarser grit (e.g., 80-120) to level larger repairs, and finish with a finer grit (e.g., 220) to achieve a perfectly smooth surface. Having a variety of grits on hand ensures you can handle any sanding task.
- Primer: Once repairs are complete, applying a primer is crucial before painting. Primer helps seal the repaired areas, providing a uniform surface that allows the paint to adhere properly. It also prevents repaired spots from standing out under the final coat of paint.
These tools and materials form the core of any surface repair project. Having them readily available will make the process more efficient and help you achieve a professional, long-lasting finish.
Step-by-Step Guide to Fix Surface Imperfections
Step 1: Inspecting the Surface
Before you can begin repairing surface imperfections, it’s essential to thoroughly inspect the surface. Carefully examine the walls to identify all types of imperfections, such as cracks, holes, dents, blistering, and peeling. Pay close attention to areas near windows, doors, and corners, as these are common spots where issues can arise. Identifying the types and extent of imperfections early will help you choose the right tools and materials for the job.
Step 2: Preparing the Area
Once you’ve identified the imperfections, the next step is to prepare the area for repair. Start by cleaning the surface with a damp cloth or mild detergent to remove any dirt, dust, or grease. A clean surface ensures better adhesion of repair materials. Next, cover the floor and any nearby furniture with drop cloths or plastic sheeting to protect them from dust and debris during the repair process. Proper preparation will save you time and effort later on.
Step 3: Repairing Cracks
Cracks in walls can vary in size, so the repair method depends on the severity of the crack:
- Filling Small Cracks with Spackling Paste: For hairline cracks and minor splits, use a putty knife to apply spackling paste directly into the crack. Press the paste firmly to ensure it fills the entire crack. Once the paste is applied, smooth it out with the putty knife, removing any excess material. Allow it to dry completely before moving on to sanding.
- Using Joint Compound for Larger Cracks: For larger or deeper cracks, apply joint compound instead of spackling paste. Start by using a putty knife to widen the crack slightly, creating a groove that will hold the compound better. Then, apply the joint compound in layers, allowing each layer to dry before applying the next. This technique provides a stronger repair and prevents the crack from reopening.
Step 4: Filling Holes and Dents
Holes and dents in the wall require a different approach depending on their size:
- Applying Spackling Paste for Small Holes: For small holes, such as those left by nails or screws, spackling paste is typically sufficient. Use a putty knife to apply the paste, pressing it into the hole and smoothing the surface. Once dry, the area can be sanded smooth.
- Patching Large Holes with Drywall Patches: For larger holes, you’ll need to use a drywall patch. Start by cutting a piece of drywall patch to fit the hole. Attach the patch using adhesive or joint compound, then apply joint compound around the edges to blend it with the surrounding wall. Sand the area smooth once the compound is dry.
Step 5: Sanding the Surface
Sanding is a critical step to ensure a smooth finish:
- Selecting the Right Grit Sandpaper: Choose sandpaper with the appropriate grit for the job. Coarse grits (e.g., 80-120) are ideal for leveling larger repairs, while finer grits (e.g., 220) are used for final smoothing.
- Sanding Techniques for a Smooth Finish: Sand the repaired areas using a sanding block or an electric sander, if available. Work in circular motions and apply even pressure to avoid creating low spots. Always check your work by running your hand over the surface to ensure it feels smooth and even.
Step 6: Addressing Blistering and Peeling
Blistering and peeling paint are common issues, particularly in areas with moisture problems:
- Scraping Off Peeling Paint: Use a scraper to remove all loose, peeling paint from the surface. Be thorough in this step, as any remaining loose paint can cause further issues down the line.
- Sealing and Priming the Surface to Prevent Future Issues: After removing the loose paint, seal the affected area with a stain-blocking primer to prevent moisture from seeping in and causing further blistering or peeling. Once the primer is dry, the surface will be ready for a fresh coat of paint.
Step 7: Final Surface Preparation
Before you begin painting, it’s important to prepare the surface one last time:
- Cleaning Up Dust and Debris: After sanding and repairing, the surface will likely have dust and debris. Wipe down the surface with a damp cloth to remove all traces of dust. This step is crucial to ensure that the primer and paint adhere properly.
- Applying Primer Before Painting: Apply a coat of primer to the repaired areas. Primer helps to create a uniform surface and prevents the paint from soaking into the repairs unevenly. Once the primer is dry, your walls are finally ready for painting.
This step-by-step guide will help you tackle any surface imperfections with confidence, ensuring a smooth, flawless finish that lasts.
Common Mistakes to Avoid
Skipping the Inspection
One of the most common mistakes when fixing surface imperfections is skipping the initial inspection. Many DIY enthusiasts are eager to jump straight into repairs, but failing to thoroughly inspect the surface can lead to overlooked imperfections. These unnoticed flaws can reappear after painting, causing frustration and the need for additional work. Always take the time to inspect the entire surface, paying close attention to corners, edges, and areas near windows and doors where imperfections are more likely to occur. A comprehensive inspection helps you identify all issues upfront, allowing for a more effective and complete repair process.
Using the Wrong Materials
Another frequent mistake is using the wrong materials for the job. Different types of imperfections require specific products, and using the wrong one can result in subpar repairs that don’t last. For example, using lightweight spackling paste on large cracks or structural damage won’t provide the necessary strength, leading to the crack reappearing over time. It’s essential to match the material to the imperfection—use joint compound for larger cracks, spackling paste for minor dents, and appropriate drywall patches for holes. Always choose high-quality materials to ensure a durable repair.
Rushing the Drying Process
Patience is key when it comes to repairing surface imperfections, yet many people make the mistake of rushing the drying process. Each layer of spackling paste, joint compound, or primer needs sufficient time to dry completely before moving on to the next step. Rushing through this process can result in uneven surfaces, peeling paint, or cracks re-emerging after painting. Follow the manufacturer’s recommended drying times and allow for additional time in humid environments. Proper drying ensures a smooth and long-lasting finish.
Failing to Sand Properly
Sanding is a crucial step in achieving a flawless surface, but it’s often rushed or skipped altogether. Improper sanding can leave visible edges, ridges, or uneven surfaces that become even more noticeable after painting. It’s important to sand each repaired area thoroughly, using the appropriate grit sandpaper, and to check the smoothness by running your hand over the surface. Failing to sand properly can ruin an otherwise well-done repair, so take the time to ensure that all surfaces are perfectly smooth before applying primer and paint.
When to Call a Professional
While many surface imperfections can be tackled by a determined DIYer, some jobs may be too complex or extensive for a non-professional. It’s important to recognize when it’s time to call in an expert.
Signs That the Job May Be Too Complex for DIY
- Structural Damage: If the imperfections are caused by underlying structural issues, such as significant cracks in the foundation or extensive water damage, it’s best to consult a professional. These issues often require specialized knowledge and tools to repair correctly.
- Large Areas of Damage: When imperfections cover a large area of the wall or ceiling, it can be challenging to achieve a uniform repair. A professional has the experience and equipment to handle extensive repairs and ensure a seamless finish.
- Repeated Failures: If you’ve attempted repairs before and the imperfections keep reappearing, this could indicate a more serious underlying problem. A professional can assess the situation and provide a long-term solution.
Cost vs. Benefit Analysis
Before deciding whether to DIY or hire a professional, consider the cost versus the benefit:
- Time and Effort: DIY repairs can be time-consuming, especially if you’re unfamiliar with the process. Consider whether the time spent on the repair is worth the savings compared to hiring a professional who can complete the job more quickly and efficiently.
- Quality of Finish: Professionals bring experience, skill, and specialized tools to the job, often resulting in a higher-quality finish. If the appearance of the final product is critical—such as in a living room or kitchen—it might be worth investing in professional help to ensure a flawless result.
- Cost Considerations: While hiring a professional comes with a higher upfront cost, it can save money in the long run by avoiding costly mistakes, redoing repairs, or addressing hidden issues that a DIY repair might miss.
Knowing when to take on a repair yourself and when to seek professional help can make all the difference in achieving a smooth, durable, and aesthetically pleasing surface.
Maintenance Tips for Long-Lasting Results
Regular Inspections
To maintain the quality of your walls and ensure that surface imperfections don’t reappear, it’s crucial to conduct regular inspections. Periodically examine the walls, especially in high-traffic areas, for signs of new imperfections such as cracks, dents, or peeling paint. Early detection allows you to address issues before they worsen, saving time and effort in the long run. Regular inspections can also help identify underlying problems, such as moisture damage, before they cause significant damage.
Addressing Minor Issues Before They Become Major Problems
One of the best ways to keep your walls looking their best is by addressing minor issues as soon as they appear. Small cracks, dents, and holes may seem insignificant at first, but if left unattended, they can develop into more extensive problems that require more intensive repairs. For example, a small crack can expand over time, leading to larger sections of damaged wall or even compromising the structural integrity of your home. By fixing minor imperfections promptly, you prevent them from escalating and ensure a smooth, well-maintained surface that will stand the test of time.
Conclusion
Fixing surface imperfections is a critical step in preparing your walls for painting, ensuring that the final result is smooth, professional, and long-lasting. Throughout this guide, we’ve covered the essential steps to successfully repair a variety of common wall imperfections, from inspecting and identifying the issues to using the right tools and materials, and finally, executing the repair process with care and precision.
Taking the time to properly inspect, prepare, and repair your walls before painting is an investment that pays off in the quality of the finished product. Rushing through the process or skipping important steps can lead to unsatisfactory results and more work in the future. By following the steps outlined in this guide, you can achieve a flawless surface that not only looks great but also lasts for years to come.
Remember, the key to a successful paint job lies in the preparation. Whether you’re a DIY enthusiast or considering hiring a professional, taking the time to fix surface imperfections thoroughly will ensure that your paint job is smooth, durable, and visually appealing. Don’t cut corners—commit to quality preparation, and you’ll be rewarded with walls that look beautiful and stay that way.
FAQs
What is the best product for filling cracks?
The best product for filling cracks depends on the size and type of crack you’re dealing with. For small, hairline cracks, spackling paste is typically sufficient. It’s easy to apply, dries quickly, and sands smoothly. For larger or deeper cracks, joint compound is a better choice. It provides more durability and can be applied in layers to fill deeper gaps. If the cracks are caused by structural movement, consider using a flexible caulk that can expand and contract with the movement, preventing the crack from reopening.
How long should I wait before sanding?
The drying time before sanding depends on the product you’re using and the thickness of the application. Generally, spackling paste takes about 1-2 hours to dry for small repairs, while joint compound may require 24 hours or more, especially if applied in thick layers. It’s crucial to ensure that the repair is completely dry before sanding; otherwise, you risk damaging the repair or creating an uneven surface. Check the manufacturer’s instructions for specific drying times, and allow extra time if you’re working in a humid environment.
Can I paint directly over spackling paste?
While you can technically paint directly over spackling paste, it’s highly recommended to apply a primer first. Spackling paste is porous, which means it can absorb the paint unevenly, leading to a patchy finish. Applying a coat of primer helps to seal the repaired area, creating a uniform surface that allows the paint to adhere evenly. This step is especially important if you’re using a light-colored paint or if the spackling paste is applied over a larger area.
How do I know if the surface is ready for painting?
To determine if the surface is ready for painting, check for a few key indicators:
- The surface should feel smooth and even to the touch, with no visible ridges or bumps.
- All repairs, including spackling and joint compound, should be completely dry.
- The surface should be clean and free of dust, which can interfere with paint adhesion. Wipe down the area with a damp cloth to remove any lingering debris.
- If you’ve applied a primer, ensure it has dried completely before applying the final coat of paint. The surface should have a consistent, matte appearance, indicating that the primer has adhered properly.
What should I do if the imperfections keep reappearing?
If surface imperfections keep reappearing, it could be a sign of an underlying issue that needs to be addressed. Common causes include:
- Structural movement: If cracks reappear, it may be due to ongoing structural shifts in your home. In this case, it’s best to consult a professional to assess and repair the structural problem.
- Moisture issues: Blistering or peeling paint can indicate moisture problems, such as leaks or poor ventilation. Addressing the moisture source, whether it’s fixing leaks or improving ventilation, is crucial to preventing further damage.
- Inadequate repair technique: Reappearing imperfections can also result from insufficient or incorrect repair methods. Make sure you’re using the right materials and techniques for the type of imperfection you’re dealing with, and follow all drying and preparation guidelines carefully.
By identifying and addressing the root cause, you can prevent imperfections from recurring and maintain a smooth, flawless surface.