The safest way to remove wallpaper from drywall is to loosen the adhesive slowly, keep moisture controlled, scrape at a low angle with a rounded tool, clean every trace of glue, let the wall dry, and repair or seal torn drywall paper before primer or paint.
Start by testing a seam. If the wallpaper face peels away, remove that first, then dampen only the backing and adhesive. If it does not peel, score lightly, apply warm water or remover in small sections, wait 10 to 15 minutes, and lift with a rounded putty knife. Benjamin Moore recommends shallow scoring, a rounded putty knife, and patience because wallpaper type and adhesive strength change the outcome.6
Avoid the two mistakes that damage drywall fastest: soaking the wall and gouging with a sharp scraper. Sherwin-Williams specifically cautions that too much moisture can damage drywall underneath wallpaper.7

Wallpaper came off, but the wall still needs saving?
If the paper face is torn, glue is still shiny, or you want the room painted after removal, Hemlock can help with careful surface prep, drywall deficiency repair, priming, and a clean interior finish.
Before you start: the 5 checks that prevent drywall damage
Wallpaper removal is not just peeling paper. You are working with water, adhesive, drywall face paper, old paint layers, possible dust, and sometimes older building materials. Take ten minutes to check the room before you touch the first seam.
- Check the home’s age. In older Canadian homes, lead-based paint may be present on interior surfaces. Health Canada says homes built before 1960 probably contain lead-based paint, and homes built between 1960 and 1990 may still contain smaller amounts on interior surfaces.1 If you may disturb old paint under wallpaper, test first or bring in a qualified professional.
- Think asbestos before sanding or cutting. BCCDC lists drywall and joint compound among older materials where asbestos may be present, with high likelihood in buildings before 1980 and moderate likelihood from 1980 to 1990.3 Do not sand unknown old drywall mud aggressively.
- Turn off power where you will use water. Wallpaper removal involves damp sponges, spray bottles, or steam near outlets and switches. Technical Safety BC notes that electrical equipment must be de-energized before work on electrical equipment begins.5 Remove cover plates only after the circuit is off and verified.
- Identify the wallpaper type. Vinyl-coated wallpaper often blocks water, so it usually needs the top layer removed or shallow scoring. Paper wallpaper may release with less moisture. Grasscloth and fabric papers can stain, shred, or hide old paste more stubbornly.
- Do a 2-square-foot test patch. Choose a low, hidden area. Try dry peeling from a seam, then warm water on the backing. If drywall paper starts lifting, stop and switch to a slower, lower-moisture approach.
Stop immediately if you see fuzzy brown drywall paper
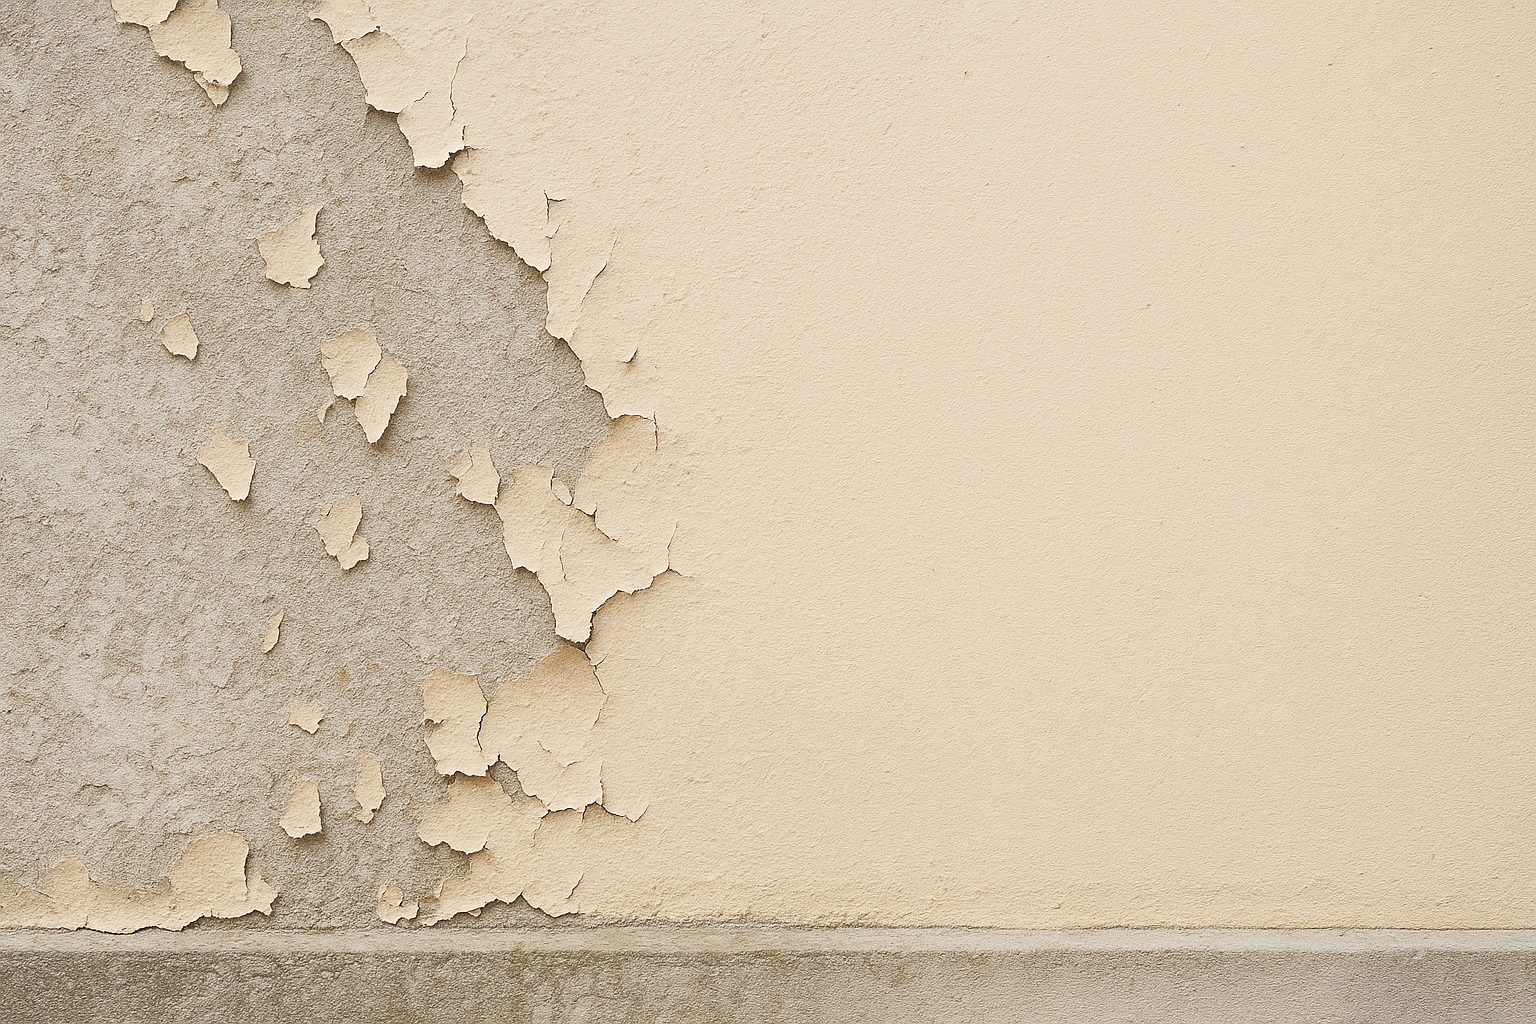
Fuzzy brown paper means the drywall face paper is tearing. Do not keep scraping. Let the area dry, remove loose fibers carefully, seal the damaged paper with an appropriate problem-surface sealer, then skim coat before sanding and priming.
Tools and supplies
You do not need a huge kit. The drywall-safe version of this job is about controlled moisture, soft tools, and enough patience to let the adhesive release.
- Rounded plastic or metal putty knife
- Wallpaper scoring tool
- Spray bottle or pump sprayer
- Bucket and clean sponges
- Drop cloths and painter’s tape
- Warm water
- Mild dish soap
- Wallpaper remover for stubborn glue
- Clean rinse water
- Optional steamer for difficult areas
- Gloves and eye protection
- Respirator for sanding dust
- Joint compound
- 220-grit sanding sponge
- Primer suitable for repaired walls
A rounded putty knife matters. Benjamin Moore includes a rounded putty knife in its wallpaper removal supply list and advises avoiding sharp edges because sharp corners can dig into the wall surface.6
Choose the right method for your wallpaper
Start with the least aggressive method that works. You can always add dwell time or repeat an area, but it is much harder to undo torn drywall paper.
| Wallpaper situation | Best first method | Drywall damage risk | What to watch for |
|---|---|---|---|
| Peelable wallpaper with a vinyl or decorative top layer | Lift the top layer dry, then dampen backing and paste | Low to medium | Backing left behind, shiny glue, drywall paper lifting at seams |
| Traditional paper wallpaper | Warm water or remover in small sections, 10 to 15 minutes dwell time | Medium | Oversaturation, paper shredding into tiny pieces |
| Vinyl-coated wallpaper that will not absorb water | Light scoring, then remover or steam in short passes | Medium to high | Scoring too deep, steam held too long, gouged drywall |
| Multiple wallpaper layers | Remove one layer at a time after a test patch | High | Old paste, hidden paint, old drywall paper, possible hazardous materials |
| Wallpaper over unprimed drywall | Very slow dampening, low-angle scraping, frequent drying pauses | High | Drywall face paper coming off with wallpaper |
If the wallpaper was applied directly to unprimed drywall, removal may expose or tear drywall paper no matter how careful you are. In that case, the win is not “zero repair.” The win is avoiding deep gouges, keeping the damage shallow, sealing torn paper correctly, and building the surface back to paint-ready.

Step-by-step: remove wallpaper without damaging drywall
- Clear and protect the room. Move furniture out or to the center. Cover floors with drop cloths or plastic. Tape baseboards, trim, vents, and any surfaces that could be stained by paste water. For older-home work where lead might be present, EPA recommends containment practices such as removing or wrapping furniture, covering floors, sealing doors, and covering HVAC vents.2
- Turn off power and remove cover plates. Switch off the breaker for the work area, verify power is off, then remove outlet and switch plates. Do not spray water into electrical boxes. Keep your sponge damp, not dripping, around openings.
- Find a seam and test dry peeling. Start under a switch plate, at a loose seam, or near the ceiling. Hold the wallpaper close to the wall and pull slowly downward at a low angle. If the decorative face separates, keep removing that layer first.
- Score only if liquid cannot reach the adhesive. If water beads on the surface, use a scoring tool with light pressure. Benjamin Moore recommends shallow cuts so the adhesive-removal solution can reactivate the adhesive without damaging the wall.6 Do not press hard enough to mark the drywall.
- Wet a small section, not the whole wall. Work in sections around 3 feet by 3 feet. Apply warm water, warm soapy water, or wallpaper remover with a sponge or sprayer. The goal is damp and active, not soaked. Sherwin-Williams warns that too much moisture can damage the drywall underneath.7
- Let the solution dwell. Give the adhesive time to soften. Benjamin Moore recommends keeping the wall damp for 10 to 15 minutes before lifting the paper.6 Sherwin-Williams suggests 5 to 10 minutes for stripping solution and notes wrinkling can indicate the section is ready.7
- Scrape with the blade almost flat. Use a rounded putty knife at a low angle. Push just under the wallpaper backing, not into the drywall. If the paper resists, stop and re-wet. Forcing it is what creates long gouges.
- Use steam cautiously on stubborn sections. Steam can help with vinyl or heavily bonded areas, but it can also over-wet drywall. Sherwin-Williams recommends holding a steam plate on wallpaper no longer than 30 seconds at a time.7 Keep moving, then scrape gently while the paste is soft.
- Remove glue until the wall no longer feels slick. Wallpaper glue left behind can cause paint adhesion issues and uneven finish. Sherwin-Williams advises cleaning glue with warm water and mild detergent, using glue remover for tougher spots, then rinsing and drying thoroughly.8
- Let the wall dry before repairs. Do not skim coat or prime while the wall is damp. Sherwin-Williams notes that 24 hours is generally enough after washing walls, depending on humidity.8 In Vancouver’s wetter seasons, give problem walls more time and use ventilation or a dehumidifier.
- Seal torn drywall paper before joint compound. If the drywall face paper is torn, remove loose fibers and seal the area before skim coating. Joint compound over unsealed torn paper can bubble because the paper absorbs moisture.
- Skim coat, sand lightly, prime, then paint. Patch gouges with joint compound. Skim coat uneven areas. Sand only as much as needed. WorkSafeBC notes that sanding drywall or joint tape can create dust containing gypsum and crystalline silica, and old drywall mud may contain asbestos, so respirator use and dust control matter.4
How to remove wallpaper glue without ruining paint adhesion
Glue is the part most homeowners underestimate. A wall can look clean but still feel tacky, shiny, or slippery. Paint over that and you may get streaks, bubbling, peeling, or uneven sheen.
Use this glue test
After the wall dries, run a clean hand across it. If it feels slick, glassy, sticky, or squeaky in patches, keep cleaning. Shine a flashlight across the wall from the side. Glue often flashes as shiny islands.
Use this cleaning sequence
Wash with warm water and mild detergent. Rinse with clean water. Let dry. Repeat on shiny areas. Use wallpaper glue remover only where water and detergent are not enough.
Sherwin-Williams specifically advises against painting over wallpaper glue because it can cause adhesion problems and an uneven finish.8 Benjamin Moore also notes that invisible adhesive may remain and recommends smoothing and priming appropriately before painting.6
What to do if the drywall paper tears
Small tears are normal on difficult wallpaper jobs. The important thing is to stop scraping before the damage spreads.
| Damage you see | What it means | What to do next |
|---|---|---|
| Light fuzzing only | Drywall face paper is abraded but not deeply torn | Let dry, remove loose fibers, seal, skim if needed, sand lightly |
| Brown paper exposed | Paint-ready face layer is gone | Stop wetting, dry fully, seal exposed paper, then skim coat |
| Gouges or scraper cuts | Tool dug below the surface | Fill with joint compound in thin coats, sand with dust control, prime |
| Soft or swollen drywall | Too much moisture entered the board | Stop work, dry thoroughly, assess whether replacement is safer |
| Musty odor or visible mould | Moisture may be inside or behind the wall | Address the moisture source before paint; get professional assessment if extensive |
Moisture is not just a finish issue. EPA says the key to mould control is moisture control and recommends drying water-damaged areas within 24 to 48 hours to help prevent mould growth.9 Health Canada notes that mould can grow on damp drywall and insulation and may hide inside walls.10
Do not paint over dampness or mould
Paint is not a moisture fix. If the wall smells musty, stays cool and damp, or shows staining after drying, find the moisture source first. USG recommends addressing the source of moisture immediately and notes that water-damaged materials may need replacement when cleaning is not effective.11
What not to do
Drywall is faced with paper. Saturation softens the surface, weakens adhesion, and increases the chance of swelling, torn paper, and mould risk.
The higher the scraper angle, the more likely it is to dig into drywall. Keep the blade low and rounded.
In older homes, drywall compound may be an asbestos concern. BCCDC says materials cannot be confirmed asbestos-free by looking at them and should be assessed by a professional when suspected.3
Primer locks in what is already there. If the wall is damp or glue is still active, primer can fail with it.
When wallpaper removal becomes a professional prep job
DIY is reasonable for a small room with newer, peelable wallpaper over primed drywall. It becomes a surface-prep project when the wallpaper is layered, the drywall paper tears repeatedly, glue remains shiny after multiple washes, or you are preparing a highly visible room where side light will reveal every ridge.
This is also where internal planning matters. If you are comparing DIY cleanup with a professional repaint, look at more than “paint on the wall.” Ask what is included for protection, glue removal, drywall repairs, skim coating, sanding dust control, primer selection, and final inspection. Hemlock’s interior process includes floor and furniture protection, surface preparation, dustless sanding, drywall deficiency repair, painting, cleanup, inspection, and labelled leftover paint.
Ready for smooth, paint-ready walls?
Wallpaper removal is only half the job. The finish comes from careful glue removal, repairs, sanding, primer, and clean paintwork. Hemlock’s full-time interior painters can take the room from stripped wallpaper to a crisp, finished space.
Paint-ready checklist after wallpaper removal
Before you prime, every item below should be true.
- No wallpaper backing remains. Check corners, behind radiators, around switches, and near trim.
- No glue feels slick or looks shiny. Use side lighting to catch residue.
- The wall is fully dry. Give it at least 24 hours after washing, longer in humid rooms.
- Torn drywall paper is sealed. Do not skim directly over loose or fuzzy paper.
- Gouges are filled in thin coats. Thick compound shrinks and flashes through paint.
- Repairs are sanded smooth with dust control. Avoid dry sweeping and use a vacuum system where possible.
- The primer matches the wall condition. Repaired, previously wallpapered, or glue-prone walls often need a higher-adhesion or stain-blocking primer.
FAQ
Can I just paint over wallpaper instead of removing it?
Sometimes, but it is rarely the best route if the wallpaper is textured, glossy, loose, stained, or has visible seams. Paint can highlight seams and may cause wallpaper to release later. For a long-term finish, remove the wallpaper, clean adhesive, repair, prime, and paint.
What is the safest wallpaper remover for drywall?
The safest option is the least moisture that releases the adhesive: warm water, warm water with mild detergent, or a wallpaper remover used in small sections. Avoid harsh soaking. The technique matters more than the liquid.
Is a steamer bad for drywall?
A steamer can be useful on stubborn wallpaper, but it can damage drywall if held too long or used too wet. Keep passes short, work in small sections, and stop if the drywall face paper softens.
How do I know when all the wallpaper glue is gone?
After drying, the wall should feel matte and clean, not sticky, slippery, or shiny. Use a flashlight across the wall at a low angle. Shiny patches usually mean glue remains.
Do I need to prime after removing wallpaper?
Yes, if you plan to paint. Primer helps unify repaired areas, seal residual staining, and create a consistent surface for paint. Do not prime until the wall is clean, dry, and repaired.
What if my home is older than 1990?
Be cautious before sanding, scraping paint layers, or disturbing drywall compound. Older homes can contain lead-based paint or asbestos-containing materials. Test first or hire qualified professionals if there is any doubt.
References
- Health Canada: Lead-based paint
- U.S. EPA: Lead-safe renovations for DIYers
- BCCDC: Asbestos in older building materials
- WorkSafeBC: Drywall dust, silica, and older drywall mud risks
- Technical Safety BC: Requirements to de-energize electrical equipment
- Benjamin Moore: How to remove wallpaper in 6 steps
- Sherwin-Williams: How to remove wallpaper
- Sherwin-Williams: How to paint walls after removing wallpaper
- U.S. EPA: A brief guide to mould, moisture, and your home
- Health Canada: Mould and indoor moisture
- USG: Moisture, mold and construction practices for water-damaged building systems
This article includes safety references for lead, asbestos, electrical work, drywall dust, and moisture. When in doubt, test first and hire a qualified professional.