Alright, let’s cut to the chase. You’ve been cruising through your wallpapering project like a champ, feeling all Bob Vila-ish, and then BAM – you hit your first corner and suddenly everything goes sideways faster than a Windows ME installation.
Here’s the deal: corners are where dreams go to die in the wallpapering world. But they don’t have to be. With the right approach, tools, and techniques, you can nail corners like a pro and avoid looking like you wallpapered with oven mitts on.
This guide isn’t going to sugarcoat it or give you participation trophies. We’re going deep into the trenches of corner wallpapering – the good, the bad, and the “why-did-I-think-this-was-a-good-idea” moments.
Reader Analysis: What You’re Really Looking For
| Search Intent | Goals | Challenges |
| How-to guidance for wallpapering corners without mistakes | Complete corner wallpapering without wrinkles, tears, or misalignment | Difficulty wrapping wallpaper smoothly around inside and outside corners |
| Solutions for common corner wallpapering problems | Achieve professional-looking results on a DIY budget | Managing excess wallpaper material that bunches up at corners |
| Step-by-step instructions for different corner types | Save money by avoiding professional wallpaper installation | Preventing air bubbles and ensuring proper adhesion at corner edges |
| Tool recommendations and techniques for clean corner work | Learn proper technique to avoid costly wallpaper waste | Matching patterns correctly when wallpaper wraps around corners |
Look, I get it. You didn’t wake up this morning thinking “Gee, I’d love to learn about the quantum physics of wallpaper corners.” But here we are, and I’m going to make this as painless as possible while giving you the real-world techniques that actually work.
Essential Tools and Materials for Corner Wallpapering
First rule of corner wallpapering: you can’t fix stupid, but you can prevent it with the right tools.
Don’t even think about tackling corners with that crusty old utility knife you found in your junk drawer. Professional results require professional tools – or at least tools that were made this decade.

Must-Have Tools
The absolute non-negotiables:
- Smoothing brush or plastic smoother – Your wallpaper whisperer
- Sharp utility knife with fresh blades – Emphasis on fresh. That blade you used to open Amazon boxes? Not cutting it (literally)
- Seam roller – For making edges stick like they actually want to be there
- Measuring tape and pencil – Because “eyeballing it” is how we ended up needing this guide
Pro Tip: “A dull blade is more dangerous than a sharp one – it’ll tear your wallpaper and your patience.” – Every contractor who’s learned this the hard way.
Specialized Corner Tools
These aren’t just fancy gadgets designed to empty your wallet:
- Corner smoothing tool – Think of it as a spatula specifically designed for wallpaper gymnastics
- Trimming guide – Your insurance policy against wobbly, amateur-hour cuts
- Small detail brush – For getting adhesive into those tight spots where your big brush fears to tread
Adhesive and Preparation Materials
Here’s where people get cheap and regret it later. Quality adhesive is like a good foundation – invisible when done right, obvious when done wrong.
| Wallpaper Type | Recommended Adhesive | Coverage per Gallon | Working Time |
| Vinyl | Heavy-duty vinyl adhesive | 200-250 sq ft | 15-20 minutes |
| Paper-backed | Standard wallpaper paste | 300-350 sq ft | 10-15 minutes |
| Fabric | Specialty textile adhesive | 150-200 sq ft | 20-30 minutes |
| Grasscloth | Natural fibre paste | 200-250 sq ft | 25-35 minutes |
Quality sources: Roman Decorating Products and Zinsser make adhesives that won’t quit on you when the going gets tough.
Understanding Different Types of Corners
Not all corners are created equal. It’s like comparing a gentle merge onto the highway to a hairpin turn in the mountains – technically the same concept, completely different execution.
Inside Corners (Concave)
These are your training wheels corners – the ones that tuck inward where two walls meet, like the corner of your living room.
Why inside corners are your friend:
- Gravity actually helps instead of fighting you
- Mistakes are more forgivable
- Less stress on the wallpaper material
- You can hide minor imperfections easier
Think of inside corners as the “Hello World” of wallpapering. Master these first, build your confidence, then tackle the boss battles.
Outside Corners (Convex)
Here’s where the rubber meets the road. Outside corners stick out like a sore thumb – window frames, built-in shelving, architectural details that looked great in the design phase.
The reality check: You’re asking wallpaper to perform Olympic-level gymnastics around a 90-degree bend without tearing, bunching, or looking like it was installed by someone wearing oven mitts.
Key insight: Outside corners require surgical precision and zero tolerance for “close enough.”
Irregular Corners and Obstacles
Welcome to the real world, where corners are about as perfectly square as a circle and pipes appear out of nowhere like they’re playing hide-and-seek.
Common curveballs:
- Corners that are “close enough” to 90 degrees (thanks, 1970s construction)
- Pipes sneaking around corners at the worst possible moment
- Electrical outlets playing peek-a-boo
- Crown moulding that’s “level” in the same way that I’m “tall”
Fun Fact: According to the Canadian Home Builders’ Association, fewer than 30% of residential corners are actually square. Plan accordingly and lower your expectations of your house’s geometry.
Pre-Wallpapering Corner Preparation
Here’s the uncomfortable truth: Amazing corner work starts long before you touch a single sheet of wallpaper. Preparation is everything – like backing up your code before making “quick fixes.”
Wall Surface Assessment
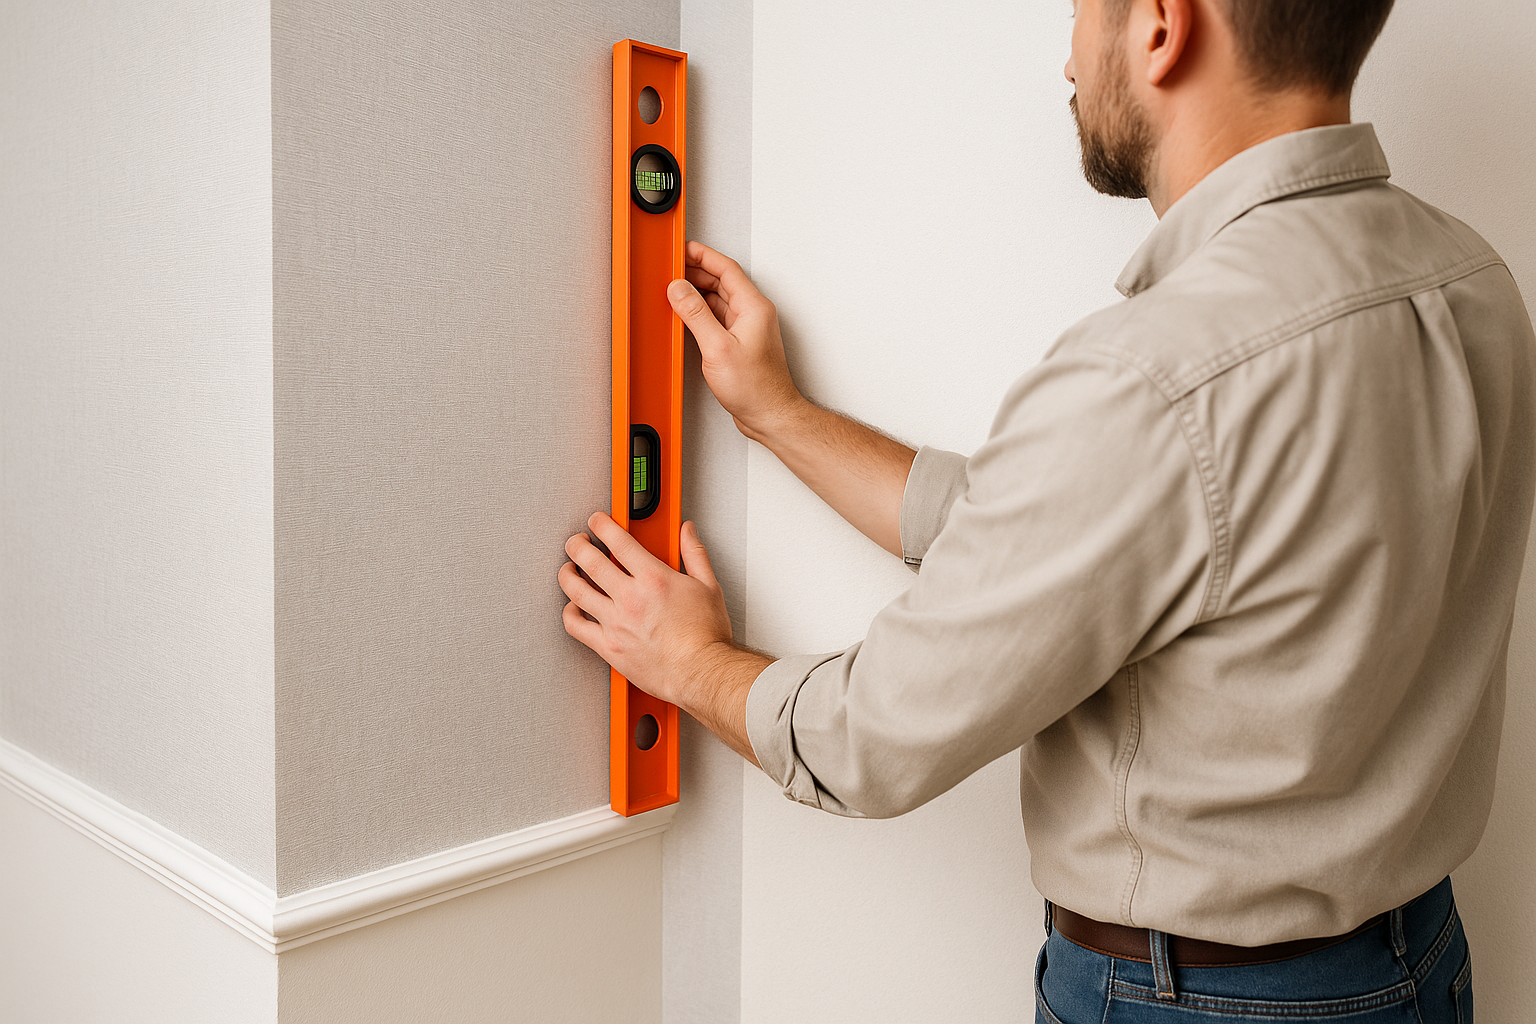
Time for some harsh reality. Grab your level and prepare to discover that your house was apparently built by people who thought “close enough” was a legitimate measurement.
What you’re hunting for:
- Walls that are actually plumb (spoiler alert: they’re not)
- Corners that genuinely hit 90 degrees (double spoiler: nope)
- Surface imperfections that’ll show through your wallpaper like a neon sign
The brutal truth: If you can feel it with your hand, you’ll see it through the wallpaper.
Measuring and Planning Pattern Placement
This is where the math comes in. Don’t panic – we’re talking addition and subtraction, not quantum mechanics.
The golden rule that’ll save your sanity: Always start your corner planning from the most visible corner in the room – usually the one you see when you walk in.
| Pattern Type | Repeat Distance | Corner Strategy | Tolerance Level |
| Random/No Pattern | N/A | Cut anywhere | High |
| Small Pattern (under 6″) | 3-12″ | Minor adjustments OK | Medium |
| Large Pattern (6-24″) | 12-36″ | Plan cuts carefully | Low |
| Architectural/Stripe | Varies | Maintain vertical lines | Zero |
Key Takeaway: It’s better to have a slightly imperfect pattern match than a corner that looks like it was installed during an earthquake.
Priming and Surface Treatment
Don’t you dare skip the primer. I know it’s boring, I know it takes time, and I know you just want to get to the fun stuff. But primer is like version control for your walls – you don’t appreciate it until you need it.
When corners need the royal treatment:
- Raw drywall (prime it or regret it)
- Previously painted surfaces, especially glossy paint
- Any stains or discolouration
- Areas where old wallpaper was removed
Quality primer sources: Benjamin Moore Fresh Start or Zinsser Bulls Eye 1-2-3 – invest in quality here.
Step-by-Step Guide: Wallpapering Inside Corners
Alright, this is where we separate the talkers from the walkers. Inside corners are your chance to build confidence before tackling the nightmare that is outside corners.
Approach and Initial Positioning
The setup is everything. You’re approaching a corner with your last full strip, and how you handle this moment determines whether you’re a hero or you’re peeling everything off for a do-over.
Here’s the play-by-play:
- Measure the distance from your last hung strip to the corner
- Add 1/8″ to 1/4″ for overlap onto the adjacent wall (not more, not less)
- Cut your strip to this exact width
- Test fit without adhesive – if it looks wrong, it is wrong
Don’t just wing it – measure twice, cut once, swear never.
Cutting and Trimming Technique
This is where precision separates the pros from the weekend warriors. Your knife needs to be sharp enough to slice paper cleanly without tearing.
The relief cut technique that actually works:
- Make small diagonal cuts at the top and bottom where the corner meets the ceiling/baseboard
- These cuts release tension and prevent that accordion-bunching disaster
- Cut at 45-degree angles about 1/2″ long
Critical detail: Keep that blade perpendicular to the wall. Angled cuts create gaps that’ll mock you every time you walk by.
Smoothing and Adhering
Work like you’re defusing a bomb – methodically, not frantically. Rush this step and you’ll be explaining to your spouse why you need to buy more wallpaper.
The technique that works:
- Start from the center and work toward the corner systematically
- Use firm, consistent pressure – not crushing, not gentle
- Work air bubbles toward the edges – don’t try to force them through the corner
- Pay special attention to the corner crease – this is where lifting starts its reign of terror
Starting the Next Wall
This is the moment where your planning pays off or bites you in the butt. Your corner overlap needs to disappear like it was never there.
The technique:
- Measure your corner overlap on the new wall
- Mark a plumb line using your level (trust the level, not your eyes)
- Cut your next strip to overlap by about 1/8″
- Align to your plumb line, completely ignoring the corner edge
- Double-cut through both layers for an invisible seam
Pro Quote: “The corner edge is rarely straight. Trust your plumb line, not what you think you see.” – Every installer who’s learned this lesson.
Step-by-Step Guide: Wallpapering Outside Corners
Welcome to the final boss fight of wallpapering. Outside corners are where good intentions go to die, but with the right technique, you can emerge victorious.
Critical Measurements
Precision isn’t just important here – it’s survival. You’re essentially gift-wrapping a corner that can’t have any wrinkles, tears, or “close enough” moments.
The formula that works:
- Measure from your last strip to the corner edge
- Add 1/2″ to 3/4″ for wrap-around (more than inside corners)
- Account for the corner not being perfectly straight (because it isn’t)
Why more overlap? Outside corners take abuse. They get bumped, scraped, and generally beaten up. That extra material is your insurance policy.
Wrapping Technique
Here’s where wallpapering becomes a contact sport. You need to convince the wallpaper to bend around that corner without tearing, and wallpaper doesn’t always want to cooperate.
The step-by-step that actually works:
- Apply gentle, consistent tension as you wrap – firm but not desperate
- Use your hands to form the corner before bringing in tools
- Work from the center outward to avoid trapping air bubbles
- Make relief cuts if needed – don’t be a hero, make the cuts
The secret weapon: Slightly dampen the wallpaper (if it’s the type that allows it) to make it more pliable. Not soaking, just barely damp.
Trimming for Clean Edges
This is where legends are born and disasters are created. One bad cut and you’re starting over with a fresh piece and a bruised ego.
The double-cut method that pros swear by:
- Overlap your next strip by about 1/4″
- Cut through both layers with a fresh blade (change blades obsessively)
- Remove the waste strips from both pieces
- Roll the seam for an invisible joint
Pro Tip: Change your blade after every few cuts. Dull blades tear wallpaper faster than bad reviews spread on social media.
Final Smoothing and Touch-ups
Don’t celebrate yet. The corner isn’t finished until it’s bomb-proof and ready for inspection.
Final inspection checklist:
- All edges securely bonded – no lifting anywhere
- No visible seam line where pieces meet
- Pattern alignment looks intentional, not accidental
- No air bubbles playing hide-and-seek under the surface
Advanced Techniques for Perfect Pattern Matching
Pattern matching at corners is what separates the pros from the enthusiastic amateurs. It’s like parallel parking – looks impossible until you know the secret.
Dealing with Large Pattern Repeats
Large patterns are gorgeous until you hit a corner, then they become mathematical nightmares that would make a calculus professor weep.
The strategy that works:
- Plan your entire layout before cutting a single piece
- Accept that perfect matching might be impossible – and that’s OK
- Prioritize the most visible areas of the room
- Consider starting with a partial pattern if it improves the overall look
When to compromise: If perfect pattern matching means a 2″ overlap or a visible seam, choose the clean corner every single time.
Handling Borders and Chair Rails
Architectural features are corner complications disguised as design elements.
The approach that saves sanity:
- Stop wallpaper at the feature rather than trying to navigate around it
- Use trim or moulding to create clean transitions
- Plan your pattern to work with these interruptions, not against them
Working with Delicate or Expensive Wallpapers
When you’re working with hand-painted silks or grasscloth that costs more per roll than your car payment, mistakes aren’t just embarrassing – they’re financially devastating.
Extra precautions that pay off:
- Practice techniques on scraps first (buy extra rolls)
- Use specialized tools designed for delicate materials
- Work slower – rushing expensive wallpaper is false economy
- Have backup adhesive for inevitable touch-ups
Fun Fact: Premium wallpaper can cost over $200 per roll. Suddenly that $30 corner smoothing tool seems like the bargain of the century.
Common Corner Wallpapering Mistakes and Solutions
Let’s talk about the hall of fame of corner catastrophes. I’ve seen them all, fixed most of them, and learned from every disaster.
| Mistake | Root Cause | Prevention Strategy | Emergency Fix |
| Corner wrinkles | Too much adhesive or rushing | Proper adhesive amount, patience | Lift and reapply carefully |
| Pattern mismatch | Poor planning or wishful thinking | Measure and plan obsessively | Live with it or start over |
| Visible overlap seam | Insufficient trimming or dull blade | Double-cut technique, fresh blades | Carefully trim with sharp blade |
| Corner lifting | Inadequate adhesive or dirty surface | Clean prep, quality adhesive | Re-adhere with seam adhesive |
| Air bubbles | Trapped air during application | Work systematically from center | Prick with needle, smooth out |
Wrinkles and Bubbles
Wrinkles in corners are like bugs in your code – ignore them and they multiply exponentially.
Prevention during application:
- Work the wallpaper into the corner gradually – don’t force it
- If it’s fighting you, stop and reassess – wallpaper doesn’t lie
- Use appropriate tools for the corner radius
Post-application emergency fixes:
- Small wrinkles: Hair dryer on low heat, then re-smooth
- Large wrinkles: You’re looking at a lift-and-reapply situation
Pattern Misalignment
Sometimes your pattern is off and there’s no hiding it. Welcome to the club – we meet for drinks and shared trauma stories.
Recovery techniques:
- Adjust subsequent strips to gradually correct alignment
- Use trim or architectural features to mask the problem
- Strategic furniture placement can hide a multitude of sins
When to bite the bullet: If the misalignment is in a prominent location and bothers you every time you see it, redo it. Your sanity is worth more than the wallpaper cost.
Visible Seams and Overlaps
Nothing screams “amateur hour” louder than visible seams.
Common causes:
- Insufficient overlap trimming
- Dull blade creating ragged edges
- Poor seam rolling technique
- Rushing because you’re “almost done”
Repair strategies:
- Carefully trim with a sharp blade
- Apply seam adhesive if edges are lifting
- Roll the seam again with appropriate pressure
Troubleshooting Corner Problems
When everything goes sideways (and it will), here’s your emergency response playbook.
Wallpaper Won’t Stick at Corners
This is usually an adhesive issue masquerading as a technique problem.
Diagnosis checklist:
- Is the surface actually clean and properly primed?
- Is your adhesive the right type for your wallpaper?
- Has the adhesive been mixed according to directions?
- Are you applying enough adhesive to corner areas?
Quick fixes that work:
- Clean the area with a slightly damp cloth
- Apply additional adhesive specifically to problem spots
- Use a seam roller to increase contact pressure
- Weight the corner with books while it sets
Tearing During Application
Tears happen to everyone. Don’t panic, don’t despair, and definitely don’t start drinking (yet).
Emergency repair techniques:
- Small tears: Smooth back together and apply gentle pressure
- Larger tears: Cut a patch from scrap material, match the pattern
- Edge tears: Trim to a clean edge and adjust your overlap accordingly
Prevention strategies:
- Keep wallpaper slightly moist (if appropriate for the type)
- Don’t over-stretch the material
- Use relief cuts to reduce tension
Uneven or Wavy Corner Lines
Crooked corners make the whole room look like it was decorated during an earthquake.
The fix:
- Mark plumb lines with your level religiously
- Use the plumb line as your guide, not the corner edge
- Consider using a straightedge for cutting guides
Professional Tips for Different Wallpaper Types
Here’s the thing – not all wallpapers are created equal. What works perfectly for vinyl might destroy grasscloth faster than a toddler with permanent markers.
Vinyl and Washable Wallpapers
Vinyl is forgiving but has its own personality quirks.
Specific considerations:
- Vinyl stretches – don’t pull too hard or you’ll create distortion
- Pre-pasted varieties need proper activation (follow the directions, not your intuition)
- Seams need more pressure to adhere properly
- Cleanup must be immediate – dried vinyl adhesive is basically permanent
Fabric and Textile Wallcoverings
Fabric wallcoverings are gorgeous but more temperamental than a vintage sports car.
Special handling requirements:
- No moisture on the face of the material (it stains permanently)
- Gentle pressure only – crushing the texture ruins the entire look
- Sharp, clean cuts are critical – frayed edges show like a neon sign
- Test all techniques on scraps first
Grasscloth and Natural Materials
Natural materials march to their own drummer and don’t care about your timeline.
Key considerations:
- Directional installation – check the arrows on the back religiously
- Variations in texture are normal and actually desirable
- Seams may be slightly visible – this is expected, not a failure
- No moisture on the face – it can cause permanent staining
Pro Quote: “Grasscloth is like a beautiful, expensive pet – gorgeous when treated right, destructive when mishandled.” – Sarah Richardson, Interior Designer
Maintenance and Long-term Corner Care
Good corner work should last as long as the wallpaper itself. Here’s how to make sure it does.
Preventing Corner Lifting
Corners are high-stress areas where physics conspires against you. Temperature changes, humidity fluctuations, and normal house settling all want to destroy your beautiful work.
Prevention strategies that work:
- Quality adhesive is non-negotiable – don’t cheap out here
- Proper surface prep creates the foundation for longevity
- Monitor humidity levels – extreme changes cause problems
- Address small issues immediately – they become big problems fast
Cleaning Corner Areas
Corners are dust and grime magnets. They collect everything and share nothing.
Safe cleaning approaches:
- Vacuum with brush attachment for textured wallpapers
- Slightly damp cloth for washable varieties only
- Avoid excessive moisture near seams (moisture is the enemy)
- Test cleaning products in hidden areas first
Key Takeaway: The best maintenance is gentle, regular cleaning rather than aggressive periodic deep cleaning that destroys more than it helps.
Look, here’s the bottom line: Wallpapering corners isn’t rocket science, but it’s not exactly finger painting either. It requires patience, decent tools, and the wisdom to slow down when every instinct tells you to rush.
The difference between pros and weekend warriors isn’t some secret technique or natural talent. It’s simply this: they’ve learned that corners demand respect. Rush them, cut corners (pun absolutely intended), or try to muscle through with inadequate tools, and they’ll humble you faster than a compiler error at 4:59 PM on Friday.
But treat corners right – prep properly, use quality tools, work methodically, and accept that perfection is the enemy of good – and you’ll get results that make people think you hired a professional.
Now stop overthinking it and go make some corners look fantastic.
FAQs
- Can I wallpaper around corners if my walls aren’t perfectly square?
Welcome to the real world of construction! Most walls are about as square as a circle. Use your level to establish plumb lines rather than following the corner itself. Small pattern adjustments and slight overlaps are infinitely better than following crooked corners and ending up with wonky results.
- How long should I wait before trimming excess wallpaper at corners?
Timing is everything here. Wait until the adhesive has begun to set but the wallpaper is still workable – typically 10-15 minutes depending on your adhesive type and room conditions. Too soon and you’ll shift the paper; too late and you’ll tear it trying to cut.
- What’s the best way to remove wallpaper from corners when redecorating?
Start with a scoring tool to perforate the surface, then apply removal solution liberally to corners where adhesive tends to be thickest. Use a putty knife at a low angle to avoid gouging the drywall. Corners always take longer than flat surfaces – plan accordingly.
- Should I use the same adhesive for corners as I do for flat walls?
Use the same type but consider applying it slightly heavier in corner areas where mechanical stress is higher. Some pros use a small brush to ensure complete coverage in the corner crease itself where rollers can’t reach effectively.
- How do I handle wallpapering corners in high-humidity rooms like bathrooms?
Use vinyl wallpaper specifically rated for high-moisture environments, ensure excellent ventilation during installation, and consider using a moisture-resistant adhesive. Pay extra attention to sealing edges where moisture could penetrate and cause lifting or mould issues.