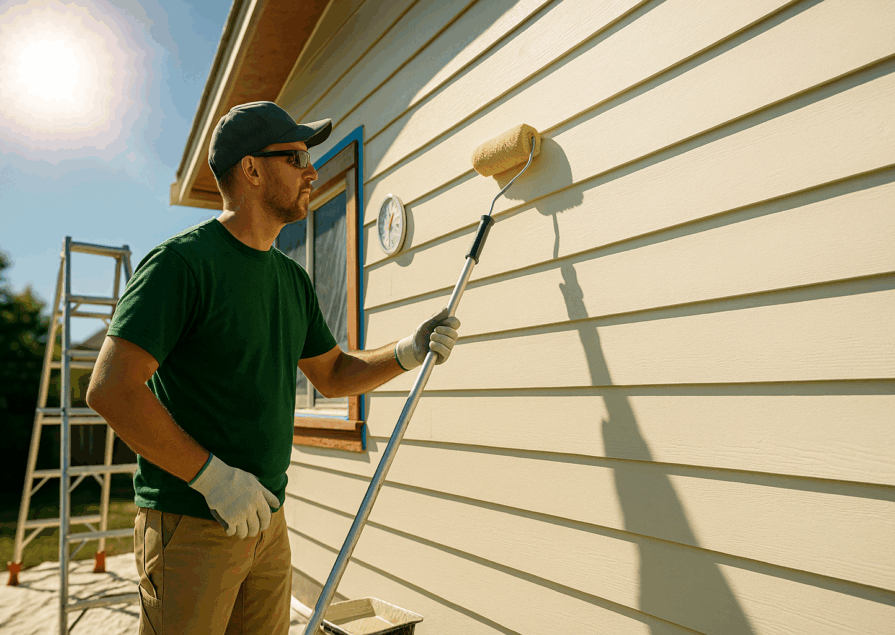
Why Proper Preparation Makes or Breaks Your Exterior Paint Job
- Eight out of ten paint failures trace back to inadequate prep. Industry studies consistently attribute ≈ 80 % of peeling, blistering, and premature fading to surface-prep mistakes, not paint quality.
- Cost of skipping prep: A typical 2-storey, 2,000 sq ft home that needs a premature repaint can run CA $6,000–$8,000, versus CA $2,500–$3,000 when done right the first time (labour, paint, rentals). Spending an extra day on prep can save thousands over the next 5–7 years.
Pre-Project Planning and Assessment (Week Before Painting)
Weather Window Planning
- 3-Day Forecast Rule: Ensure at least 72 hours of dry weather after your final coat.
- Ideal Temperature: 10 °C – 30 °C (50 °F – 86 °F)—avoid extremes that cause poor curing.
- Humidity Target: ≤ 70 % for latex; ≤ 60 % for oil-based coatings.
- Seasonal Timing:
- Spring: Paint once nightly frost risk is gone.
- Summer: Work early mornings/evenings to dodge direct sun.
- Fall: Finish two weeks before average first frost.
| Season | Temp (°C / °F) | Max RH (latex / oil) | Rain-free window after final coat | Notes |
|---|---|---|---|---|
| Spring | 10–30 / 50–86 | ≤ 70% / ≤ 60% | 72 hours | Paint after frost risk is gone. |
| Summer | 10–30 / 50–86 | ≤ 70% / ≤ 60% | 72 hours | Work mornings/evenings; avoid direct sun & hot surfaces. |
| Fall | 10–30 / 50–86 | ≤ 70% / ≤ 60% | 72 hours | Finish at least 2 weeks before first frost. |
| Winter | Generally not recommended | — | — | Risk of frost & prolonged curing times. |
Surface Condition Assessment Checklist
Visual Inspection Criteria
- Peeling or bubbling paint
- Chalky residue when rubbed
- Cracks, holes, or loose joints
- Mold, mildew, or algae growth
- Rust stains on metal components
Problem-Area Identification Guide
- Chalking: Powdery surface indicates degraded binder—requires washing and bonding primer.
- Mildew/Algae: Green or black spotting—treat with bleach solution (3 : 1 water).
- Peeling Blisters: Moisture trapped—locate and fix source before repainting.
DIY vs Professional Call-Out
- DIY: Minor flaking, small caulk gaps, superficial mildew.
- Call a Pro: Structural rot, extensive lead paint, high-rise work, or moisture intrusion.
Project Scope and Timeline Estimation
Square-Footage Calculation
- Measure wall length × height for each façade.
- Subtract areas of large windows/doors.
- Add 10 % contingency for trim, eaves, and waste.
Time Requirements per Prep Step (per ~500 sq ft)
| Task | Avg. Hours | Notes |
| Cleaning/Power-wash | 2–3 | +24 h drying |
| Scraping & Sanding | 3–5 | Depends on paint condition |
| Repairs & Caulking | 2–4 | Wood filler cure time |
| Masking & Covering | 1–2 | Protect windows/landscaping |
Realistic Project Scheduling
- Day 1: Power-wash.
- Day 2: Drying / supply run.
- Day 3–4: Scrape, sand, repair.
- Day 5: Prime problem areas.
- Day 6–7: Paint two finish coats.
- Always reserve one buffer day for unexpected delays.
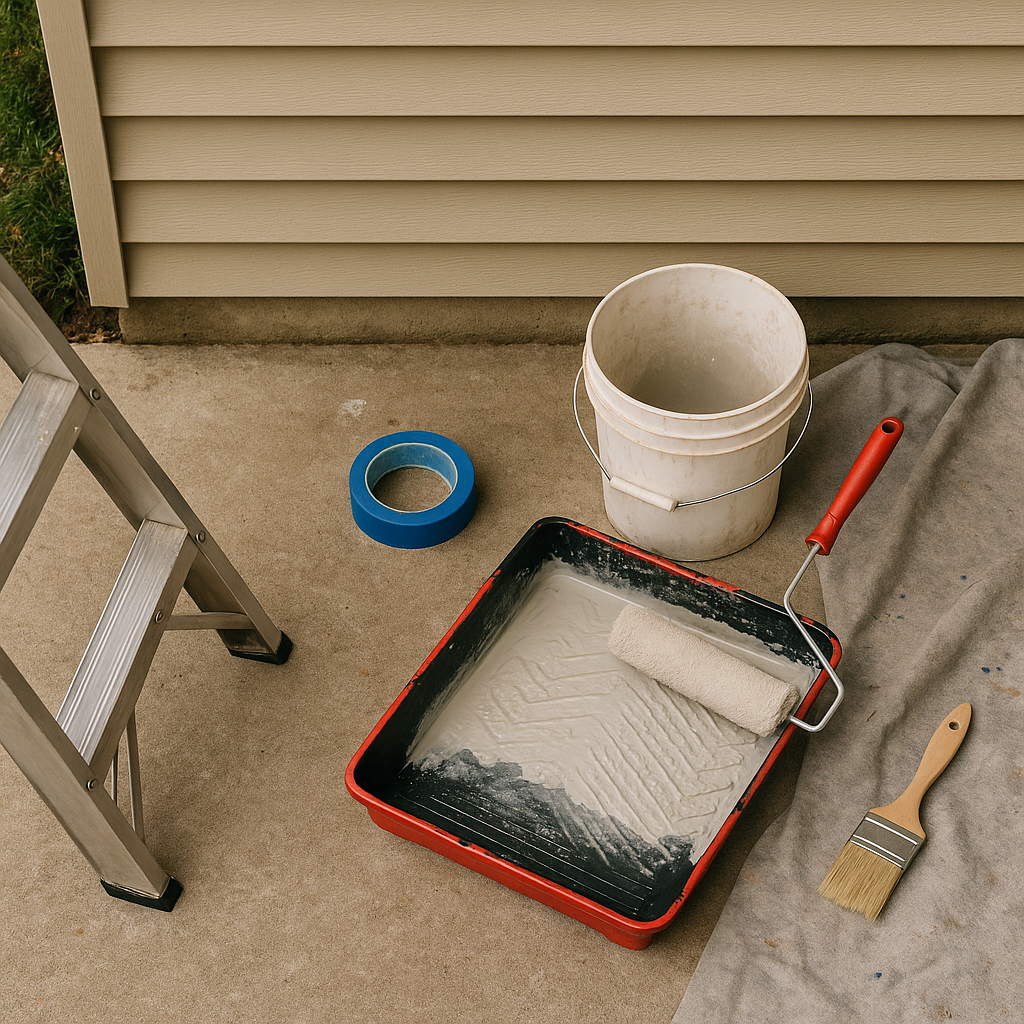
Essential Tools and Materials Checklist
A well-planned toolkit keeps prep efficient and prevents mid-project delays. Use this master list to stock up before you start.
Surface Preparation Tools
| Tool | Best For | When to Use |
| Rigid Paint Scraper | Flat siding & trim | Removing loose, flaking paint in localized spots |
| Pull (Tungsten) Scraper | Weathered wood | Heavy flake removal with minimal gouging |
| Detail/Contour Scraper | Moldings, grooves | Intricate profiles where rigid blades can’t reach |
| Random-Orbit Sander (80–120 grit) | Wood siding, decks | Feather-smoothing after scraping; leveling filler |
| Detail Sander (triangle head) | Corners, window muntins | Tight areas that orbitals miss |
| Power Washer (1,500–2,500 PSI, 25°/40° tips) | All large exterior walls | Pre-cleaning dirt, chalk, mildew; rinsing stripper |
| Soft & Stiff Bristle Brushes | General wash / mildew treatment | Agitating cleanser, bleach mixes on delicate trim |
| Buckets, Mild Detergent, Oxygen/Bleach Cleaner | Dirt, grease, mildew | Surface-specific cleaning prior to sanding |
Safety Equipment Requirements
PPE Checklist
- Safety glasses or wrap-around goggles
- N95/P100 respirator (plus lead-rated cartridges if needed)
- Heavy-duty nitrile or leather gloves
- Long sleeves, pants, and non-slip work boots
- Hearing protection (for grinders, sanders, power washers)
Ladder Safety Essentials
- Type I or IA extension ladder rated for outdoor use
- Ladder stabilizer / standoff arms for gutters & siding
- Leveling legs or adjustable feet on uneven terrain
- Rule of 4 to 1: base one foot out for every four feet in height
- Never stand on the top two rungs; tie off above 24 ft
Lead-Paint Testing & Protocols
- Homes built pre-1978: test with an EPA-recognized kit
- If positive, use wet-scraping or chemical stripping—no dry sanding
- Contain chips with poly sheeting; clean up with HEPA vac
- Dispose of debris per local hazardous-waste regulations
Primers, Paints, and Application Materials
Primer Selection Guide by Substrate
| Substrate | Recommended Primer | Key Benefit |
| Bare wood | Alkyd or bonding acrylic | Seals tannins & evens porosity |
| Weathered wood (gray) | High-build acrylic consolidator | Re-binds loose fibres |
| Masonry/Stucco | Elastomeric masonry primer | Breathable; bridges small cracks |
| Bare metal | Rust-inhibiting alkyd | Prevents flash rust & corrosion |
| Previously painted (sound) | Acrylic multi-surface | Promotes adhesion, blocks stains |
Paint Quantity Calculations
- Coverage rule of thumb: 1 gal = 250–400 sq ft per coat (texture & colour affect spread rate)
- Plan two finish coats on all surfaces for longevity.
- Primer typically covers 15 % fewer sq ft than finish paint—order extra if surface is porous.
Brush & Roller Selection Criteria
| Task | Brush / Roller | Why |
| Trim & cutting-in | 2–2½” angled synthetic brush | Crisp lines; holds latex well |
| Wide fascia & soffits | 3–3½” flat brush | Faster coverage, minimal lap marks |
| Smooth siding | ½” nap roller | Even film build without stipple |
| Textured stucco/brick | ¾–1″ nap roller | Reaches crevices |
| Large flat walls | Airless sprayer (2,000 PSI) + back-roll | Uniform finish, speed on tall façades |
Materials Checklist Table (Primer & Paint by Square Footage)
| Paintable Area (sq ft) | Primer (gal) | Finish Paint (gal) | Caulk (tubes) | Drop Cloths (9 × 12 ft) |
| 500 | 2 | 3 | 4 | 2 |
| 1,000 | 4 | 6 | 6 | 3 |
| 1,500 | 6 | 9 | 8 | 4 |
| 2,000 | 7 | 11 | 10 | 5 |
| 2,500 | 9 | 13 | 12 | 6 |
Tip: Add 10 % contingency to paint totals if colour change is drastic or surface is highly textured.
Step 1 – Power Washing and Initial Cleaning
Proper cleaning is the foundation of every long-lasting exterior paint job. Dirt, chalk, mold, and loose paint all undermine adhesion; removing them now prevents bubbling and flaking later.
Power Washing Technique and Safety
| Surface Type | Safe Pressure Range | Recommended Tip | Typical Nozzle Distance |
| Wood siding & decks | 500 – 1,200 PSI | 25- or 40-degree | 12–18 cm (5–7 in) |
| Vinyl siding | 1,300 – 1,600 PSI | 25-degree | 30 cm (12 in) |
| Stucco & brick | 1,500 – 2,500 PSI | 25-degree | 45 cm (18 in) |
| Painted metal | 800 – 1,200 PSI | 40-degree | 20 cm (8 in) |
Technique Essentials
- Start with the widest fan tip and lowest pressure; increase only as needed.
- Keep the wand moving in smooth, overlapping passes—never pause in one spot.
- Spray with the grain or siding overlap, aiming slightly downward to avoid forcing water behind boards.
- Wear eye protection, non-slip footwear, and hearing protection around gas units.
Drying Time Requirements
- Most substrates need 24–48 hours of dry time before scraping or sanding.
- Porous masonry and shaded areas may require up to 72 hours; confirm with a moisture meter (<15 % for wood).
Manual Cleaning for Delicate Surfaces
Some trim and ornate details can’t handle high-pressure spray. Use gentler hand methods to protect these areas.
Hand-Washing Methods for Trim & Detail Work
- Mix warm water + mild dish soap in a bucket.
- Agitate with a soft-bristle brush in small circular strokes.
- Rinse with a clean sponge or low-pressure garden hose.
Mildew & Stain Removal Techniques
- Mildew/Algae: 3 : 1 water-to-bleach solution. Apply, sit 10 min, rinse thoroughly.
- Rust Marks: Apply oxalic-acid–based cleaner with a nylon brush; rinse after 5 min.
- Grease/Smoke Residue: Use trisodium phosphate (TSP) substitute; wear gloves and goggles.
Surface-Specific Cleaning Solutions
| Surface | Cleaner | Notes |
| Bare wood | Wood cleaner + brightener (no ammonia) | Restores natural colour; neutralize with water |
| Vinyl | Commercial vinyl wash | Avoid solvents that can cloud finish |
| Masonry | TSP substitute or masonry degreaser | Rinse until run-off is clear |
| Aluminum | Mild detergent only | Abrasives can scratch the coating |
After the entire exterior is clean and completely dry, you’re ready to inspect for damage.
Step 2 – Surface Inspection and Damage Assessment
A thorough inspection prevents hidden problems from sabotaging your new paint job. After the surface is completely dry, walk the entire exterior—up close and at eye level—to identify trouble spots.
Identifying Problem Areas Requiring Attention
Rot & Wood-Damage Detection
- Probe fascia boards, window sills, and trim with a screwdriver; soft, spongy wood or the tool sinking in > 3 mm signals rot.
- Discolored “coffee-stain” patches or fungus growth often mark concealed moisture damage.
- For decks or railings, check fastener heads—rust stains can indicate internal decay.
Caulk Failure Identification
- Inspect joints around windows, doors, siding butt joints, and between dissimilar materials.
- Look for gaps, cracked beads, or hardened/brittle caulk that no longer flexes with temperature changes.
- Note areas where previous caulk has pulled away from one side; these require complete removal and re-caulking.
Paint Adhesion Testing Methods
- Tape Test: Score a small “X” with a utility knife, press painter’s tape firmly, pull at 180°. Any paint on the tape = poor adhesion.
- Alligatoring & Blistering Check: Network-like cracks or raised bubbles show underlying bond failure or moisture entrapment.
- Chalking Rub: Wipe surface with a dark rag; excessive powder indicates eroded binder—requires washing and possibly a bonding primer.
Prioritizing Repairs by Severity
| Priority | Examples | Consequences if Ignored | Typical Added Time & Cost |
| Critical (Fix Before Painting) | Wood rot, active leaks, loose siding, missing caulk, lead-paint hazards | Moisture intrusion, structural decay, paint failure within months | 1–3 days; CA $200–$1,500+ depending on carpentry scope |
| Important (Address During Prep) | Moderate peeling, hairline stucco cracks, minor rust on metal | Accelerated flaking; visible defects through new paint | 4–8 hours; CA $50–$300 materials |
| Cosmetic (Optional/Post-Paint) | Small dents, non-structural trim gaps, faded but sound paint | Aesthetic only—no impact on longevity | 1–2 hours; minimal cost |
Budget Allocation for Unexpected Issues
- Reserve 10–15 % of the overall project budget for hidden repairs (e.g., sheathing rot uncovered after scraping).
- Keep contingency funds liquid—material prices and carpenter rates fluctuate seasonally.
Timeline Impact
- Minor caulk/patching: +½–1 day.
- Board replacements or epoxy repairs: +1–2 days (plus drying/curing).
- Moisture remediation or lead abatement: +3–5 days, often requiring specialist scheduling.
Pro Tip: Document each issue with photos and notes now; match them against a repair checklist so nothing is missed when you transition to Step 3—Scraping and Paint Removal.
Step 3 – Scraping and Paint Removal
Removing all loose or failing paint guarantees a sound substrate for primer and finish coats. Choose the right removal method—scrape, sand, or chemically strip—based on paint condition, surface type, and safety regulations.
When to Scrape vs Sand vs Strip
| Paint / Surface Condition | Recommended Method | Why It’s Best | Notes |
| Localized peeling & flaking | Hand scraping + spot sanding | Fast, precise removal of loose layers only | Feather edges with 80-120 grit |
| Sound paint but glossy finish | Light sanding (150-180 grit) | Scuffs surface for adhesion without full removal | Ideal for recent coatings |
| Thick, multi-layer buildup | Chemical or infrared stripper | Softens stacked layers; preserves detailed trim | Neutralize stripper per manufacturer |
| Embedded lead-based layers (pre-1978) | Wet scraping or certified encapsulation | Minimizes hazardous dust; meets EPA/RRP rules | Hire certified contractor if > 6 ft² |
Lead-Paint Regulations: In Canada and the U.S., any home built before 1978 must be tested. If positive, use HEPA vacs, poly containment, and wet methods—never dry-sand or power-grind lead paint. Dispose of chips in sealed, labeled bags per municipal bylaws.
Efficient Scraping Techniques
- Tool Selection
- Rigid paint scraper: Quick removal on flat siding.
- Pull scraper with carbide blade: Aggressive but leaves smoother finish on weathered wood.
- Detail/contour scraper: Intricate moldings and profiles.
- Technique Tips
- Maintain a 30-45° blade angle; pull with the wood grain.
- Use two hands for control on tough spots; lighten pressure near edges to avoid gouging.
- Feather remaining paint edges with a random-orbit sander (80 → 120 grit).
- Debris Containment & Disposal
- Lay 6-mil poly sheeting under work zones.
- Collect chips frequently; vacuum with HEPA-filtered shop vac.
- Double-bag debris—especially if lead positive—and label per local regulations.
Step 4 – Sanding and Surface Smoothing
Sanding levels feathered edges, opens surface pores for primer, and delivers the ultra-smooth finish that distinguishes professional work.
Grit Selection and Sanding Sequence
| Surface Condition | First Pass | Second Pass | Final Pass / Spot Feathering | Method |
| Heavy scrape lines, filler patches | 60–80 grit | 100–120 grit | 150 grit | Random-orbit sander |
| Moderate scuffs, weathered wood | 100 grit | 150 grit | — | Random-orbit or hand block |
| Sound paint, just dulling gloss | 150 grit | 180-220 grit | — | Pole sander or sanding sponge |
| Trim & edges (detailed profiles) | 120 grit sponge | 180 grit sponge | 220 detail pad | By hand / detail sander |
Power Sander vs Hand Sanding
- Random-orbit or DA sander: Large, flat areas—fast stock removal without swirl marks.
- Detail/triangular sander: Corners, louvered shutters, window muntins.
- Hand block/sponges: Final feathering, curved moldings, spots where power tools can over-cut.
Avoid Over-Sanding: Stop at bare substrate + intact feather edge. Over-sanding thin clapboards can create low spots and expose nails.
Dust Control and Cleanup
- Containment
- Attach power sanders to a dust-extractor vacuum with HEPA filtration.
- Hang poly sheeting over doors, vents, and shrubbery; wet foliage beforehand to trap dust.
- Cleanup Protocol
- Vacuum surfaces, ledges, and horizontal trim again after sanding.
- Wipe down with damp microfiber cloths to remove residual dust—change cloths frequently.
- For masonry, rinse lightly with hose mist and allow to dry.
- Surface Prep for Priming
- Inspect for missed splinters or shiny spots—re-sand if necessary.
- Re-caulk any joints disturbed by sanding; let caulk cure per product spec.
- Once the surface feels uniformly smooth and dust-free, you’re ready for Step 5 – Priming and Sealing.
Step 5 – Repairs and Surface Restoration
Ignoring repairs now all but guarantees premature failure later. Tackle every flaw—no matter how small—before primer touches the surface.
Wood Repair and Filling Techniques
| Issue | Product / Method | Key Steps | Cure Time* |
| Nail holes, small gouges | Exterior wood filler (cellulose or vinyl) | Pack flush ➞ overfill slightly ➞ sand level (120 → 180 grit) | 30 – 60 min |
| Checks & deep cracks | Two-part epoxy wood filler | Undercut edges ➞ mix & press in ➞ sculpt profile | 4 – 6 hr |
| Soft rot (≤ ½″ deep) | Epoxy consolidant + filler | Remove punky wood ➞ saturate with consolidant ➞ back-fill with epoxy paste | 24 hr |
| Severe rot / missing sections | Dutchman repair (wood patch) | Square cut to sound wood ➞ mill matching wood plug ➞ glue & clamp | 24 hr + |
*Approximate at 20 °C/68 °F—check manufacturer specs.
Grain Matching & Texture Restoration
- Use wood graining combs or a cut piece of scrap siding to imprint wet filler.
- For cedar/shiplap, mimic saw-kerf by lightly dragging a wire brush after filler sets but before full cure.
Caulking and Sealing Critical Areas
| Joint Location | Recommended Caulk | Reason |
| Siding butt-joints | High-flex acrylic-urethane | Paintable, ±50 % movement |
| Trim to masonry | Polyurethane | Superior adhesion to porous surfaces |
| Windows & doors | Acrylic-silicone blend | UV-stable; easy tool-out |
| Metal flashings | 100 % silicone (neutral-cure) | Temperature resilience; non-corrosive |
Application Tips
- Cut nozzle at a 45 ° angle sized to joint width.
- Hold gun at ~45 ° to surface; push bead ahead of tip for complete wet-out.
- Tool within 5 min using wet finger or caulk spatula; aim for concave profile.
- Allow full cure (24 h typical) before priming.
Weather-Seal Inspection
- Check door sweeps, window gaskets, and any flashing counter-laps.
- Replace cracked rubber or missing drip-edge before coating begins.
Step 6 – Priming Strategy and Application
Primer is the bonding bridge between your painstaking prep and a flawless topcoat. Match the primer to the substrate and apply it like a finish coat.
Primer Selection by Surface Type
| Substrate / Condition | Compatible Primer | Purpose | Example Products |
| Bare wood (tannin-rich) | Alkyd or stain-blocking acrylic | Seals bleed-through | Zinsser Cover-Stain, BIN Advanced |
| Weathered wood (chalky) | High-build acrylic bonding | Re-binds loose fibers | XIM Peel-Bond |
| New masonry / stucco | Elastomeric masonry primer | Breathable; hairline-crack bridging | Loxon Concrete & Masonry |
| Rust-free metal | Acrylic DTM (direct-to-metal) | Corrosion resistance | Sherwin-Williams Pro Industrial DTM |
| Rusted metal | Rust-converting alkyd | Converts & seals | Corroseal, Rust-Oleum Rust Reformer |
| Smoke- or water-stained areas | Shellac-based stain blocker | Locks odors & stains | BIN Original |
Spot Priming vs Full Coverage
- Spot prime: Sound, previously painted surfaces with isolated repairs.
- Full prime: New substrates, chalky surfaces, drastic colour shifts, or when using self-etching / rust-inhibitive primers.
Professional Priming Techniques
- Application Methods
- Brush & roll on trim and small façades (400–500 ft² / gal).
- Airless sprayer (0.015–0.017 tip, 2,000 PSI) for large walls—always back-roll to work primer into pores.
- Coverage Rates
- Wood & hardboard: 300–350 ft² / gal.
- Porous masonry: 200–250 ft² / gal.
- Dry-to-Recoat Windows
- Acrylic: 1–2 h to touch; 4 h before topcoat.
- Alkyd: 6–8 h to touch; 16 h recoat.
- Shellac: 20 min to touch; 45 min recoat.
- Quality Control
- Look sideways under raking light—primer should appear uniformly dull with no glossy holidays.
- Check moisture content (wood < 15 %) before topcoating; primer should not feel tacky.
Step 7 – Final Prep and Paint-Ready Checklist
The day before you open a paint can, run through this final checklist to make sure every surface and condition is truly ready. A 15-minute verification now can save hours of sanding, re-priming, and colour mismatch later.
Surface Quality Verification
| Inspection Point | Pass Criteria | Corrective Action If Needed |
| Cleanliness | No dust when hand is wiped across surface | Damp-wipe, vacuum with brush attachment |
| Repairs & Filler | Flush to surrounding plane; no shrinkage cracks | Sand/spot-fill → allow curing |
| Caulked Joints | Continuous bead, slight concave profile | Re-caulk gaps; tool smooth |
| Primer Uniformity | Even, flat sheen; no glossy “holidays” | Spot-prime bare areas; feather edges |
| Moisture Level | Wood ≤ 15 % (check with moisture meter) | Delay painting; allow drying time |
| Adhesion Check | Tape test = 0–1 % lift | Feather sand & spot-prime failing spots |
Touch-Up Requirements
- Sand any raised grain or drips with 180-220-grit sponge.
- Fill micro-pinhole nail sets; re-prime patches.
- Wipe all handprints or pollen with a damp microfiber cloth.
Environmental Condition Confirmation
- Forecast shows ≥ 24 h rain-free and temps 10 °C–30 °C (50 °F–86 °F).
- Humidity is predicted ≤ 70 % during drying window.
- Wind under 15 km/h (10 mph)—reduces overspray and debris adhesion.
Paint Day Preparation
| Task | Best Practice | Time Needed |
| Material Staging | Group primers, topcoats, additives, & colour sticks by elevation/area | 30 min |
| Tool Layout | Place rollers, brushes, grid pans, and extension poles on tarp-covered table; label by colour | 15 min |
| Mask & Cover | Re-check plastic on windows, plants, fixtures; secure edges with fresh tape | 20 min |
| Weather Monitoring | Set phone alert for pop-up showers, wind shifts; keep hygrometer onsite | During work |
| Mix & Box Paint | Combine all cans of each colour in 5-gal pail; stir 3 min for uniformity | 10 min |
| Edge Testing | Brush a 30 cm × 30 cm (1 ft × 1 ft) test patch; verify sheen/colour after 10 min flash | 10 min |
| Crew Briefing / Solo Plan | Review ladder moves, cut-in order, safety checks | 5 min |
Last-Minute Prep Tasks
- Remove or tape over dew-wet areas on drop cloths—prevent moisture transfer.
- Double-check ladder feet on level ground; secure stabilizers.
- Keep a damp rag in pocket to catch drips instantly.
- Load roller covers with water (latex) or mineral spirits (alkyd) and spin out—reduces first-stroke lint.
With every surface verified and supplies staged, you can roll into the first coat knowing nothing stands between you and a flawless, professional finish.
Common Prep Mistakes and How to Avoid Them
Even the highest-quality paint cannot compensate for rushed or sloppy preparation. Below are the pitfalls that most often sabotage otherwise good work—and the fixes that keep your finish flawless.
Top 5 Preparation Errors That Ruin Paint Jobs
| Mistake | Consequence | How to Prevent It |
| 1. Insufficient Surface Cleaning | Paint lifts, blisters, or peels within months | Power-wash or hand-scrub; allow 24–48 h dry-time; wipe with tack cloth before priming |
| 2. Skipping Primer Application | Uneven sheen, bleed-through, poor adhesion | Spot-prime repairs at minimum; full-prime bare or chalky substrates with surface-specific primer |
| 3. Inadequate Drying Time | Trapped moisture causes bubbling and mould | Use moisture meter (< 15 %); follow product cure times; factor extra dry days in humid seasons |
| 4. Poor Weather Timing | Lap marks, sagging, colour fade | Paint 10 °C–30 °C (50 °F–86 °F); humidity ≤ 70 %; no rain or frost 24 h pre-/post-coat |
| 5. Incomplete Surface Repairs | Cracks reappear, rot spreads, paint cracks | Replace rotten wood, fill checks, sand flush, recaulk gaps before primer |
Quality Control Checkpoints
- Self-Inspection Techniques
- Run a bright LED at a shallow angle to highlight missed scraper ridges or gloss “holidays.”
- Perform the tape-pull test on random spots to verify adhesion strength.
- Signs of Inadequate Preparation
- Dust accumulates on finger swipe after final wipe-down.
- Primer flashes (glossy patches) or absorbs unevenly.
- Caulk beads show shrink gaps or pinholes after cure.
- When to Restart Prep Work
- Any adhesion failure > 2 cm (¾ in) wide.
- Moisture reading > 15 % after scheduled dry time.
- Visible mildew return or persistent chalk after wash.
Restarting early beats repainting an entire wall.
Time and Cost Estimation Guide
Planning hours and dollars with realistic buffers keeps the project on schedule and on budget.
Realistic Timeline for Each Prep Step
| Prep Stage | Average Rate* | Typical Hours per 1,000 sq ft | Extending Factors |
| Power-washing | 150 sq ft / hr | ~7 hr (+drying) | Tall walls, heavy mildew |
| Scraping & Sanding | 60 sq ft / hr | ~17 hr | Multi-layer paint, intricate trim |
| Repairs & Caulking | 90 lf / hr | 6–8 hr | Wood rot, hard-to-reach joints |
| Priming | 300 sq ft / gal | 4–5 hr (spray + back-roll) | High porosity, full colour-change |
*Based on a two-person crew; solo work roughly doubles hours.
Workflow Optimisation Tips
- Work clockwise around the house to avoid missed areas.
- Alternate tasks (one scrapes while the other sands) to minimise idle time.
- Stage tools and materials for each elevation before moving ladders.
Budget Planning for Materials and Tools
| Project Size (Exterior Wall Area) | Primer† | Paint† | Consumables & PPE | Tool Rentals | Total Est. Cost* |
| ≤ 1,000 sq ft (bungalow) | CA $150 | CA $240 | CA $80 | CA $50 | ≈ CA $520 |
| 1,500 sq ft (1½-storey) | CA $210 | CA $360 | CA $100 | CA $80 | ≈ CA $750 |
| 2,000 sq ft (2-storey) | CA $280 | CA $480 | CA $120 | CA $100 | ≈ CA $980 |
†Assumes mid-tier acrylic products at CA $35 / gal; two finish coats.
*Excludes labour.
Where to Invest vs Save
- Invest: High-build bonding primer, flexible quality caulk, carbide scraper blades.
- Save: Buy roller covers and brushes in contractor packs; rent instead of buying power washers or sprayers for one-off jobs.
Hidden Costs to Anticipate
- Extra blades, sanding discs, drop-cloth replacements.
- Unexpected wood or trim replacement.
- Additional primer if extreme colour shift or porous masonry.
By planning for common mistakes, building in quality checkpoints, and forecasting time and budget accurately, you’ll arrive at finish-coat day with confidence—and without last-minute surprises.
Maintenance Schedule for Long-Term Results
Paint is an investment that pays dividends only if you maintain it. A simple, yearly routine keeps colours fresh, prevents expensive repairs, and can double the life of an exterior coating system.
Annual Inspection and Touch-Up Guidelines
| Task | When | What to Look For | Action |
| Visual Walk-Around | Early spring | Peeling, blistering, hairline cracks | Spot-scrape, sand, and touch-up with matching paint |
| Moisture Check | After heavy rains | Soft wood, mildew stains, swollen boards | Clean mildew; caulk or replace affected trim |
| Caulk & Seal Review | Mid-summer heat | Gaps, split beads, hard/brittle caulk | Cut out failed sections; re-caulk with paintable sealant |
| Hardware & Flashing | Fall | Rust stains, loose screws, failed flashings | Clean rust; prime/paint; re-secure or replace flashing |
| Gutter & Downspout Cleaning | Spring & Fall | Debris buildup causing overflow | Clear gutters; ensure water doesn’t back-wash siding |
Preventive Tips
- Keep shrubs trimmed 15-20 cm (6-8 in) away from siding for airflow.
- Rinse dirt and pollen off painted surfaces with a garden hose yearly.
- Record colour codes and leftover paint amounts for quick touch-ups.
When to Repeat Full Preparation Process
| Indicator | Meaning | Recommended Action |
| > 25 % Paint Failure | Peeling/ blistering on large areas | Complete scrape, sand, prime, repaint |
| Widespread Chalk (powder rubs off on hand) | Binder breakdown | Wash, power-sand, full prime, repaint |
| Deep Substrate Cracks / Rot | Structural deterioration | Replace material, full prep & paint |
| Colour Fading to Primer | UV degradation | Full prime if substrate exposed; repaint |
Prep Shortcuts for Maintenance Painting
- Sound paint: Light scuff-sand (150–180 grit) + spot prime repairs.
- Minor hairline cracks: Elastomeric patch + touch-up coat on affected board only.
- Glossy but intact surface: Deglossing liquid + adhesion primer instead of heavy sanding.
Long-Term Planning
- Build a 6- to 8-year repaint cycle into your home-maintenance budget for most climates.
- Schedule major prep during lower-humidity seasons to maximize coating longevity.
Frequently Asked Questions
- How do I know if my house has lead paint, and what special precautions should I take?
Homes built before 1978 are at risk. Use an EPA- or Health Canada–approved lead test kit on suspect areas. If positive, employ wet-scraping or chemical-strip methods, contain chips in poly sheeting, and vacuum with a HEPA-rated unit. Consider hiring a certified lead-safe contractor for areas larger than 6 ft² (0.56 m²). - Can I paint in partial shade or do I need to wait for full sun/shade throughout the day?
Partial shade is ideal—direct sun can cause lap marks and rapid dry-down, while full shade may lengthen drying. Follow the sun around the house, painting the side that is in shade but will remain above 10 °C (50 °F) for the curing window. - What should I do if it rains during my prep work or between prep and painting?
Pause work, let surfaces dry completely (24–48 h for wood). Re-check moisture levels (< 15 %) and wash off any new dirt or pollen. Re-prime any areas where primer was exposed to heavy rain. - How can I tell if my primer is compatible with both the old paint and new topcoat?
Match primer chemistry to both substrates: acrylic primers adhere to most existing latex or oil paints and accept any water-based topcoat. For oil topcoats, use an alkyd or multi-surface bonding primer. Always perform a 24-hour adhesion test on a small area: scratch lightly with a coin; no peeling indicates compatibility. - Should I remove all old caulk before repainting, or can I paint over existing caulk in good condition?
If the bead is still flexible, fully adhered, and crack-free, scuff it lightly and paint it. Remove and replace any caulk that is brittle, separated, or has visible gaps—partial replacement can cause uneven expansion and premature failure.