Why Post-Painting Cleanup Matters
Cleaning up after a painting project may seem like the last step, but it’s one of the most crucial tasks for ensuring your hard work looks its best and lasts for years. A proper post-painting cleanup protects your new paint job, prevents stains and residue, and keeps your tools in good shape for future use. Let’s explore why these aspects of cleanup are so important.
Protecting Your Newly Painted Surfaces
Freshly painted surfaces are more vulnerable to damage than they appear. Dirt, dust, or even stray bristles from your brushes can easily stick to the wet paint, leaving imperfections that may not be noticeable until the paint fully dries. Additionally, if you fail to remove painter’s tape properly or allow splatters to dry, you risk damaging the clean lines and smooth finish you’ve worked so hard to achieve. Cleaning up carefully helps preserve the integrity of the paint job and ensures it dries as intended.
Preventing Long-Term Stains and Residue
Leftover paint splatters, drips, and smudges on floors, windows, or furniture can be more challenging to remove once they’ve dried. They can also lead to permanent stains if not addressed promptly. Similarly, improperly cleaned brushes or rollers can hold onto paint that can transfer onto unintended surfaces during storage. Taking the time to clean thoroughly after painting helps you avoid these unsightly stains and ensures your space looks neat and polished when the project is complete.
Extending the Life of Your Painting Tools
Good quality brushes, rollers, and other painting tools are an investment, and with proper care, they can last for multiple projects. Failing to clean your tools thoroughly after use can result in dried paint build-up, which not only reduces their effectiveness but may also render them unusable for future projects. By cleaning your tools properly, you prevent them from hardening and ensure they remain in top condition for the next painting job, saving you time and money in the long run.
Essential Materials for a Successful Cleanup
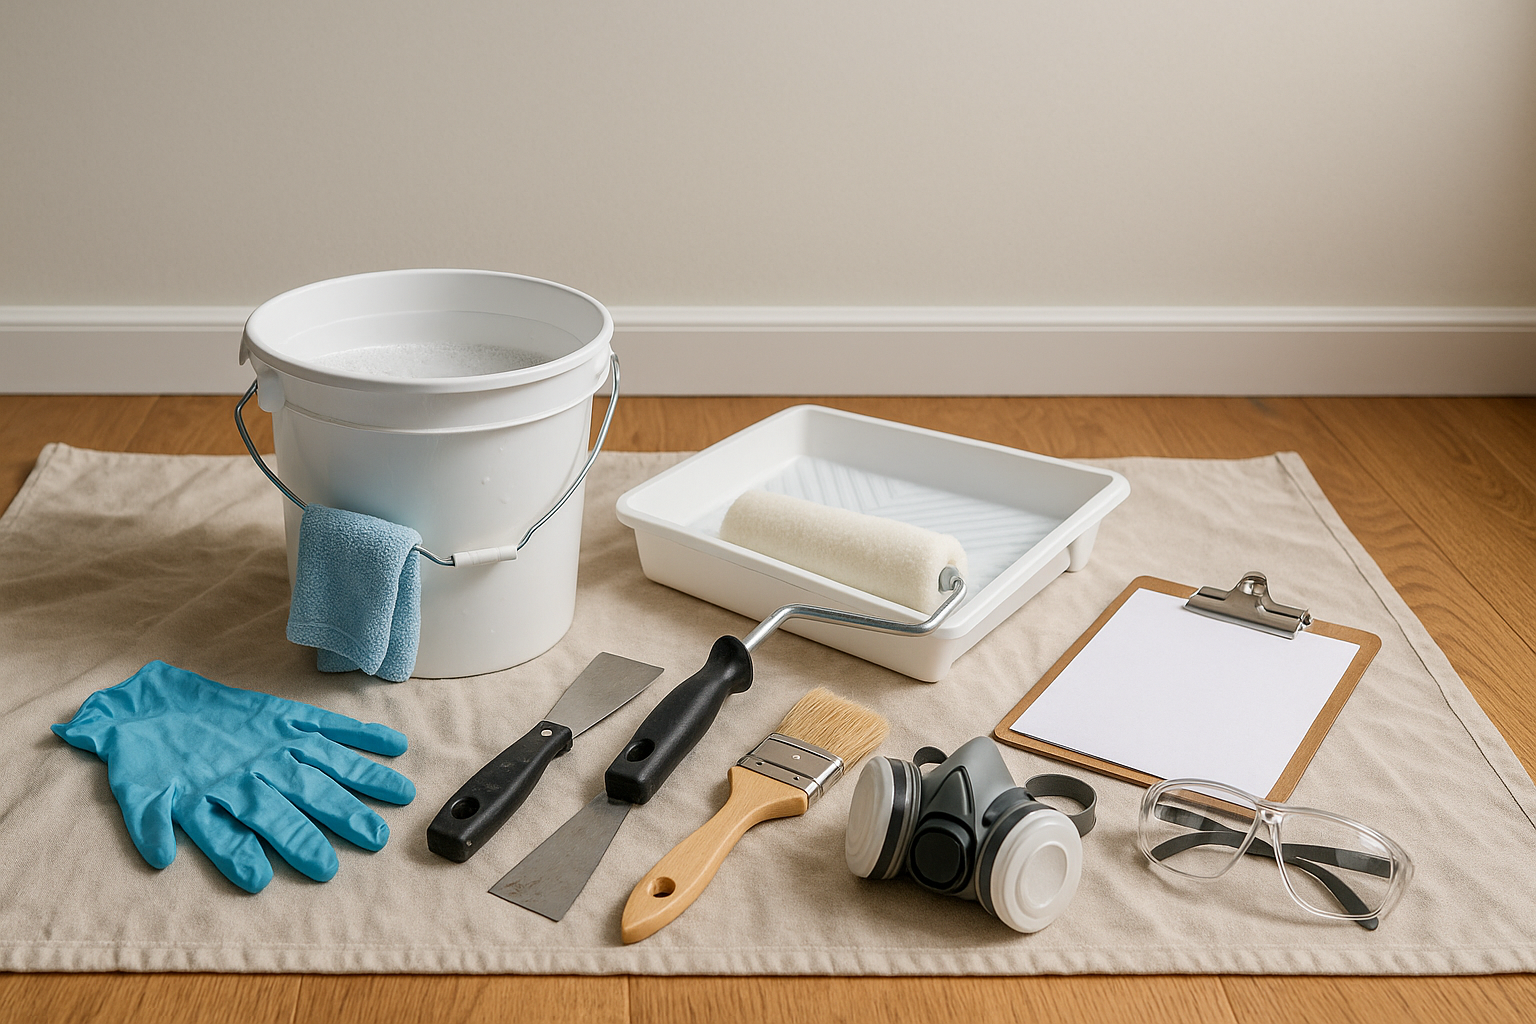
Having the right materials on hand makes post-painting cleanup more efficient and ensures you avoid damaging your freshly painted surfaces or tools. This section will outline the essential cleaning supplies and personal protective equipment (PPE) you’ll need to get the job done properly.
Post-Painting Cleaning Supplies Checklist
To ensure a smooth and effective cleanup process, gather the following materials before you begin. Having everything ready will save time and prevent unnecessary accidents.
| Item | Purpose |
| Microfiber cloths or rags | Wiping down surfaces and cleaning paint splatters |
| Warm water and mild detergent | Cleaning brushes, rollers, and trays |
| Paint thinner or solvent | Removing oil-based paints from tools |
| Bucket or basin | Rinsing tools during cleanup |
| Scraper or putty knife | Removing dried paint splatters from hard surfaces |
| Drop cloths or plastic sheeting | Protecting floors and furniture during cleanup |
| Vacuum with brush attachment | Cleaning dust or debris from the work area |
These tools will help you clean up efficiently, ensuring that all surfaces, tools, and workspaces are free of paint residue.
Personal Protective Equipment for Safety
Safety is just as important during cleanup as it is while painting. Here are the key pieces of personal protective equipment you should use to protect yourself from potential hazards:
- Gloves: Protect your hands from harsh chemicals, paint, and solvents used during cleanup. Disposable or reusable gloves made of nitrile or latex are ideal for this task.
- Safety goggles: Prevent splashes of water, paint thinner, or cleaning solvents from getting into your eyes while washing tools or wiping down surfaces.
- Protective clothing: Wear long sleeves and old clothes to protect your skin from contact with cleaning chemicals and any remaining wet paint. Aprons or disposable coveralls can provide added protection.
- Respirator or face mask: If you’re working with strong solvents or cleaning agents, a respirator or face mask is essential to avoid inhaling fumes, especially in poorly ventilated areas.
Having the right protective gear not only keeps you safe during cleanup but also ensures you can focus on the task without worrying about accidents or exposure to harmful substances.
Step-by-Step Post-Painting Cleanup Process
A thorough post-painting cleanup process ensures your newly painted surfaces look pristine and your tools remain in excellent condition. Below is a step-by-step guide to help you tackle this task efficiently.
Step 1: Safely Removing Painter’s Tape
Best Time to Remove Painter’s Tape
The ideal time to remove painter’s tape is when the paint is dry to the touch but not fully cured. This typically occurs between 1-2 hours after painting, depending on the paint type and environmental factors. Removing the tape too early can cause smudging, while removing it too late risks peeling away the dried paint.
Techniques to Prevent Peeling or Damage
To avoid damaging your fresh paint job, pull the painter’s tape off slowly at a 45-degree angle. If the tape is difficult to remove, score along the edge of the tape with a utility knife to break the bond between the paint and the tape.
Step 2: Cleaning Brushes, Rollers, and Trays
How to Properly Clean Paint Brushes
For water-based paints, rinse your brushes under warm water while gently rubbing the bristles to remove paint. Use mild soap to get any remaining paint out. For oil-based paints, soak the brushes in a solvent such as paint thinner, then wash them with soap and water.
Cleaning and Storing Paint Rollers for Reuse
To clean paint rollers, scrape off excess paint using a putty knife or roller scraper. For water-based paints, rinse the roller under warm water, rolling it out between washes to remove paint. For oil-based paints, soak the roller in a paint thinner, then rinse and air-dry before storing.
Best Practices for Maintaining Paint Trays
Clean paint trays by rinsing them out immediately after use. For water-based paints, warm soapy water will do the job. If you’re using oil-based paint, you’ll need a solvent to dissolve the paint. Line your paint trays with a plastic liner in future projects to make cleanup easier.
Step 3: Disposing of Leftover Paint and Hazardous Materials
Proper Disposal Methods for Leftover Paint
Never pour leftover paint down the drain. Water-based paint can often be dried out and disposed of with regular trash, while oil-based paints should be taken to a hazardous waste disposal facility. Check with your local waste management for specific guidelines.
Recycling and Reusing Paint: What You Need to Know
If you have a significant amount of leftover paint, consider donating it to local organizations or recycling it through a paint stewardship program. You can also mix small amounts of leftover paint for touch-ups or smaller projects around the house.
How to Safely Dispose of Solvents and Paint-Covered Rags
Solvents like paint thinner and turpentine are hazardous materials and should be disposed of at a hazardous waste disposal site. Used rags soaked in paint or solvent should be allowed to dry out in a well-ventilated area before being disposed of in a metal container to prevent spontaneous combustion.
Step 4: Cleaning Up Paint Splatters and Drips
Removing Paint from Floors, Carpets, and Tiles
For fresh paint splatters, use a damp cloth or sponge to wipe up the mess. For dried paint, gently scrape it off with a putty knife, then use a cleaning solution to remove any residue. For carpets, use a fabric-safe cleaner and blot the area instead of rubbing it to prevent the paint from spreading.
Cleaning Windows and Mirrors Without Scratching the Surface
For paint splatters on glass surfaces, use a razor blade held at a 45-degree angle to scrape the paint off carefully. Follow up with a window cleaner and a microfiber cloth to remove any streaks or residue without scratching the surface.
Step 5: Restoring Your Work Area
Dusting and Vacuuming to Remove Paint Dust
After painting, there may be dust or debris on floors and surfaces. Use a vacuum with a brush attachment to clean floors and baseboards. Wipe down surfaces with a damp microfiber cloth to remove any remaining dust particles.
Wiping Down Baseboards, Trim, and Windowsills
Baseboards, trim, and windowsills often collect dust during painting. Use a damp cloth or a gentle cleaner to wipe these areas down, making sure to remove any paint residue or dust.
Putting Furniture and Decorations Back in Place
Once the room is clean and the paint is dry, carefully move furniture back to its original position. Be cautious to avoid bumping freshly painted walls. Place decorations and artwork back on walls once the paint is fully cured.
Step 6: Conducting a Final Inspection
Checking for Missed Paint Spots or Imperfections
Before calling the project complete, walk around the room to check for any missed spots, drips, or uneven paint coverage. Use a small brush to touch up these areas as needed.
How to Handle Minor Touch-Ups Quickly and Efficiently
For minor touch-ups, use leftover paint and a fine-tip brush to carefully apply paint to areas that need attention. Be sure to feather out the edges to blend with the existing paint.
Step 7: Ventilating the Room After Painting
The Role of Ventilation in Drying Paint
Ventilation is key to drying paint evenly and reducing fumes in the room. Open windows and doors to allow air circulation. If possible, use fans to direct airflow, helping the paint cure properly and reducing the presence of any lingering odors.
Simple Ventilation Techniques to Speed Up Drying
Use a box fan or ceiling fan to increase airflow in the room. Keep windows and doors open for several hours after painting, or until the smell of paint has completely dissipated. If weather permits, use natural airflow to help the paint dry faster and more evenly.
Long-Term Maintenance After Cleanup
After completing a successful post-painting cleanup, taking care of your tools and workspace is key to ensuring they last for future projects. Here are some practical tips for proper storage and maintenance of your painting tools.
Proper Storage of Painting Tools for Future Projects
Properly storing your painting tools will save you time and money in the long run. Here are a few tips:
- Brushes: Once thoroughly cleaned, dry brushes completely and store them with the bristles facing up or hanging them to prevent misshaping. You can also wrap the bristles in wax paper or plastic to help them retain their shape.
- Rollers: For short-term storage between painting sessions, cover paint rollers with plastic wrap or aluminum foil to keep them from drying out. If you’re done for good, wash and dry them completely before storing them in a clean, dry place.
- Trays and Buckets: Clean trays and buckets immediately after use. Store trays flat to avoid warping and stack them in a dry area. If using plastic liners, dispose of them and replace them as needed for future projects.
By storing your tools properly, they will remain in top condition and ready for your next project.
How to Maintain Brushes, Rollers, and Other Equipment Over Time
Long-term maintenance of your tools involves more than just cleaning after use. Here’s how you can extend the life of your equipment:
- Brushes: After washing, occasionally soak brushes in a solution of fabric softener and water to keep the bristles soft and flexible. Avoid storing brushes in containers where the bristles could become bent or misshapen.
- Rollers: Ensure rollers are completely free of paint before storage. For oil-based paints, ensure that all solvent is rinsed out to avoid hardening. Rollers that develop matted fibers or clumps should be replaced to avoid uneven paint application in the future.
- Other Equipment: Regularly inspect your paint trays, buckets, and scrapers for wear and tear. If any of the tools are cracked or damaged, consider replacing them to avoid messes during future projects.
With regular maintenance, your painting tools will stay in optimal condition, making your next painting project easier.
Tips for Preventing Messes During Your Next Painting Project
The best way to make cleanup easier is to prevent messes from happening in the first place. Here are some simple steps to keep your next painting project clean and stress-free.
How to Use Drop Cloths Effectively
Drop cloths are essential for protecting floors, furniture, and other surfaces from paint splatters. To use them effectively:
- Choose the Right Material: For large areas like floors, use canvas drop cloths, which are absorbent and less slippery. For small areas or furniture, plastic drop cloths can be effective for easy removal and disposal.
- Secure Drop Cloths in Place: Ensure your drop cloths don’t shift while you work. Use painter’s tape to secure the edges, or layer drop cloths to fully cover any surfaces that could be exposed.
- Cover All Surrounding Areas: Don’t just cover the area directly beneath where you’re painting—paint splatters can travel, especially when using a roller. Make sure to cover a wider area than you think you’ll need.
Techniques for Taping Off Edges to Minimize Splatter
Painter’s tape is your best friend when it comes to creating clean edges and preventing splatter. Follow these steps for optimal results:
- Prep the Surface: Make sure the surface is clean and dry before applying tape. Any dust or debris can prevent the tape from sticking properly, leading to leaks.
- Apply Tape Carefully: When taping edges, press the tape down firmly along the length of the area to ensure a tight seal. Use a putty knife or credit card to smooth out air bubbles or gaps along the tape line.
- Remove Tape at the Right Time: Once you’ve finished painting, remove the tape while the paint is still slightly wet. Pull the tape at a 45-degree angle to prevent any of the fresh paint from peeling away.
These strategies for maintaining your tools and preventing messes will ensure you’re always ready for your next painting project, and your workspace will stay as clean and efficient as possible.
Conclusion: The Importance of a Thorough Post-Painting Cleanup
A thorough post-painting cleanup is essential to protecting your hard work, maintaining the quality of your tools, and ensuring a safe environment. By following the step-by-step process outlined above, you’ll avoid common pitfalls like paint stains, tool damage, and environmental hazards. Let’s recap the key steps and long-term benefits of proper cleanup.
Recap of Key Cleanup Steps
- Remove painter’s tape carefully to prevent peeling the fresh paint.
- Clean brushes, rollers, and trays immediately to ensure they can be reused and maintained.
- Dispose of leftover paint and hazardous materials properly, following environmental regulations.
- Wipe down all surfaces to remove splatters, dust, and any residual paint particles.
- Ventilate the room to help the paint dry evenly and reduce fumes.
By being diligent in your cleanup, you’ll extend the lifespan of your tools and ensure your space looks polished and professional.
Long-Term Benefits of Proper Cleanup and Tool Maintenance
Taking the time to clean and store your painting tools properly not only saves you money but also makes future projects much smoother. Clean, well-maintained tools result in a better paint application, and your next cleanup will be quicker since your tools will be in optimal condition. Additionally, following proper disposal methods ensures you’re protecting the environment and staying compliant with local regulations.
Encouragement to Follow Environmental Guidelines for Safe Disposal
Improper disposal of paint, solvents, and other hazardous materials can have serious environmental consequences. Always follow local guidelines when disposing of paint and related supplies. Many communities offer recycling programs for leftover paint and hazardous waste collection sites for safe disposal. By being mindful of these guidelines, you contribute to a cleaner environment and avoid potential fines or penalties.
FAQs
How soon should I remove painter’s tape after painting?
The best time to remove painter’s tape is when the paint is dry to the touch but not fully cured. This is typically between 1-2 hours after painting. Remove the tape slowly at a 45-degree angle to prevent peeling or damaging the fresh paint.
Can I store leftover paint in plastic containers?
Yes, you can store leftover paint in plastic containers, but make sure the container is airtight to prevent the paint from drying out. Metal containers are preferred because they create a better seal, but if using plastic, choose a durable, air-tight option and store it in a cool, dry place.
How do I remove paint from fabric surfaces?
To remove paint from fabric, act quickly before it dries. Blot the paint with a damp cloth and apply a mixture of water and mild detergent. For dried paint, you may need to use a fabric-safe cleaner or rubbing alcohol. Always test any cleaning solution on an inconspicuous area first.
What’s the best way to clean dried paint off my tools?
For dried paint on brushes and rollers, soak them in warm soapy water or paint thinner, depending on the type of paint. Use a brush comb or wire brush to gently remove dried paint from the bristles or roller fibers. Be patient, as it may take time to soften the dried paint.
Do I need to ventilate the room if I use low-VOC paint?
Yes, even when using low-VOC paint, ventilation is important. While low-VOC paints emit fewer harmful fumes, they can still release some odor and moisture as they dry. Proper ventilation ensures faster drying times and reduces any lingering smells or airborne particles.