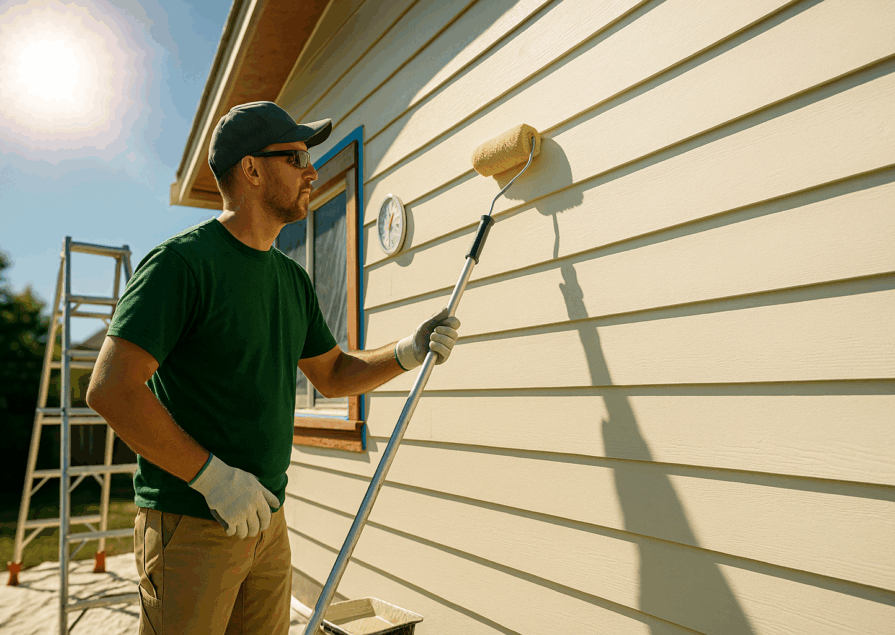
Proper surface preparation is the secret sauce to achieving a flawless paint job. It’s the foundation that ensures your paint adheres well and lasts longer. Skipping this crucial step can lead to peeling paint, uneven finishes, and a lot of frustration. Whether you’re a seasoned pro or a DIY enthusiast, mastering the techniques for surface prep can make all the difference in the final outcome.
Surface prep isn’t just about slapping on some primer. It’s about inspecting, cleaning, repairing, and priming surfaces to create the perfect canvas for your paint. From drywall to wood to metal, each type of surface has its unique preparation needs. In this guide, we’ll dive into the nitty-gritty of surface prep, exploring the tools, techniques, and common mistakes to avoid.
Whether you’re prepping walls for a fresh coat of paint, getting your deck ready for a stain, or priming metal for a protective coating, we’ve got you covered. Let’s get started on the journey to professional-level surface preparation!
Surface Preparation Overview
Definition and Importance
Surface preparation is all about getting your surfaces ready to receive paint, stain, or other finishes. It involves cleaning, repairing, and priming the surface to ensure the finish adheres properly and lasts as long as possible. Think of it like laying the groundwork for a masterpiece—without a solid foundation, even the best paint job can fail.
Why is surface prep so important? Well, even the highest-quality paint can’t perform its best on a poorly prepared surface. Dust, dirt, grease, and old paint can prevent new coatings from sticking properly. Imperfections like cracks, holes, and rough spots can show through the paint, ruining the final look.
Key Takeaway: Surface preparation is the key to a smooth, durable, and professional-looking finish. Skipping this step can lead to peeling paint, uneven finishes, and a lot of wasted effort.
Impact on Final Results
The quality of your surface preparation directly impacts the final results of your paint job. Properly prepped surfaces not only look better but also last longer. Here’s how good surface prep makes a difference:
- Adhesion: Clean, smooth surfaces ensure that the paint sticks properly, reducing the risk of peeling and flaking.
- Durability: Well-prepped surfaces are more resistant to wear and tear, ensuring your paint job stands the test of time.
- Aesthetics: Smooth, even surfaces create a professional finish, free from blemishes and imperfections.
By understanding the importance of surface preparation, you can approach your painting projects with the confidence that you’re setting the stage for success. Remember, a little extra effort in the prep stage can save you a lot of hassle down the road.
Types of Surfaces and Their Preparation Techniques
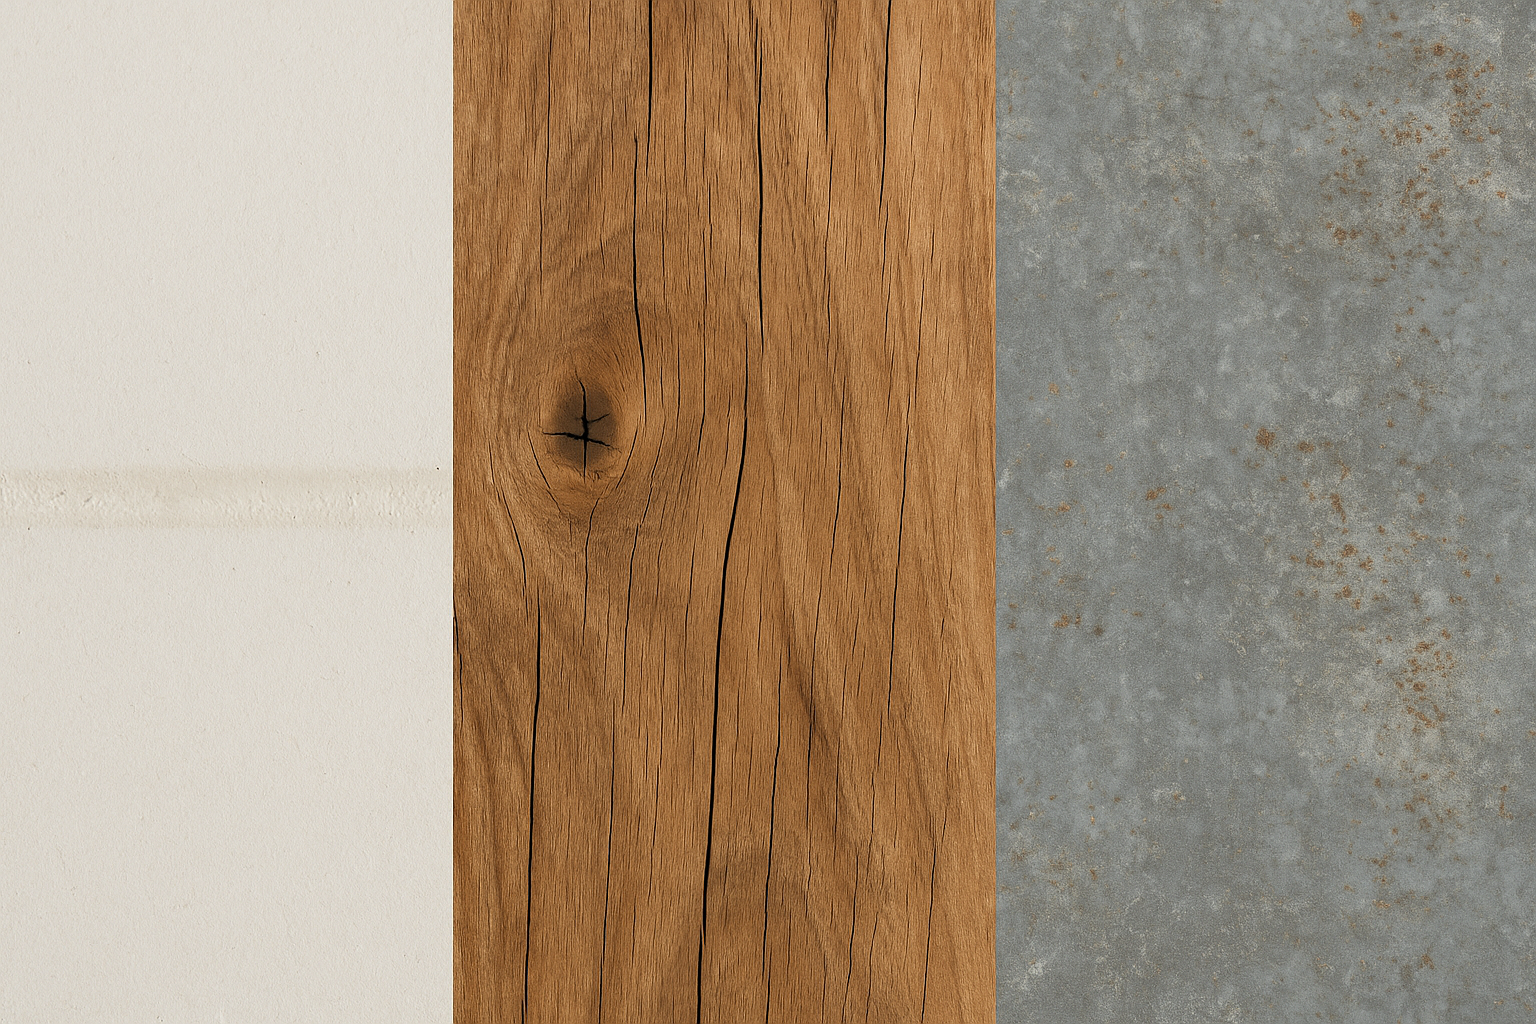
Preparing Drywall
Drywall is one of the most common surfaces you’ll encounter, and getting it ready for paint is crucial. Here’s a step-by-step guide to prepping drywall:
Tools Needed:
- Sandpaper or sanding sponge
- Drywall compound
- Putty knife
- Primer
- Clean cloth
Steps for Effective Prep:
- Inspect the Surface: Look for any imperfections like nail holes, cracks, or dents. Mark these areas for repair.
- Patch and Repair: Use a putty knife to apply drywall compound to any holes or cracks. Smooth it out and let it dry completely.
- Sand the Surface: Once the compound is dry, sand the area until it’s smooth and flush with the rest of the wall. Wipe away any dust with a clean cloth.
- Clean the Surface: Ensure the surface is free from dust, dirt, and grease. A clean surface helps the primer and paint adhere better.
- Prime the Surface: Apply a coat of primer to seal the drywall and create a uniform surface for painting.
Pro Tip: Always use a high-quality primer to ensure the best adhesion and finish. Primer not only helps the paint stick better but also hides any imperfections and provides a consistent base colour.
Preparing Wood Surfaces
Wood surfaces require a bit more attention due to their natural imperfections and grain. Here’s how to get wood surfaces ready for painting or staining:
Tools Needed:
- Sandpaper (various grits)
- Wood filler
- Putty knife
- Primer or wood conditioner
- Clean cloth
Steps for Effective Prep:
- Inspect the Surface: Check for any cracks, holes, or rough spots. Wood can have a lot of natural imperfections that need addressing.
- Fill and Repair: Use wood filler to fill any cracks or holes. Smooth it out with a putty knife and let it dry.
- Sand the Surface: Start with a coarse grit sandpaper and work your way to a finer grit for a smooth finish. Always sand in the direction of the grain.
- Clean the Surface: Wipe away any dust and debris with a clean cloth. Ensure the wood is dry and free from any oils or contaminants.
- Prime or Condition: Apply a primer for painting or a wood conditioner if you’re staining. This helps the finish adhere better and provides a more uniform appearance.
Preparing Metal Surfaces
Metal surfaces can be tricky due to their tendency to rust and their smooth texture. Here’s how to prepare metal surfaces effectively:
Tools Needed:
- Wire brush or grinder
- Sandpaper
- Rust remover
- Primer (specifically for metal)
- Clean cloth
Steps for Effective Prep:
- Inspect the Surface: Look for rust, peeling paint, or other imperfections. Metal surfaces can corrode over time, so pay close attention.
- Remove Rust and Old Paint: Use a wire brush or grinder to remove any rust or loose paint. Ensure the surface is as smooth as possible.
- Clean the Surface: Use a clean cloth to remove any dust and debris. For stubborn dirt or grease, use a suitable cleaner.
- Prime the Surface: Apply a metal primer to protect against rust and ensure good paint adhesion. Let the primer dry completely before painting.
Pro Tip: Use a rust-inhibiting primer to extend the life of your paint job on metal surfaces. This helps prevent future rust and keeps your surfaces looking great.
By following these detailed steps for different surfaces, you’ll ensure that your paint job not only looks fantastic but also lasts longer. Each type of surface has its own quirks, so tailor your approach accordingly for the best results.
Essential Tools for Surface Preparation
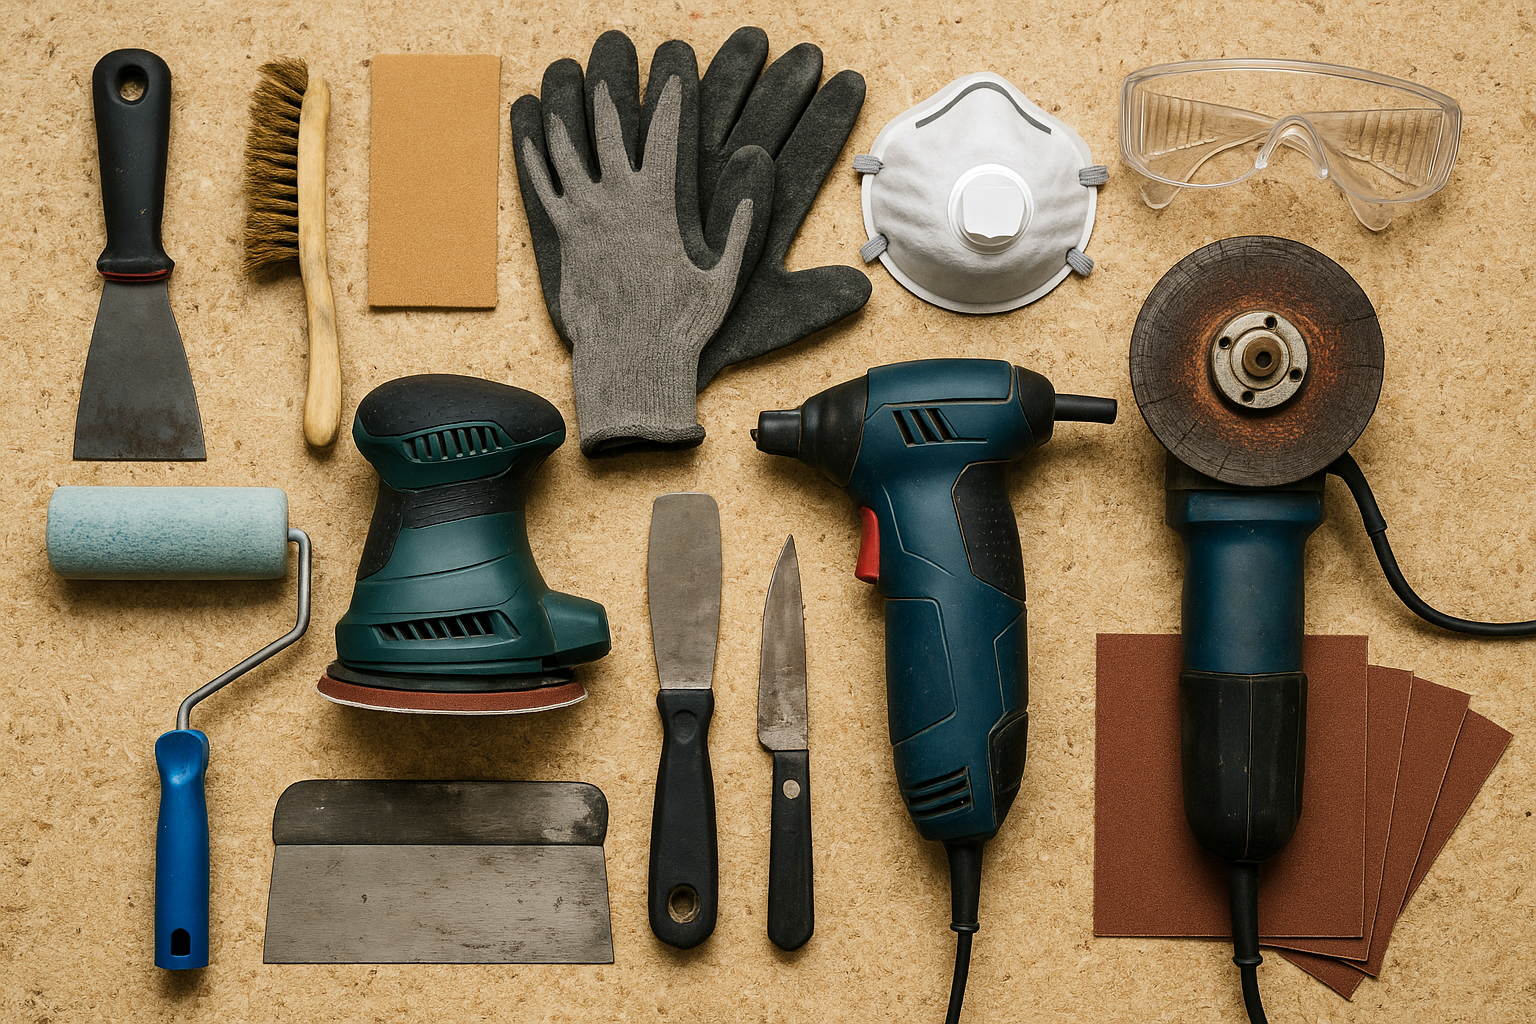
Hand Tools
Hand tools are the backbone of surface preparation. Here’s a look at some essential hand tools you’ll need:
- Scrapers: Ideal for removing old paint, wallpaper, or debris from surfaces.
- Sandpaper: Comes in various grits, essential for smoothing surfaces and removing imperfections.
- Wire Brushes: Great for scrubbing away rust, dirt, and loose paint, especially on metal surfaces.
Power Tools
Power tools can make surface preparation faster and more efficient. Here are a few you might consider:
- Sanders: From orbital to belt sanders, these tools make quick work of smoothing surfaces.
- Grinders: Perfect for metal surfaces, grinders can remove rust and old paint effectively.
Safety Gear
Safety should always be a top priority. Here’s what you’ll need:
- Masks: Protect your lungs from dust and harmful particles.
- Gloves: Keep your hands safe from chemicals and rough surfaces.
- Goggles: Protect your eyes from debris and splashes.
By using the right tools and safety gear, you’ll not only make the prep process easier but also ensure your own safety and the quality of your work.
Professional Techniques for Surface Prep
Step-by-Step Guide to Surface Preparation
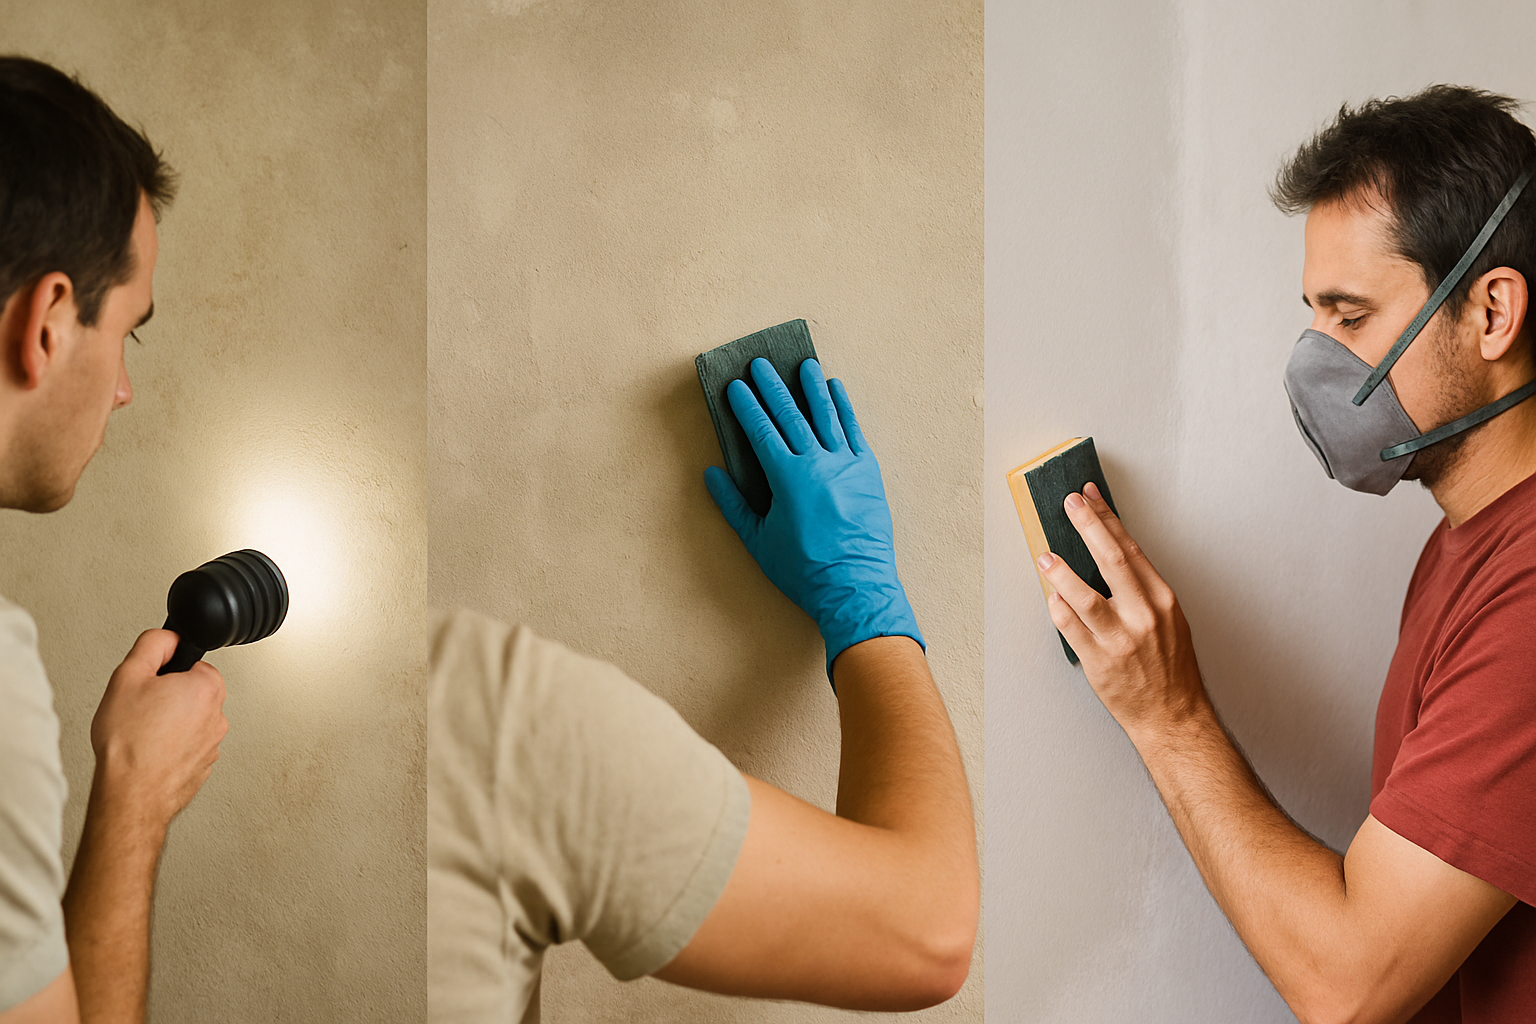
Inspecting the Surface
Before you start with cleaning, repairing, or priming, inspecting the surface is crucial. This step helps you identify any issues that need addressing to ensure a smooth and durable finish.
Key Steps:
- Look for Damage: Carefully examine the surface for cracks, holes, dents, or other imperfections. Pay close attention to corners and edges, as these areas are prone to damage.
- Assess Surface Condition: Check if the surface is smooth or has any rough spots that need sanding. Ensure there are no old paint flakes, dust, or debris.
- Check for Contaminants: Identify any areas with grease, dirt, or mildew that need to be cleaned before painting.
Pro Tip: Use a flashlight at a shallow angle to highlight imperfections on the surface. This technique helps you spot problems that might not be visible under normal lighting.
By thoroughly inspecting the surface, you can address all potential problems before they affect the final paint job.
Key Takeaway: Always inspect the surface before starting any preparation work to ensure a flawless finish.
Cleaning the Surface
Cleaning is a vital step in surface preparation. A clean surface ensures better adhesion of primers and paints, leading to a longer-lasting finish.
Steps for Effective Cleaning:
- Dust and Debris Removal: Use a vacuum or a dry cloth to remove loose dust and debris from the surface.
- Washing: For greasy or heavily soiled areas, wash the surface with a mild detergent solution. Use a sponge or cloth to scrub away the dirt.
- Rinse Thoroughly: After washing, rinse the surface with clean water to remove any soap residue.
- Drying: Allow the surface to dry completely before moving on to the next step. Moisture can interfere with primer and paint adhesion.
Pro Tip: For stubborn stains or mildew, use a solution of water and bleach (1 part bleach to 3 parts water). Apply the solution, let it sit for 10-15 minutes, then scrub and rinse thoroughly.
By ensuring your surface is clean, you set the stage for a successful painting project.
Key Takeaway: Clean surfaces lead to better adhesion and a longer-lasting finish.
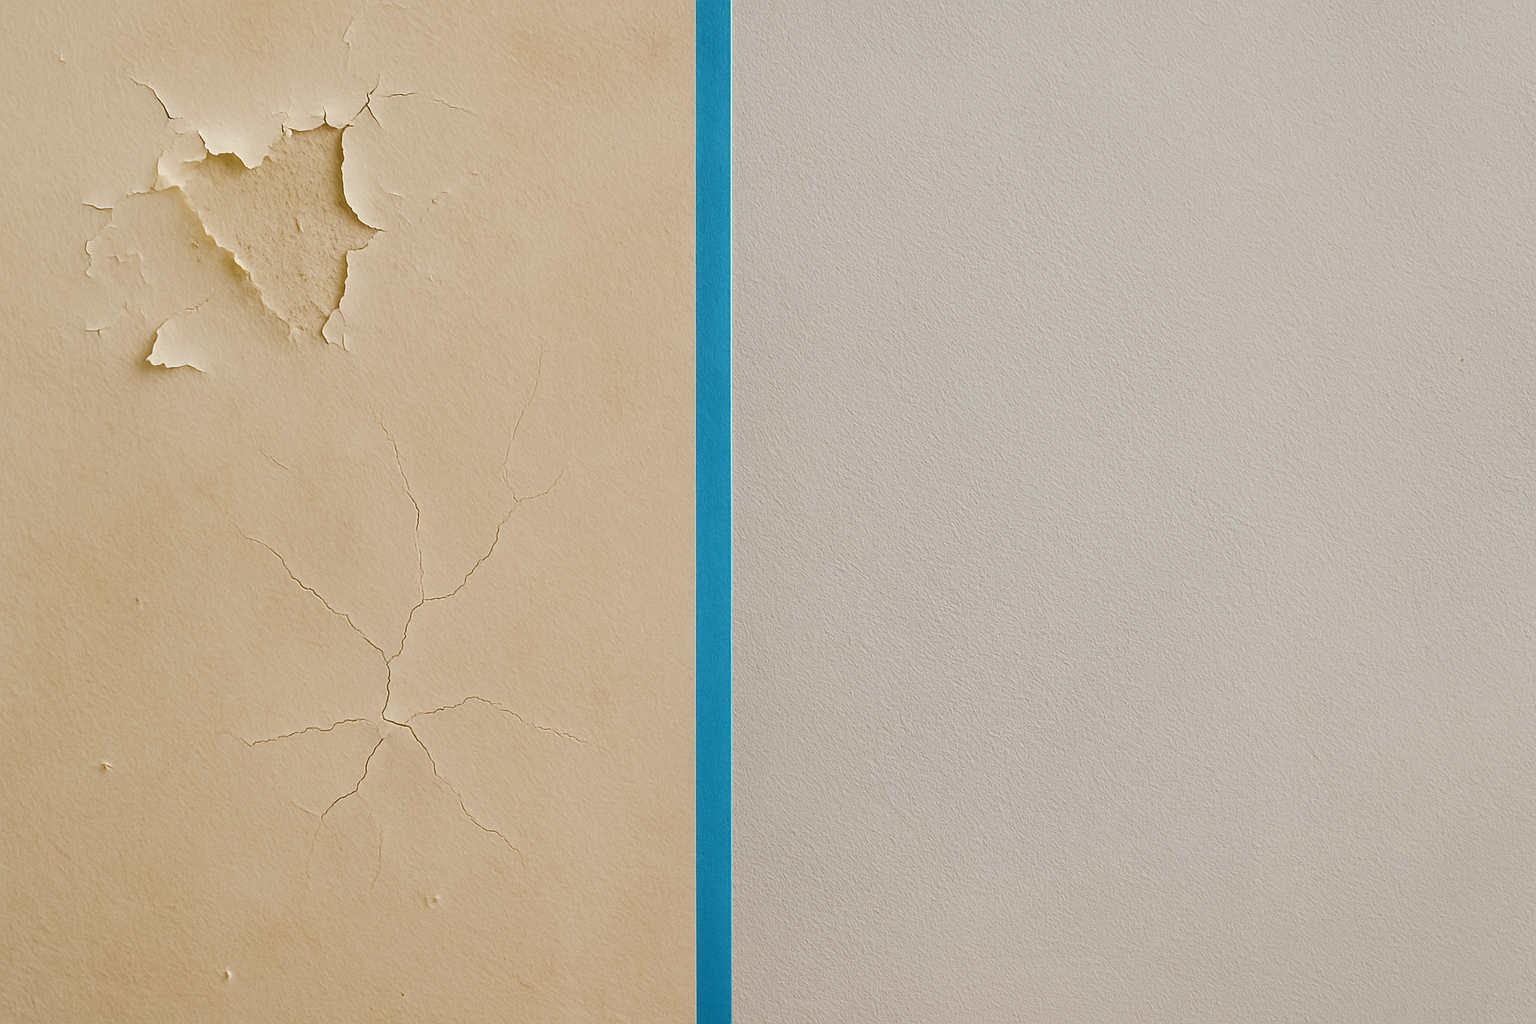
Repairing and Patching
Repairing and patching are essential to achieve a smooth and even surface, which is critical for a professional-looking paint job.
Steps for Effective Repair and Patching:
- Fill Cracks and Holes: Use a putty knife to apply filler or spackle to any cracks or holes in the surface. Smooth out the filler and let it dry completely.
- Sand the Repairs: Once the filler is dry, sand the patched areas until they are smooth and level with the surrounding surface.
- Reinspect the Surface: Check the repaired areas to ensure they are smooth and seamless. Apply additional filler if necessary and repeat the sanding process.
- Clean Again: Remove any dust from sanding with a vacuum or a damp cloth.
Pro Tip: Use a high-quality filler that matches the surface type you’re working on. For example, use wood filler for wooden surfaces and drywall compound for drywall.
Key Takeaway: Properly repairing and patching the surface ensures a smooth and even base for your paint.
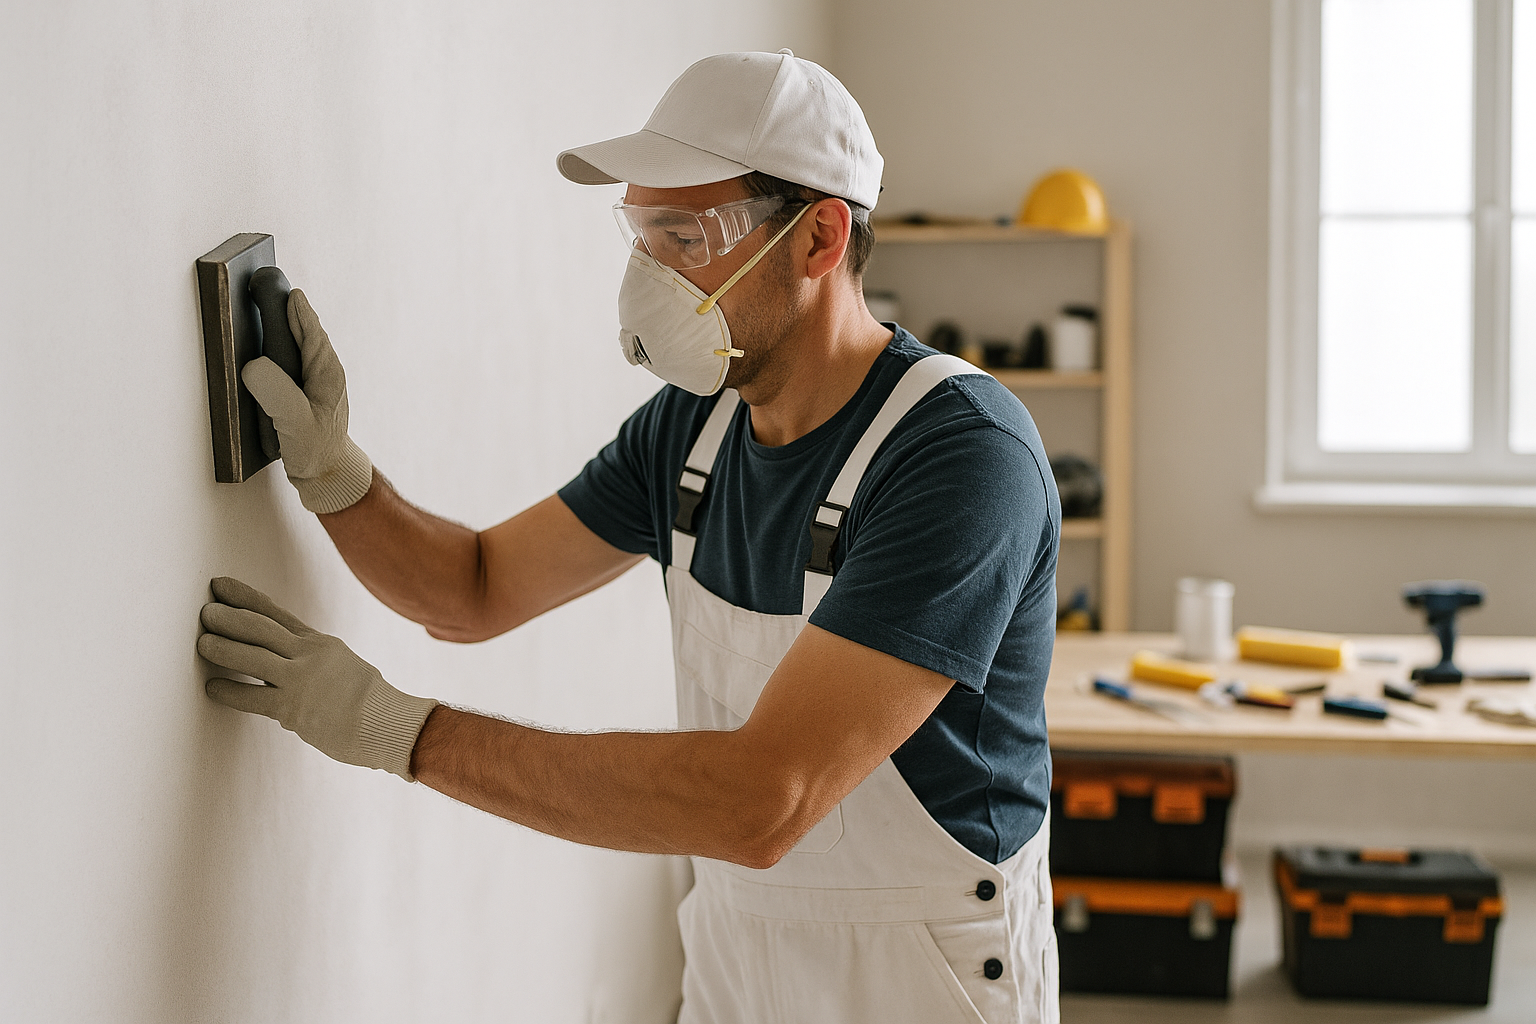
Sanding and Smoothing
Sanding is a crucial step that helps create a smooth surface, ensuring that the paint adheres properly and looks flawless.
Steps for Effective Sanding:
- Choose the Right Grit: Start with a coarse grit sandpaper (80-100) to remove rough spots, then move to a finer grit (150-220) for a smooth finish.
- Sand in the Direction of the Grain: When sanding wood, always sand in the direction of the grain to avoid scratches.
- Use a Sanding Block or Power Sander: For large areas, a sanding block or a power sander can make the job faster and more efficient.
- Remove Dust: After sanding, thoroughly remove dust using a vacuum or a damp cloth. Dust can interfere with paint adhesion.
Pro Tip: For intricate areas or tight spots, use a sanding sponge or small sandpaper pieces to reach all the nooks and crannies.
Key Takeaway: Proper sanding creates a smooth surface that ensures better paint adhesion and a flawless finish.
By following these steps for inspecting, cleaning, repairing, and sanding, you’ll set the foundation for a professional-quality paint job. Proper surface preparation is the key to achieving a smooth, durable, and visually appealing finish.
Professional Techniques for Surface Prep
Priming the Surface
Priming is a critical step that often gets overlooked. A good primer can make all the difference in achieving a long-lasting and beautiful paint job. It seals the surface, provides a uniform base, and enhances paint adhesion.
Steps for Effective Priming:
- Choose the Right Primer: Select a primer that is suitable for the surface you’re working on. For example, use a drywall primer for drywall, a wood primer for wood, and a metal primer for metal surfaces.
- Apply the Primer: Use a high-quality brush or roller to apply a thin, even coat of primer. For large areas, a paint sprayer can save time and provide a smooth finish.
- Let It Dry: Allow the primer to dry completely according to the manufacturer’s instructions. This usually takes a few hours but can vary based on the product and environmental conditions.
- Inspect the Surface: After the primer is dry, inspect the surface for any remaining imperfections. Lightly sand the surface if necessary and apply a second coat of primer if needed.
Pro Tip: Use a tinted primer that matches the colour of your final paint. This can help achieve better coverage with fewer coats of paint.
Key Takeaway: Priming prepares the surface, enhances paint adhesion, and ensures a uniform finish.
Common Mistakes in Surface Preparation
Even the most experienced professionals can make mistakes during surface preparation. Knowing these common pitfalls can help you avoid them and ensure a flawless finish.
Common Mistakes:
- Skipping Steps: Rushing through the prep process or skipping steps like cleaning or priming can lead to poor paint adhesion and a subpar finish.
- Using Incorrect Tools: Using the wrong tools for the job can damage the surface and result in an uneven finish.
- Ignoring Safety Measures: Failing to use proper safety gear like masks, gloves, and goggles can expose you to harmful chemicals and dust.
- Not Allowing Enough Drying Time: Impatience can lead to applying paint on a damp or improperly primed surface, causing peeling and flaking.
- Inconsistent Sanding: Uneven sanding can create rough spots that show through the paint.
Pro Tip: Always follow the manufacturer’s instructions for drying times and application techniques. Patience and attention to detail are crucial for a professional finish.
Key Takeaway: Avoiding common mistakes ensures a smooth, durable, and professional-looking paint job.
Advanced Techniques for Professionals
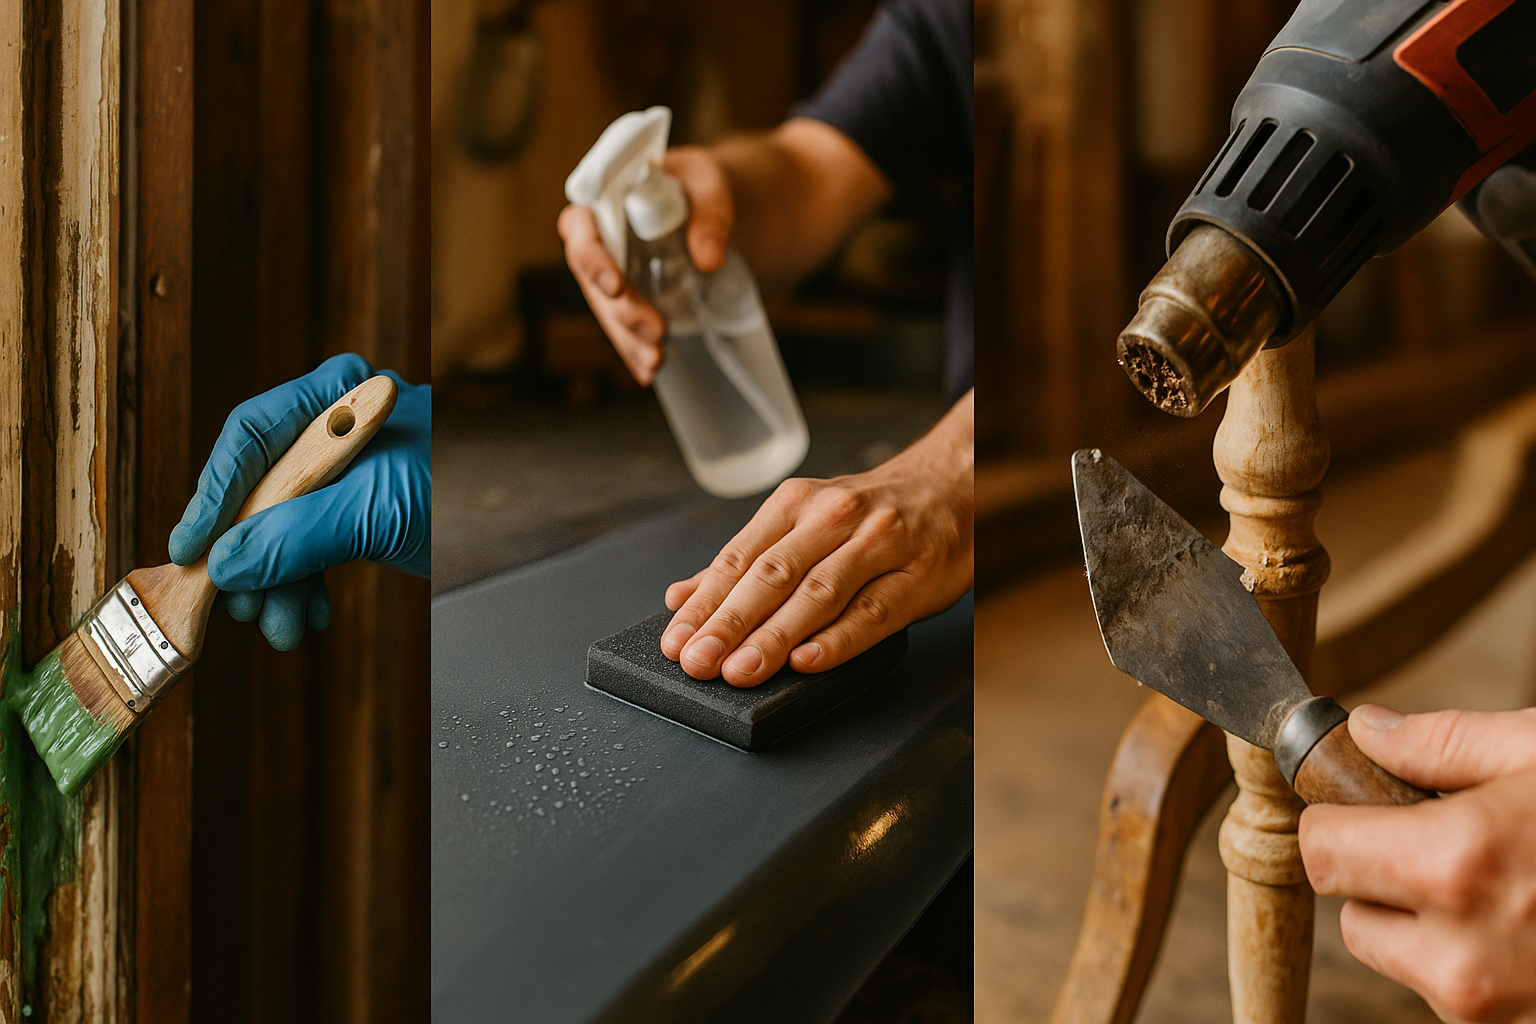
For those looking to take their surface preparation to the next level, advanced techniques can provide even better results. These methods are often used by professionals for high-end projects.
Advanced Techniques:
- Using Chemical Strippers: For removing old paint, especially on intricate surfaces, chemical strippers can be very effective. Always follow safety guidelines when using these products.
- Wet Sanding: This technique involves sanding the surface with water to reduce dust and achieve a smoother finish. It’s especially useful for final sanding on wood and automotive surfaces.
- Heat Guns and Infrared Devices: These tools can quickly remove old paint and varnish. They are particularly useful for large areas or tough coatings.
- Vacuum Sanding: Using a vacuum sander reduces dust and provides a cleaner working environment. This is ideal for indoor projects.
Pro Tip: Advanced techniques require proper training and safety measures. Make sure you understand how to use these tools and products before starting.
Key Takeaway: Advanced surface prep techniques can enhance the quality and efficiency of your projects.
Maintaining Tools for Longevity
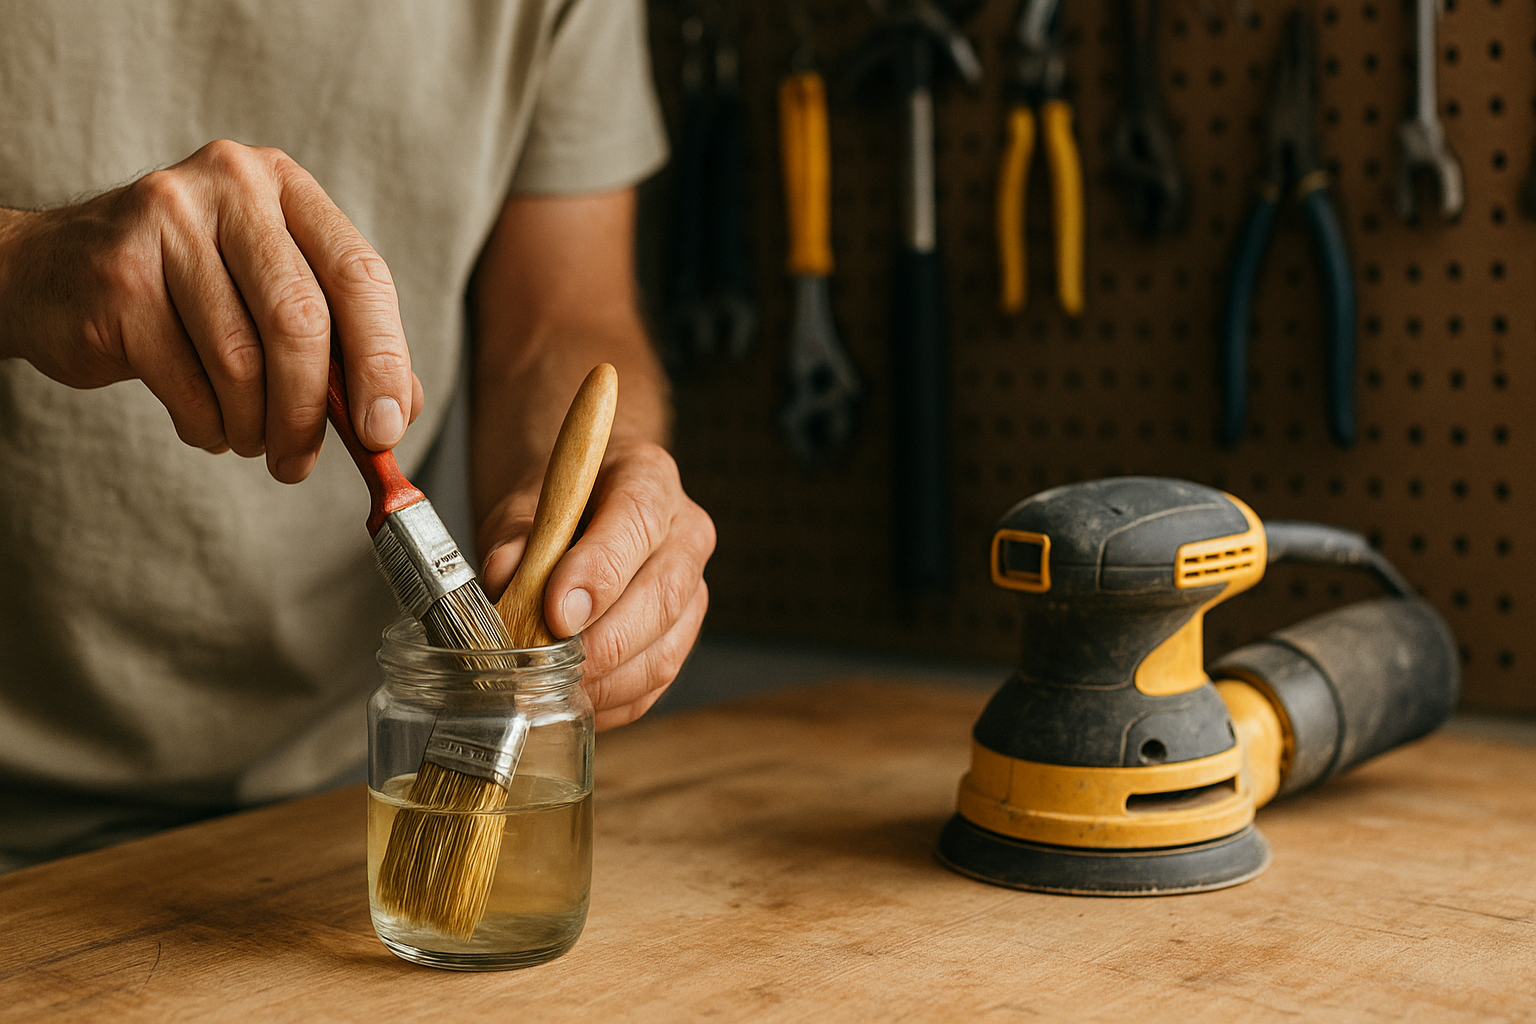
Taking care of your tools is just as important as using them correctly. Well-maintained tools last longer and perform better, saving you time and money in the long run.
Steps for Tool Maintenance:
- Cleaning: Clean your tools immediately after use. For brushes and rollers, use the appropriate solvent (water for latex paints, mineral spirits for oil-based paints).
- Drying: Allow tools to dry completely before storing them to prevent rust and damage.
- Storage: Store tools in a dry, cool place. Use protective covers for sharp tools and keep power tools in their cases.
- Regular Maintenance: Inspect your tools regularly for wear and tear. Replace worn-out parts like sandpaper on a sander or blades on a scraper.
Pro Tip: Label your tools with the date of purchase and any maintenance done. This helps keep track of their condition and ensures they are always in top shape.
Key Takeaway: Regular maintenance of your tools ensures their longevity and optimal performance.
Conclusion
Surface preparation is the cornerstone of any successful painting project. By following the steps outlined in this guide, you can achieve a professional finish that not only looks great but also lasts for years. Remember, the time and effort you invest in surface prep will pay off in the quality of your final result. Happy painting!
FAQs
- What is the most important step in surface preparation?
- Cleaning the surface is crucial as it ensures good adhesion and a smooth finish.
- Can I skip priming if the surface looks good?
- No, priming is essential for sealing the surface and ensuring paint adhesion.
- How do I choose the right primer for my surface?
- Select a primer based on the surface type (drywall, wood, metal) and the type of paint you plan to use.
- What should I do if I make a mistake during prep?
- Identify the issue, fix it promptly, and ensure the surface is properly prepared before continuing.
- How can I ensure my tools last longer?
- Regular cleaning, proper storage, and routine maintenance are key to extending the life of your tools.