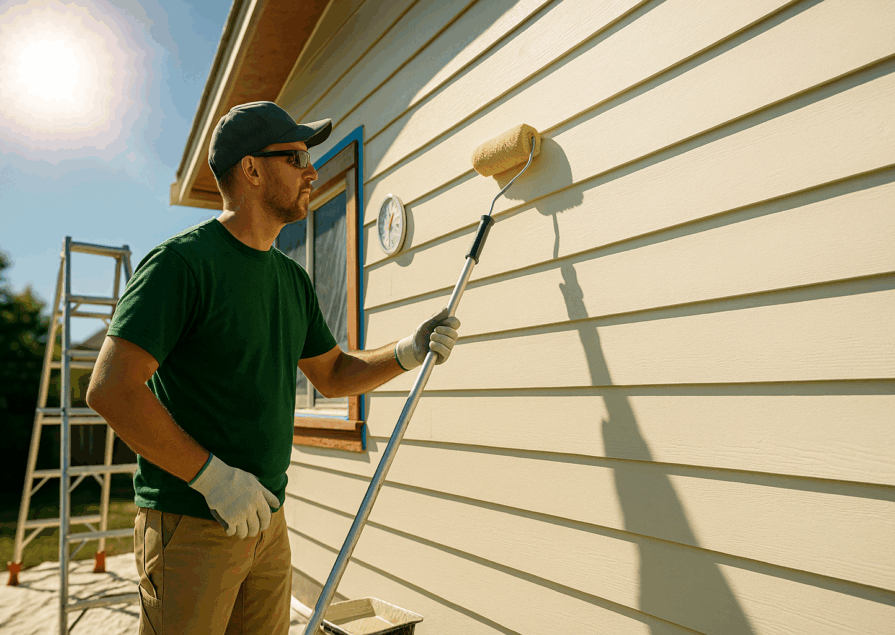
Achieving a professional-looking paint job in every room requires more than just selecting the right color. The way each room is used, the lighting conditions, and the level of foot traffic can significantly affect how paint looks and wears over time. By customizing your approach for different spaces, you can create a long-lasting, beautiful finish tailored to each room’s unique needs.
Why Room-Specific Painting Techniques Matter
Rooms serve distinct purposes, and the way they are used directly impacts how paint holds up over time. The right choice of paint type and technique can make a big difference in both appearance and longevity. Applying room-specific techniques ensures that your paintwork remains fresh and durable, while also preventing issues like peeling, fading, or early wear and tear.
The Impact of Room Usage on Paint Selection
Different rooms present different demands. For example, kitchens and bathrooms deal with high levels of moisture, making them prone to steam, grease, and cleaning product exposure. In these spaces, semi-gloss or satin finishes are ideal because they resist moisture and are easy to clean. Conversely, living rooms and bedrooms tend to have lower moisture levels and traffic, so matte or eggshell finishes work well, offering a soft, elegant look that still stands up to daily use.
Adapting Techniques to Different Lighting and Traffic Conditions
Lighting plays a crucial role in how paint colors appear, and this can vary from room to room. In spaces with ample natural light, lighter shades can make the room feel airy and open, but if you’re working in a room with dim lighting, deeper hues may create warmth. In high-traffic areas such as hallways or entryways, durability is key, so choosing a more resistant paint finish like satin or semi-gloss can prevent scuffs and wear from showing too quickly.
Common Pitfalls When Painting Multiple Rooms
One of the biggest mistakes homeowners make is using the same paint type and technique across every room. High-moisture areas require specific prep and finishes to prevent mold and peeling. Overlooking the effects of light can also result in paint looking washed out or too intense in certain rooms. Another common error is underestimating the importance of high-traffic durability, which can lead to faster wear in frequently used spaces. By considering the individual needs of each room, you can avoid these pitfalls and ensure that your paint job looks great and lasts for years.
Preparing Each Room for Painting
Proper preparation is key to achieving a professional finish, regardless of the room you’re working on. Each space presents unique challenges, from the type of surface to the environmental conditions, which need to be addressed before you even think about opening that can of paint. A well-prepped surface ensures that your paint adheres smoothly, lasts longer, and looks its best.
Living Room Prep: Ensuring a Smooth, Clean Surface
Living rooms typically have lower moisture and fewer environmental concerns compared to kitchens or bathrooms, but it’s still important to prep the walls thoroughly. Start by removing any dust or debris, and repair small imperfections like cracks or nail holes with spackle. Sand the surface lightly for a smooth finish, then wipe down the walls with a damp cloth to remove any remaining dust. Don’t forget to cover furniture and floors with drop cloths to protect them from paint splatters.
Kitchen and Bathroom Prep: Managing Moisture and Heat
Kitchens and bathrooms are prone to moisture and heat, which can cause peeling or bubbling if the surface isn’t properly prepped. Start by cleaning the walls to remove any soap residue, grease, or dirt. High-moisture areas may also require a mildew-resistant primer to ensure the paint adheres well and stands up to the environment. Make sure the room is well-ventilated during painting to allow the paint to cure properly in these humid conditions.
Removing Grease and Grime Before Kitchen Painting
The kitchen presents specific challenges when it comes to surface preparation, particularly around cooking areas where grease and grime tend to accumulate. Begin by using a degreaser or a mixture of water and vinegar to scrub down surfaces, especially around the stove and counters. Failing to remove these contaminants can result in poor paint adhesion and an uneven finish. Once cleaned, allow the walls to dry completely before applying primer or paint.
Surface Prep for High-Traffic Areas Like Hallways and Entryways
Hallways and entryways experience a lot of foot traffic, so it’s essential to prepare these surfaces carefully. Start by inspecting the walls for scuffs, scratches, or dents, and fill any imperfections with a spackle or patching compound. After sanding the repairs, clean the walls with a mild detergent solution to remove dirt and oils. Consider using a high-durability primer to ensure the paint holds up against daily wear and tear in these busy areas.
Proper preparation in each room ensures that your paint adheres properly, looks great, and lasts for the long haul. Skipping these crucial steps can result in an uneven finish or premature wear, so taking the time to get the prep work right is essential.
Choosing the Right Paint for Each Room
Selecting the right paint finish for each room is crucial to achieving the best look and durability. Different rooms serve different functions, so the type of paint you choose should reflect the room’s specific needs. From high-traffic areas to spaces that experience moisture and heat, matching the right paint to the room’s environment will ensure a professional, long-lasting result.
Ideal Paint Finishes for Living Rooms, Bedrooms, and Playrooms
Living rooms, bedrooms, and playrooms typically see less moisture and wear than kitchens or bathrooms, so you have more flexibility in choosing a finish. For these spaces, flat or matte finishes work well, offering a smooth, non-reflective surface that hides small imperfections. If you prefer something easier to clean in a playroom or higher-traffic bedroom, an eggshell finish offers a slight sheen and added durability while still maintaining a soft look.
The Role of Glossy Finishes in Kitchens and Bathrooms
Kitchens and bathrooms require more durable finishes due to the higher levels of moisture, heat, and the potential for stains and splashes. Glossy or semi-gloss finishes are ideal in these spaces as they provide a protective layer that’s easy to clean and can resist the effects of steam, water, and grease. Semi-gloss works particularly well for cabinets, trim, and doors, where frequent cleaning is necessary, while satin finishes can be used on walls to achieve a balance of durability and subtle shine.
Matching Paint Finish to Room Functionality
When selecting a paint finish, it’s essential to consider how the room will be used. High-traffic areas like hallways or children’s rooms need durable finishes like satin or semi-gloss, which are more resistant to wear and tear. In contrast, rooms that prioritize relaxation, such as bedrooms or living rooms, can benefit from the softer look of matte or eggshell finishes. For areas that may need frequent cleaning, such as kitchens or bathrooms, a glossier finish is the most practical choice.
How Color and Lighting Affect Room Perception
The interaction between color and lighting dramatically impacts how a room feels. Lighter shades reflect more light, making small spaces feel larger and brighter. In rooms with abundant natural light, cool tones such as blues or greens work well to balance the warmth of sunlight. On the other hand, in dimly lit rooms, warm colors such as beige, taupe, or even deeper tones like charcoal can create a cozy, inviting atmosphere. The paint finish also plays a role, with glossy finishes enhancing the reflection of light and matte finishes absorbing it for a more subdued effect.
| Room | Recommended Finish | Why It Works |
| Living Room | Matte or Eggshell | Hides imperfections, soft and elegant appearance |
| Bedroom | Eggshell or Satin | Soft look with added durability for touch-ups |
| Playroom | Satin or Semi-Gloss | Easy to clean, withstands high traffic and mess |
| Kitchen | Semi-Gloss or Gloss | Resistant to moisture and grease, easy to clean |
| Bathroom | Satin or Semi-Gloss | Handles moisture, easy to wipe down |
| Hallway/Entryway | Satin or Semi-Gloss | Durable, withstands frequent use and cleaning |
By choosing the right paint finish for each room, you can ensure your space looks great and holds up to the wear and tear of everyday life. The right combination of finish, color, and lighting will also enhance the overall atmosphere, creating the perfect balance of style and functionality in each room.
Living Room Painting Techniques
The living room is one of the most important spaces in your home, and it offers endless opportunities for creativity when it comes to painting. Whether you’re looking to create a bold focal point or add subtle depth to the room, the right techniques can elevate the space and make it feel both stylish and welcoming.
Using Accent Walls to Create a Focal Point
One of the most effective ways to make a statement in your living room is by incorporating an accent wall. This technique involves painting one wall a different color or using a bold shade to draw attention to a specific area, such as a fireplace or a piece of art. To choose the best wall for an accent, consider where your eyes naturally go when entering the room. Bold colors like navy blue, deep green, or even bright yellow can add vibrancy and personality, while softer hues can create a subtle but impactful look.
Two-Tone Painting for Added Dimension
If you’re looking for a way to add dimension to your living room without committing to an entirely bold color, consider two-tone painting. This technique involves dividing the wall into two sections, typically with a lighter color on top and a darker one on the bottom. The separation can be done at chair rail height or closer to the floor, depending on the effect you’re going for. Two-tone painting can create the illusion of higher ceilings or a larger space, especially in smaller living rooms. It also provides a modern, sophisticated look without overwhelming the space with color.
How to Achieve Crisp Lines with Proper Taping
Achieving clean, crisp lines is essential for creating a polished look, especially when working with accent walls or two-tone designs. The key is using proper taping techniques. Start by selecting high-quality painter’s tape designed to create sharp lines. Apply the tape carefully along the edges where the colors will meet, ensuring it’s straight and pressed down firmly to prevent paint from bleeding underneath. After painting, remove the tape while the paint is still wet for the cleanest results. For best results, use a small angled brush to touch up any areas where the lines might not be perfect.
These living room painting techniques can transform your space, adding personality and depth while keeping the design cohesive. Whether you opt for a bold accent wall or a subtle two-tone approach, the right execution ensures a professional and stunning finish.
Bedroom Painting Techniques
The bedroom is a place for relaxation and rest, and the right painting techniques can enhance this atmosphere. By selecting calming colors and using techniques that add subtle dimension, you can create a serene and cohesive space that promotes tranquility while maintaining visual interest.
Relaxing Color Schemes for a Calm Bedroom Environment
Choosing the right color scheme is crucial for setting a peaceful tone in your bedroom. Soft, muted hues like pale blues, greens, and greys are perfect for creating a calming effect. These colors evoke a sense of serenity and make the space feel light and airy. Neutral tones like beige, soft whites, and light taupe also work well for fostering a restful environment. Avoid overly bright or bold colors in large areas, as these can be too stimulating for a space meant for relaxation.
How to Create a Statement Wall Without Overpowering the Space
A statement wall in the bedroom can add character and depth without overwhelming the serene vibe. The key is to choose a subtle yet striking color that contrasts with the rest of the room. For example, a deep charcoal or navy blue can provide a sophisticated touch without being too loud, especially when balanced with lighter walls. To keep the design cohesive, use softer accent pieces like bedding, curtains, or artwork that complement the statement wall. Placing the accent wall behind the bed is a great option, as it naturally draws attention to the room’s focal point without overpowering the space.
Trim and Ceiling Painting Tips for Seamless Transitions
A clean transition between the walls, ceiling, and trim is essential for achieving a polished bedroom look. For the trim, opt for a slightly different sheen—typically a satin or semi-gloss finish—so it stands out subtly from the walls. White or light-colored trim against soft wall colors adds elegance and crispness to the space. When painting the ceiling, lighter colors like white or a pale version of the wall color help create the illusion of higher ceilings and contribute to a more spacious feel. Use painter’s tape to ensure straight lines and smooth transitions between the walls, trim, and ceiling, and consider using an angled brush for precise edges.
These bedroom painting techniques help create a serene and polished environment where you can unwind and recharge. By combining soothing colors, balanced statement walls, and seamless trim transitions, you can achieve a space that feels both restful and stylish.
Kitchen Painting Techniques
The kitchen is one of the busiest rooms in the home, and its unique environment—high heat, moisture, and frequent use—demands durable and washable finishes. Painting in the kitchen also requires specific techniques to ensure that walls, cabinets, and other surfaces can stand up to the rigors of daily cooking and cleaning.
How to Choose Durable, Washable Paint for High-Grease Areas
Kitchens are prone to grease splashes and spills, especially around the stove and countertops. Choosing the right paint finish is critical for ensuring the longevity of your paint job. Semi-gloss or satin finishes are ideal for these areas because they are highly durable and washable. These finishes resist grease buildup and can be easily wiped down without damaging the paint. In contrast, matte or flat finishes may absorb grease and are more challenging to clean, making them less suitable for kitchens.
Preventing Paint Damage in Moisture-Heavy Spaces
With steam from cooking and frequent cleaning, kitchens experience more moisture than most other rooms. To prevent paint damage such as peeling or bubbling, it’s essential to prepare the surface properly. Start with a high-quality, moisture-resistant primer, which will create a solid base for the topcoat and help the paint adhere better to the walls. For areas near the sink or stove, where water and steam are constant, using a semi-gloss finish provides extra protection. Good ventilation is also crucial during and after painting to allow the paint to dry fully and avoid any moisture-related issues.
Painting Kitchen Cabinets: A Step-by-Step Guide
Painting your kitchen cabinets can dramatically update the look of your kitchen without the cost of a full renovation. Here’s a step-by-step guide to help you achieve a professional finish:
- Remove Cabinet Doors and Hardware: Start by removing all cabinet doors, drawers, and hardware. Label each piece to ensure everything goes back in its correct place.
- Clean the Cabinets Thoroughly: Grease and grime can accumulate on cabinets over time. Use a degreaser to clean all surfaces thoroughly before painting.
- Sand the Cabinets: Lightly sand the cabinet surfaces to remove the existing finish and create a smooth surface for the paint to adhere. Wipe off any dust with a damp cloth.
- Prime the Cabinets: Apply a high-quality primer designed for wood surfaces. This will ensure the paint bonds well and prevents stains from bleeding through.
- Apply the Paint: Use a high-quality latex or oil-based paint for durability. Apply multiple thin coats, allowing each coat to dry completely before adding the next.
- Reassemble the Cabinets: Once the paint has fully dried, carefully reattach the doors and hardware. This step completes your cabinet transformation.
| Step | Details |
| Remove Doors & Hardware | Label each piece for easy reassembly |
| Clean Cabinets | Use a degreaser to remove all grease and grime |
| Sand the Cabinets | Light sanding ensures smooth adhesion of the paint |
| Apply Primer | Use a primer specifically for wood surfaces |
| Paint the Cabinets | Apply thin, even coats with drying time in between |
| Reassemble Hardware & Doors | Ensure all pieces are completely dry before reattaching |
The Best Tools for Achieving a Smooth Cabinet Finish
The tools you use for painting kitchen cabinets can significantly affect the final result. To achieve a smooth, professional finish, consider the following tools:
- High-Quality Brushes: Use an angled brush for cutting in around the edges and for detailed work on trim and moldings. A good quality, synthetic-bristle brush is ideal for cabinets.
- Rollers: Use small, foam rollers for the flat surfaces of the cabinet doors to create a smooth finish without brush marks.
- Paint Sprayers: If you want an ultra-smooth, factory-like finish, consider using a paint sprayer for your cabinets. This tool applies a thin, even coat of paint with minimal texture.
- Sandpaper: Have a variety of sandpaper grits on hand, from coarse for removing old finishes to fine for smoothing surfaces between coats.
By using the right paint, preparing surfaces properly, and choosing the best tools, you can achieve a durable and professional-looking finish in your kitchen. With these techniques, your kitchen will not only look great but also withstand the daily demands of cooking and cleaning.
Bathroom Painting Techniques
Bathrooms are exposed to high humidity, steam, and frequent cleaning, making them one of the most challenging rooms to paint. Choosing the right products and techniques is essential to prevent common issues like mildew, peeling, and fading. Here’s how to ensure your bathroom looks fresh and stays protected for the long term.
Selecting Mildew-Resistant Paint for Humid Environments
Because bathrooms are naturally humid environments, selecting mildew-resistant paint is crucial to prevent mold growth. Look for paints specifically designed for high-moisture areas, such as those labeled as “bathroom paint” or “mildew-resistant.” These paints contain additives that inhibit mold and mildew growth, making them ideal for bathrooms, especially in poorly ventilated spaces. Semi-gloss or satin finishes are also good choices since they provide extra protection against moisture and are easier to clean.
How to Minimize Peeling and Fading in Bathrooms
Peeling paint is a common problem in bathrooms due to constant exposure to moisture. To minimize peeling, start by properly preparing the walls. This includes cleaning the surfaces to remove soap scum, dirt, and old paint. Applying a moisture-resistant primer before painting will help seal the surface and improve paint adhesion. Once the primer is dry, apply multiple thin coats of your chosen paint to ensure long-lasting coverage. For areas that experience direct water contact, such as near sinks or showers, use high-quality water-resistant paint to prevent fading and wear.
The Importance of Proper Ventilation During and After Painting
Proper ventilation is critical when painting in a bathroom. Without adequate airflow, moisture can become trapped, leading to premature peeling, bubbling, and mildew growth. While painting, open windows and doors or use an exhaust fan to keep air moving through the room. After painting, allow the room to ventilate for several days to ensure that the paint fully cures and can withstand the bathroom’s humid conditions. Even after the project is finished, using ventilation like fans or windows after showers will help maintain the paint’s integrity over time.
Hallway and Entryway Painting Techniques
Hallways and entryways are high-traffic areas, which means they need a durable paint job that can stand up to daily wear and tear. By choosing the right paint finishes and techniques, you can maintain a fresh and polished look despite the heavy use these areas experience.
High-Traffic Paint Solutions for Hallways
Hallways are often the most frequently used spaces in a home, so selecting a durable paint finish is essential. Semi-gloss or satin finishes are ideal for hallways as they provide a smooth, durable surface that can withstand frequent cleaning and resist scuffs and marks. These finishes also make it easier to wipe away fingerprints, dirt, and smudges without damaging the paint. If you have children or pets, washable paints designed for high-traffic areas are a great option for maintaining a pristine look.
Using Darker Colors to Conceal Wear and Tear
Darker colors can be a practical and stylish solution for hallways and entryways. These shades naturally conceal dirt, scuffs, and other imperfections that tend to accumulate in high-traffic areas. Deep greys, navy blues, or even rich earth tones can give your hallway a sophisticated look while hiding everyday wear and tear. When using darker colors, make sure the space has adequate lighting to prevent it from feeling too closed in or dim.
How to Paint Around Door Frames and Trim with Precision
Painting around door frames and trim requires attention to detail to achieve clean, professional-looking lines. Start by using painter’s tape to mask off the edges of the trim or door frame to prevent paint from bleeding onto adjacent surfaces. Use an angled brush to carefully cut in around these areas, making sure to apply paint evenly without overloading the brush. For best results, paint the trim and doors with a semi-gloss or gloss finish, which is easier to clean and more resistant to dents and scratches.
These techniques ensure that your hallway and entryway not only look great but can withstand the daily wear and tear that these high-traffic spaces typically experience. By using the right finishes, colors, and precision painting methods, you’ll keep these areas looking fresh for years to come.
Playroom and Kids’ Room Painting Techniques
When painting playrooms or kids’ bedrooms, it’s essential to balance fun design with practical considerations. From bright color schemes that stimulate creativity to durable, easy-to-clean surfaces, the right techniques can transform these spaces into playful yet functional areas.
Fun, Bright Color Schemes for Creative Spaces
Playrooms and kids’ bedrooms are the perfect places to experiment with vibrant, playful color schemes. Consider bold hues like primary colors (red, blue, yellow) or soft pastels, depending on the age of the child and the room’s theme. Bright colors can stimulate creativity and energy, while softer tones like light greens or yellows can create a soothing, inviting environment. To add a sense of balance, use neutral tones like white or light grey for trim or accents, helping the brighter colors stand out without overwhelming the room.
Choosing Washable Paints for Easy Clean-Up
Durability is key in kids’ rooms, as they are prone to spills, fingerprints, and general wear and tear. Choosing washable paints ensures that walls can be cleaned frequently without sacrificing the integrity of the paint. Satin or semi-gloss finishes are perfect for playrooms and kids’ bedrooms, as they provide durability while being easy to wipe down. These finishes resist stains and allow for easy cleanup with a damp cloth, making them ideal for high-activity spaces.
How to Use Chalkboard and Magnetic Paint for Interactive Walls
Interactive walls are a fantastic addition to any playroom or kid’s bedroom, allowing children to draw, write, and create without damaging the walls. Chalkboard paint is a fun and functional option, creating a writable surface where kids can express their creativity. Magnetic paint can also turn any wall into a space for hanging artwork, notes, or educational tools. For the best results, apply multiple coats of chalkboard or magnetic paint to ensure the surface is smooth and functional. Consider designating one wall or a specific section for these interactive areas to balance creativity with the room’s overall aesthetic.
Ceiling and Trim Painting Techniques
Painting ceilings and trim requires special attention to detail to achieve a clean, professional finish. With the right techniques and tools, you can ensure that these elements seamlessly complement the rest of the room’s design.
Techniques for Smooth, Even Ceiling Coverage
When painting ceilings, it’s important to create an even, smooth finish that enhances the room’s overall look. Use a roller with an extended handle to cover large areas efficiently, applying the paint in light, even strokes. Start by cutting in around the edges with a brush, then roll out the ceiling using a “W” pattern to ensure even coverage and prevent streaks. For lighter ceilings, flat or matte finishes are best as they hide imperfections and reflect less light, helping the ceiling blend with the walls.
How to Paint Baseboards and Crown Molding Efficiently
Baseboards and crown molding add a finished look to any room, but they require precise painting techniques to ensure a clean result. Use a high-quality angled brush to apply the paint to these areas, as it allows for better control and coverage. To speed up the process, tape off the areas where the trim meets the walls or floor to prevent any paint from bleeding onto them. Semi-gloss or gloss finishes are typically ideal for trim, as they create a smooth, durable surface that can be easily wiped clean and stands up to daily wear.
Tools for Cutting In Around Trim Like a Pro
Cutting in around trim requires precision to avoid uneven lines or messy edges. The best tool for the job is an angled brush, which allows you to get into corners and tight spaces without overlapping onto the walls or ceilings. A high-quality painter’s tape is also essential for masking off areas where you want to avoid paint bleed. For added precision, you can use an edger tool, which helps you achieve clean, straight lines, especially around baseboards and crown molding. Taking your time with this process ensures a professional, seamless look.
By mastering these techniques, you can achieve a polished, cohesive look in any room, from the ceiling to the trim. Whether you’re adding bright colors to a playroom or creating a clean, sophisticated finish on trim, these painting methods ensure long-lasting, professional results.
The Best Tools for Room-Specific Painting
Using the right tools for painting different rooms is essential for achieving a professional finish. The type of tool you choose can make a significant difference in coverage, smoothness, and overall quality. From large rollers for broad walls to detail brushes for trim work, having the right tools ensures efficiency and precision.
Essential Brushes, Rollers, and Sprayers for Each Room
Different rooms require different types of painting tools depending on the size, surface texture, and amount of detail involved. For large, flat surfaces like living rooms or bedrooms, a high-quality roller will speed up the process and provide an even coat of paint. Use a roller with a medium nap (⅜ inch) for smooth walls and a longer nap (½ inch) for textured walls.
For more intricate areas, such as trim or detailed woodwork, a synthetic-bristle angled brush is ideal for precision. In kitchens and bathrooms, where cabinets and detailed surfaces require smooth finishes, a paint sprayer is an excellent option for achieving an even coat without brush strokes or roller marks.
Specialty Tools for Tight Corners and Detailed Work
Tight corners, window frames, and baseboards require specialty tools to ensure clean lines and smooth transitions. An angled sash brush is perfect for cutting in along edges and corners, allowing you to paint straight lines without bleeding onto adjacent surfaces. For very tight spots or detailed areas, a smaller trim brush (about 1-2 inches wide) provides the control needed for precise application.
An edger tool can also help you paint straight lines around trim, ceilings, and doors, making the job easier without the need for excessive taping. For tricky spots like behind radiators or narrow spaces, mini rollers or detail brushes can reach areas standard rollers can’t.
| Tool | Best For | Room Types |
| 9-inch Roller (⅜ inch nap) | Smooth wall surfaces | Living rooms, bedrooms, hallways |
| 9-inch Roller (½ inch nap) | Textured walls | Bathrooms, kitchens, textured spaces |
| Angled Sash Brush | Cutting in along edges and trim | All rooms (corners, ceilings, baseboards) |
| Paint Sprayer | Smooth, professional finish for cabinets/trim | Kitchens, bathrooms |
| Mini Roller | Tight spaces, narrow walls | Behind radiators, tight hallways |
| Edger Tool | Straight lines along ceilings and baseboards | Any room with trim or detailed work |
Room-Specific Painting Tips for Longevity
Ensuring your paint job lasts requires more than just applying the right color and technique. Proper maintenance and the use of protective coatings are essential, especially in high-use areas or rooms exposed to moisture and heat.
How to Maintain Paint in High-Use Areas
High-traffic areas like hallways, entryways, and kitchens are more prone to wear and tear, so maintaining paint in these spaces requires extra attention. Use high-durability paints like satin or semi-gloss, as these finishes resist scuffs and stains better than matte or flat paints. Regular cleaning of the walls with a soft, damp cloth will help remove dirt and grime that can build up over time. In areas prone to frequent bumps or scrapes, consider applying a clear protective coating over the paint to extend its life.
Protective Coatings for Rooms Exposed to Heat and Moisture
Kitchens, bathrooms, and laundry rooms are subject to high humidity, heat, and occasional splashes of water, all of which can damage paint. To protect the walls, apply a clear, water-resistant protective topcoat, especially in areas near sinks or stoves. This coating acts as an extra barrier against moisture and heat, preventing peeling, bubbling, or fading over time. In addition, using mildew-resistant paint or primers is critical in bathrooms to keep mold at bay.
Easy Maintenance Solutions for Keeping Paint Fresh
To keep your paint looking fresh for years, consider a few simple maintenance habits. For all rooms, touch up scuffs and chips as soon as you notice them using leftover paint. Keep small amounts of each paint color stored in airtight containers for quick fixes. For rooms with high moisture or exposure to cooking oils (like kitchens), clean the walls every few months with a gentle detergent solution to remove buildup. Regular ventilation in bathrooms and kitchens will also help prevent moisture from compromising the paint’s durability.
By using the right protective coatings and following simple maintenance routines, you can extend the lifespan of your paint job and keep your home looking freshly painted for years to come. These strategies are especially important in rooms exposed to moisture or heavy use, where paint is more likely to show wear.
How to Tackle Common Room-Specific Painting Challenges
Painting different rooms comes with unique challenges, especially in older homes or areas with high humidity or heavy traffic. Knowing how to address these common issues will help ensure a smooth, professional finish that stands the test of time.
How to Fix Uneven Walls in Older Homes
Older homes often have uneven walls due to settling or outdated construction methods. Before painting, address any surface imperfections by using spackling compound or drywall mud to fill in dents, cracks, or gaps. Once dry, sand the surface smooth with fine-grit sandpaper to ensure an even base for paint application. For larger imperfections, consider using a skim coat over the entire wall to level it out. Always use a high-quality primer to further smooth the surface and help the paint adhere evenly.
Dealing with Cracking or Peeling Paint in Humid Rooms
Cracking or peeling paint is a common issue in bathrooms, kitchens, and laundry rooms, where humidity levels are high. To prevent this, start by scraping away any loose or peeling paint with a putty knife or scraper. Once the surface is clear, sand the area to smooth out the edges of the remaining paint. Apply a moisture-resistant primer, which helps the new paint adhere properly, then follow up with a semi-gloss or satin finish paint designed for humid environments. Good ventilation during and after painting is crucial to ensure the paint dries fully and adheres correctly.
Solutions for Stains and Marks in High-Traffic Areas
High-traffic areas like hallways, entryways, and staircases are prone to scuffs, stains, and marks. To address these, start by cleaning the surface with a mild detergent solution to remove any dirt or grime. For stubborn stains like oil or ink, you may need to use a stain-blocking primer before applying a fresh coat of paint. Opt for durable, washable paints like satin or semi-gloss finishes, which make it easier to wipe away future stains without damaging the paint. Regularly touch up these areas to keep them looking fresh and avoid wear-and-tear buildup.
Conclusion
Mastering room-specific painting techniques is key to achieving professional results throughout your home. By adapting your approach to each room’s unique needs—whether it’s choosing the right finish for a high-moisture bathroom or tackling uneven walls in older homes—you can create a polished, durable finish that enhances the look and longevity of every space.
Key Takeaways for Long-Lasting Results in Every Room
- Always prepare surfaces based on room-specific conditions (e.g., moisture, traffic levels, lighting).
- Use the appropriate paint finishes for each room to maximize durability and aesthetic appeal.
- Regular maintenance, including cleaning and touching up, will help preserve your paint job and keep it looking fresh.
Encouragement for DIYers and Professional Painters Alike
Whether you’re a DIY enthusiast tackling your home renovation or a professional painter, following these room-specific painting techniques ensures success. With the right preparation, tools, and understanding of each room’s challenges, you’ll be able to achieve professional-grade results and a home that looks beautifully painted for years to come.
FAQs
What’s the best technique for painting ceilings without drips?
To avoid drips when painting ceilings, use a high-quality roller with a long handle for even coverage. Apply paint in light, even strokes and avoid overloading the roller with too much paint. Start by cutting in around the edges with an angled brush, then roll out the ceiling in a “W” pattern to distribute the paint evenly. For extra protection against drips, use a drop cloth or plastic sheeting to cover floors and furniture.
How often should high-traffic areas like hallways be repainted?
High-traffic areas like hallways, entryways, and staircases generally need to be repainted every 2 to 3 years to maintain a fresh appearance. These areas are more prone to scuffs, stains, and general wear, so choosing durable, washable paint like satin or semi-gloss can extend the life of your paint job. Regular touch-ups can also help prolong the time between full repaints.
Can I use the same paint in my bathroom as I do in my living room?
It’s not recommended to use the same paint in bathrooms as in living rooms. Bathrooms are high-moisture areas, and regular paints used in living rooms may not withstand the humidity. For bathrooms, choose mildew-resistant, moisture-proof paints, such as semi-gloss or satin finishes, which are designed to hold up in humid environments. Living rooms, on the other hand, can use matte or eggshell finishes for a softer, less reflective appearance.
How do I fix paint mistakes on walls without starting over?
To fix paint mistakes without starting over, first wait for the paint to dry completely. For minor imperfections like streaks or brush marks, lightly sand the area with fine-grit sandpaper, then touch up with a thin layer of matching paint. For color mismatches or uneven areas, carefully apply a small amount of paint with a brush or roller, blending it into the surrounding paint to avoid obvious touch-ups.
What’s the ideal drying time between coats for different room conditions?
The ideal drying time between coats depends on the type of paint and the room’s conditions. In well-ventilated rooms with normal humidity, most latex paints should dry within 2 to 4 hours before you can apply a second coat. In high-humidity environments like bathrooms, you may need to wait 4 to 6 hours to ensure the paint has dried thoroughly. Always follow the manufacturer’s recommendations for drying times, especially in humid or high-temperature conditions, to avoid premature peeling or uneven coverage.