Why Painting Your Kitchen is Different from Other Rooms
Painting a kitchen comes with unique challenges that you won’t face in other areas of the home. From the effects of moisture and heat to the high traffic and frequent cleaning that kitchen walls endure, these factors can all impact the longevity and appearance of your paint job. Understanding these differences will help ensure a professional, long-lasting finish.
High Moisture and Heat Exposure
Kitchens are constantly exposed to high levels of moisture and heat due to cooking activities. The steam from boiling pots, splatters from frying pans, and heat from the oven all contribute to a challenging environment for paint. Because of this, you need to choose paint that is moisture-resistant and durable, so it doesn’t peel or blister over time. Latex-based paints, for example, are typically more resistant to moisture compared to oil-based paints, making them a better choice for kitchens.
Frequent Cleaning and Stains
Kitchen walls are often exposed to grease, food stains, and splashes. This means you’ll need to clean them regularly to keep them looking fresh. Using a paint that can handle frequent scrubbing is essential. Semi-gloss and satin finishes tend to perform well in kitchens, as they are more resistant to stains and can withstand cleaning without losing their sheen.
Choosing the Right Colors for Small vs. Large Kitchens
The size of your kitchen plays a big role in selecting the right paint color. For smaller kitchens, lighter shades like soft whites, pale grays, or muted pastels can create the illusion of more space, making the room feel brighter and airier. In larger kitchens, you can experiment with bolder, darker colors like deep blues or earthy tones, which can add warmth and depth without overwhelming the space. The goal is to create a balance between functionality and aesthetics, ensuring the colors complement the overall style of your home while enhancing the kitchen’s practicality.
Selecting the Best Paint for Your Kitchen
Choosing the right type of paint for your kitchen is crucial to achieving a long-lasting, attractive finish. Here’s how to select the best options.
Choosing Between Latex and Oil-Based Paint
Latex and oil-based paints each have their pros and cons. Latex paint, which is water-based, dries quickly and has less odor, making it more convenient for DIY projects. It also resists cracking and is flexible enough to handle the moisture and heat fluctuations common in kitchens. On the other hand, oil-based paints are known for their durability and smooth finish but come with longer drying times and stronger odors. In kitchens, latex paint is generally the better option due to its moisture resistance and ease of cleanup.
Best Paint Finishes for Kitchens (Semi-gloss, Satin)
The finish of your paint is just as important as the type. For kitchens, semi-gloss and satin finishes are ideal because they offer durability, moisture resistance, and are easy to clean. Semi-gloss finishes are slightly shinier, reflecting more light, and are great for areas that need frequent cleaning. Satin finishes, while slightly more matte, still offer a smooth, wipeable surface and are less likely to show imperfections in the walls. Both options are excellent for high-traffic areas like kitchens.
Ideal Color Schemes for a Kitchen Space
Color plays a crucial role in the overall feel of your kitchen. Lighter colors such as whites, creams, or light grays can make a small kitchen appear more spacious and bright, while darker hues like navy blue, forest green, or charcoal can add sophistication and contrast to larger kitchens. Additionally, warm neutrals such as beige or taupe can create a cozy atmosphere, perfect for inviting spaces where families gather.
Preparing Your Kitchen for a Successful Paint Job
Proper preparation is crucial for a successful kitchen painting project. By taking the time to clear and prep the space, you’ll ensure that the paint adheres well, and you’ll avoid accidental damage to your appliances or surfaces. Here’s how to get started:
Clearing the Kitchen and Covering Surfaces
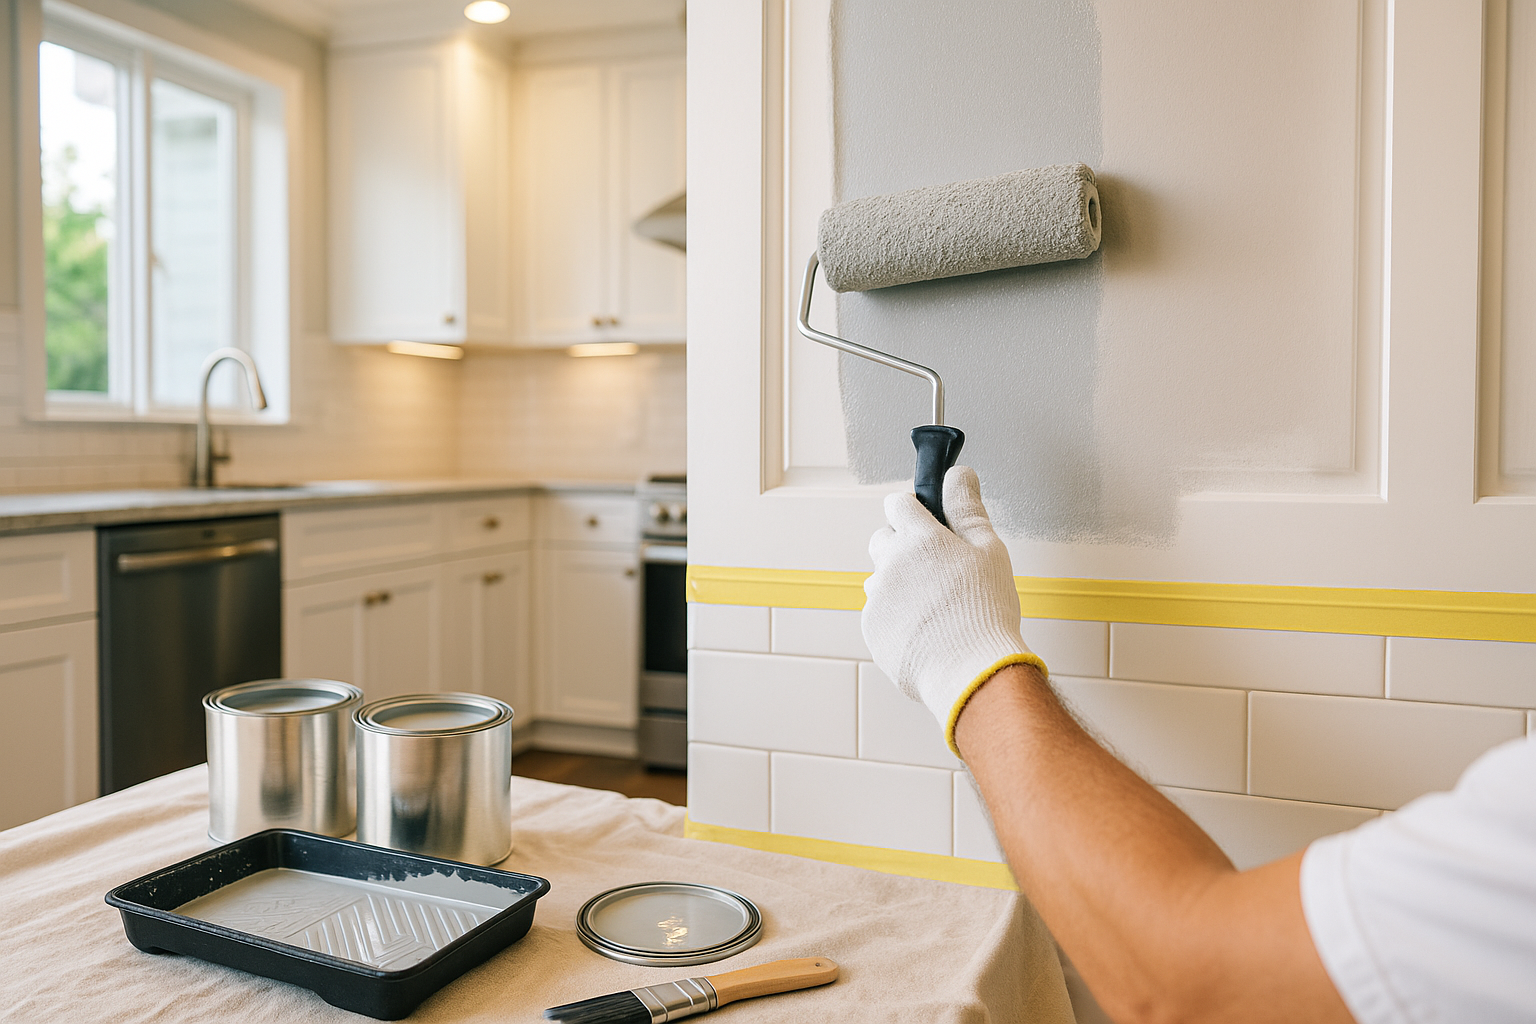
Before you start painting, clear out as much of the kitchen as possible. Move small appliances, cookware, utensils, and any decorative items to another room. Larger items such as refrigerators or stoves should be shifted, if possible, away from the walls or covered with drop cloths. It’s essential to protect your countertops, floors, and any immovable appliances with plastic sheeting or drop cloths. Don’t forget to tape off the edges around cabinets, windows, and door frames with painter’s tape to prevent unwanted paint splatters.
Cleaning Walls and Degreasing Problem Areas
Kitchen walls often accumulate grease, food splatters, and other debris, which can affect how well the paint sticks to the surface. Before painting, thoroughly clean the walls with a mild detergent or a solution of water and vinegar. Pay special attention to areas near the stove and sink, as these are the most prone to grease buildup. For tough, greasy spots, a degreasing cleaner may be necessary. Once the walls are clean, allow them to dry completely before moving on to the next steps.
Removing or Masking Appliances, Cabinets, and Fixtures
To achieve a clean, professional paint job, it’s essential to remove or mask any appliances, cabinets, and fixtures that could get in the way. For kitchen cabinets, you may want to remove doors and hardware if you’re painting them separately. If that’s not an option, carefully mask off cabinet edges, knobs, and handles with painter’s tape. Light fixtures, switches, and outlet covers should also be removed or taped over to avoid getting paint on them. Taking the extra time to mask or remove these items will make your job easier and your results look more polished.
Repairing and Prepping Kitchen Walls
Once the kitchen is cleared and cleaned, it’s time to inspect the walls for any damage that needs repair. Ensuring the walls are smooth and properly prepped will help the paint adhere better and provide a more even finish.
Patching Holes and Cracks for Smooth Finishes
Kitchens, especially older ones, often have small holes or cracks in the walls caused by hanging items or settling of the home. Use a patching compound or spackling paste to fill any holes or cracks in the walls. After applying the compound, smooth it out with a putty knife and allow it to dry completely. Once dry, lightly sand the area to ensure it’s level with the surrounding wall. This step is critical to achieving a professional-looking finish.
Sanding Surfaces for Better Paint Adhesion
Sanding the walls is an essential step for ensuring that the new paint adheres properly. Use fine-grit sandpaper (around 220 grit) to lightly sand the entire surface of the walls, focusing on areas where you’ve patched holes or filled cracks. Sanding helps to remove any imperfections, rough spots, and residual grease that cleaning may have missed. After sanding, wipe down the walls with a damp cloth to remove any dust or debris left behind.
Applying Primer for Problematic Kitchen Surfaces
In kitchens, applying primer before painting is highly recommended, especially if you’re working with greasy walls, significant color changes, or walls that have been previously damaged. A good quality primer will help block stains, cover imperfections, and create a smooth base for the paint to adhere to. For best results, use a primer that’s formulated for high-traffic areas like kitchens, which often experience wear and tear. Once the primer is dry, you’re ready to start painting.
Essential Tools and Supplies for Painting a Kitchen
Having the right tools and supplies is key to making your kitchen painting project go smoothly and ensuring a professional-looking result. Here’s a breakdown of what you’ll need:
Paint Brushes, Rollers, and Trays
The foundation of any paint job lies in the brushes, rollers, and trays you use. For a kitchen, it’s essential to have both high-quality paint brushes and rollers. Use a 2-3 inch angled brush for “cutting in” around cabinets, windows, and appliances. For the larger areas, opt for a 9-inch roller with a medium nap (3/8 to 1/2 inch), which works well for smooth or slightly textured walls. Make sure to have a sturdy paint tray with disposable liners to reduce cleanup time.
Painter’s Tape and Drop Cloths
Painter’s tape is essential for protecting surfaces like trim, cabinets, and countertops from stray paint. Make sure you choose a high-quality tape that’s easy to remove without leaving residue behind. Drop cloths or plastic sheeting should be used to cover floors, appliances, and countertops, ensuring that drips or splatters don’t cause damage. Opt for heavy-duty canvas drop cloths for floors and plastic sheeting for furniture and appliances.
Special Tools for Tight Spaces and Edges
Kitchens often have tight spaces and hard-to-reach corners. A smaller angled sash brush or a trim roller is great for these areas. For painting behind appliances or in narrow gaps, consider using a mini roller or a painter’s pad for more precise control. Corner rollers can also be helpful for achieving clean, even lines in difficult areas.
Step-by-Step Painting Process for Kitchens
Now that you’ve prepped your kitchen and gathered your tools, it’s time to start painting. Follow these steps for a flawless finish:
Priming the Kitchen Walls for Best Results
Priming is a critical first step when painting a kitchen, especially if you’re dealing with stains, grease, or bold colors. Choose a primer that’s designed for high-moisture areas like kitchens. Apply it evenly across the entire surface using a roller, and use a brush to prime around windows, cabinets, and edges. Allow the primer to dry completely before moving on to the next step.
Cutting in: Edging Around Cabinets, Windows, and Appliances
“Cutting in” refers to painting along the edges of your kitchen where the roller won’t easily reach, such as around cabinets, countertops, windows, and door frames. Use an angled brush for precise lines and steady hands to avoid overlapping onto other surfaces. This step creates clean, sharp edges and prevents the roller from smudging or missing areas.
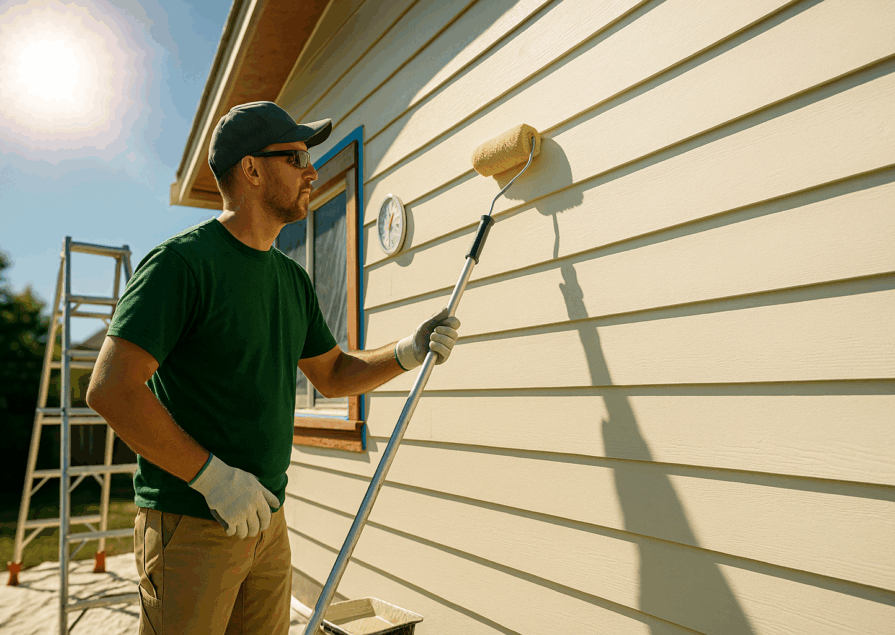
Rolling Paint on Larger Kitchen Walls
Once you’ve cut in around the edges, it’s time to tackle the larger surfaces with a roller. Start in one corner and roll the paint in overlapping “W” or “M” shapes to ensure even coverage. Avoid applying too much pressure to the roller to prevent streaks. It’s a good idea to work in sections, blending each section with the next as you move along the walls.
Applying a Second Coat for Durability
For kitchens, applying a second coat of paint is recommended to enhance durability, especially in high-traffic areas. Once the first coat is completely dry (usually after 4-6 hours), apply the second coat in the same method as the first: cut in the edges first, then use the roller for the larger sections. The second coat will ensure better coverage, longevity, and a more uniform finish.
By following this step-by-step process and using the right tools, you’ll achieve a professional, durable finish that can withstand the wear and tear of a busy kitchen environment.
Painting Cabinets and Trim: Pro Tips
Kitchen cabinets and trim require special attention during a painting project, as they receive a lot of daily use. The right techniques and materials can help ensure a smooth, professional finish that stands up to wear and tear.
Best Paints and Techniques for Cabinet Painting
When painting kitchen cabinets, it’s essential to choose a paint that is durable and can handle frequent cleaning. Acrylic latex or hybrid enamel paints are excellent choices, as they offer the smooth finish of oil-based paints with the easy cleanup of water-based paints. For best results, remove cabinet doors and drawers, label them for reassembly, and paint them separately. Use a high-quality brush or foam roller to avoid brush marks, and apply multiple thin coats rather than one thick one to prevent drips and uneven coverage.
How to Paint Around Handles, Hinges, and Other Fixtures
To achieve a clean look, it’s best to remove cabinet hardware like handles and knobs before painting. If you cannot remove these fixtures, carefully mask them with painter’s tape to avoid getting paint on them. For hinges and other fixed hardware, use an angled brush to paint around the edges carefully. If your cabinets have intricate designs or tight corners, consider using a small artist’s brush to get into hard-to-reach areas without creating a mess.
Giving Trims a Clean, Professional Look
Painting trim requires precision to avoid overlap onto walls or flooring. Use painter’s tape to mask off the areas adjacent to the trim. A high-quality angled sash brush works best for applying paint evenly to trim surfaces. When painting baseboards or crown molding, always apply thin coats and sand lightly between coats to ensure a smooth, glossy finish. Taking your time with this step ensures that your trim will complement the walls and cabinets, giving the entire kitchen a polished, professional appearance.
Drying Time, Ventilation, and Safety Measures
Once your painting is complete, proper drying and safety precautions are essential to ensure the longevity of your work and a safe environment while the paint cures.
How Long Should You Wait Between Coats?
The drying time between coats depends on the type of paint you’re using. For most latex-based paints, wait 2-4 hours between coats, although cooler or more humid environments may require a longer drying time. If you’re painting cabinets or trim, allow a full 24 hours between coats to ensure the paint has fully set, especially if you plan to apply multiple layers for durability. Patience is key here to prevent smudging, streaks, or imperfections.
Creating Proper Ventilation to Speed Up Drying
Proper ventilation is crucial when painting kitchens, as it not only speeds up the drying process but also reduces the buildup of fumes. Open windows and use fans to circulate air throughout the kitchen. Position the fans to direct airflow toward windows or doors, helping to remove moisture and fumes. If you’re painting during colder months and can’t open windows, consider using a dehumidifier to remove moisture from the air, which can slow down the drying process.
Ensuring Safety While Working in the Kitchen Environment
Painting in a kitchen presents unique safety challenges, especially when working around electrical appliances, stoves, and food preparation areas. Before you start painting, make sure to unplug appliances and turn off power to outlets near your painting area. Be mindful of food contamination and cover all kitchen surfaces with plastic sheeting. Keep the area well-ventilated to minimize inhalation of fumes, and consider wearing a mask if you’re working in tight spaces with limited airflow.
Taking these precautions ensures a safe and efficient painting process while maintaining a clean, professional finish throughout your kitchen.
Common Kitchen Painting Mistakes and How to Avoid Them
Painting a kitchen presents several unique challenges, and making the wrong choices can lead to issues with the final look or durability of the paint. Below are some common mistakes and tips on how to avoid them.
Not Using the Right Primer for Greasy Walls
Kitchens are prone to grease buildup, especially near cooking areas. Failing to use the appropriate primer for greasy surfaces can cause the paint to peel or not adhere properly. To avoid this, always clean the walls thoroughly with a degreaser and choose a primer specifically designed for kitchens or high-traffic areas. This ensures that the paint bonds correctly to the wall and stays intact, even in areas exposed to moisture and grease.
Skipping Wall Preparation and Cleaning
Skipping prep work is one of the most common mistakes when painting a kitchen. Dirty, unprepared walls prevent paint from adhering properly and can result in an uneven or streaky finish. Before painting, clean the walls with a mixture of water and mild detergent to remove grease, dirt, and dust. Lightly sand the walls to smooth out imperfections and apply primer for optimal paint adhesion. Taking the extra time to prep will lead to better, longer-lasting results.
Choosing the Wrong Paint Finish or Color
Choosing the wrong paint finish can significantly affect both the appearance and durability of your kitchen walls. Flat or matte finishes may be trendy, but they aren’t suitable for kitchens as they can’t withstand frequent cleaning. Instead, opt for semi-gloss or satin finishes, which are more durable and easier to clean. Additionally, when selecting a color, consider the kitchen’s size and lighting. Light colors can open up smaller spaces, while darker shades can make larger kitchens feel cozy. Test swatches under various lighting conditions before committing to a color.
Cleaning Up After Painting Your Kitchen
Once you’ve completed your kitchen painting project, proper cleanup ensures that your tools are ready for future use and that your paint job remains flawless.
Safely Removing Painter’s Tape Without Peeling Paint
Painter’s tape is essential for creating clean lines, but removing it too early or too late can cause the paint to peel. The best time to remove the tape is when the paint is still slightly tacky, usually about 1-2 hours after applying the final coat. Gently pull the tape at a 45-degree angle to avoid tearing the paint. If the paint has dried, use a utility knife to score along the edge of the tape before removing it to prevent peeling.
Cleaning and Storing Brushes and Rollers
Cleaning your brushes and rollers immediately after use is essential to prolong their lifespan. For latex-based paints, rinse brushes and rollers under warm water, using soap if necessary, to remove all traces of paint. Gently squeeze out excess water and allow them to air dry. For oil-based paints, use mineral spirits or paint thinner to clean your tools. Store brushes by hanging them or keeping them flat, and rollers can be wrapped in plastic or placed in sealed bags for future use.
How to Touch Up Any Mistakes or Imperfections
Even with careful painting, small imperfections or missed spots may appear once the paint dries. To fix these, lightly sand the area with fine-grit sandpaper, wipe away dust, and apply a thin coat of paint with a brush or roller. For areas with drips or excess paint, carefully scrape away the excess paint before sanding and reapplying. Make sure to blend the touch-up into the surrounding paint for a seamless finish.
Taking the time to avoid these common mistakes and following proper cleanup procedures will result in a polished, professional-looking kitchen that lasts for years to come.
Long-Term Maintenance of Your Kitchen Walls
After investing time and effort into painting your kitchen, maintaining the fresh look of your walls is essential to prolong their lifespan and keep your kitchen looking its best.
How to Keep Your Kitchen Walls Clean and Fresh
Kitchen walls are exposed to grease, food splatters, and daily wear and tear, making regular cleaning important. To keep your kitchen walls looking fresh, clean them with a soft sponge or microfiber cloth and a mild detergent mixed with warm water. Avoid abrasive cleaners that can strip the paint’s finish. Regularly wiping down walls in high-traffic areas, especially near the stove and countertops, will prevent the buildup of grease and grime.
Spot Cleaning Without Damaging the Paint Finish
For small stains or splatters, spot cleaning is often enough to restore the walls. Dampen a cloth with soapy water and gently blot the stained area. If you’re working with a semi-gloss or satin finish, you can use a bit more pressure without worrying about damaging the paint. However, for flat or matte finishes, be more gentle to avoid leaving shiny spots. Always test in an inconspicuous area first to ensure the paint won’t be affected.
When to Repaint for a Fresh Look
Even with regular cleaning, kitchen walls will eventually show signs of wear. Scuffs, fading, or areas that have been cleaned too often can dull the appearance. As a rule of thumb, kitchens typically need repainting every 3-5 years, depending on the quality of the original paint job and the amount of use the kitchen gets. If you’re noticing that cleaning doesn’t seem to restore the original vibrancy or if stains become more noticeable, it’s time to consider a fresh coat.
Conclusion: Transforming Your Kitchen with the Right Paint Job
Painting your kitchen can dramatically transform its appearance, making the space more inviting, functional, and stylish. The key to a successful kitchen painting project lies in choosing the right type of paint for the unique environment, such as moisture-resistant latex and a durable semi-gloss or satin finish. Proper preparation—including cleaning, sanding, and priming—is crucial for ensuring that the paint adheres well and lasts for years.
Avoiding common mistakes like skipping primer, choosing the wrong finish, or failing to clean properly will save time and ensure a professional-looking result. With careful planning and execution, your kitchen will not only look beautiful but will also withstand the daily demands of cooking and cleaning.
Now that you’re equipped with the knowledge of how to properly paint and maintain your kitchen, it’s time to take action! Gather your tools, choose your colors, and start your kitchen painting project with confidence. A fresh coat of paint can breathe new life into one of the most important rooms in your home.
FAQs
- What type of paint finish is best for a high-traffic kitchen?
The best paint finishes for a high-traffic kitchen are semi-gloss and satin. These finishes are durable, moisture-resistant, and easy to clean, making them perfect for a space that frequently deals with grease, spills, and regular scrubbing. Semi-gloss offers a slightly shinier finish, while satin provides a more subtle sheen, but both are great at withstanding the wear and tear of a busy kitchen. - Do I need to use a special primer for kitchen walls?
Yes, using a primer designed for kitchens or high-moisture areas is highly recommended. Kitchen walls often accumulate grease, stains, and moisture, which can prevent the paint from adhering properly. A good primer helps seal the surface, blocks stains, and creates a smooth base for the paint to stick to, ensuring a longer-lasting, professional finish. - How do I choose a color that makes my kitchen feel bigger?
To make a small kitchen feel bigger, opt for light, neutral colors like white, pale gray, or soft beige. These colors reflect light, making the space appear more open and airy. If you want to add a pop of color, consider light pastels or cool tones, like pale blue or green, which can also create an expansive feel. Avoid dark or overly bold colors, which can make the room feel more enclosed. - What’s the best way to clean kitchen walls before painting?
Before painting kitchen walls, clean them thoroughly to remove grease, dust, and stains. Use a mild detergent or a mixture of water and vinegar to wipe down the walls. Pay extra attention to areas around the stove and sink where grease buildup is most common. For particularly greasy spots, use a degreaser. After cleaning, allow the walls to dry completely before proceeding with priming or painting. - Can I paint my kitchen cabinets without removing them?
Yes, you can paint kitchen cabinets without removing them, but it’s a bit more challenging. If you leave the cabinets in place, be sure to carefully mask off surrounding areas, such as countertops, appliances, and flooring, with painter’s tape and plastic sheeting. It’s also important to remove or tape over hinges, knobs, and handles. While painting cabinets without removing them is possible, removing the doors and hardware allows for better access and a smoother finish.