Importance of Surface Preparation Before Painting
Surface preparation is the critical first step in any painting project. It involves getting the surface ready to ensure that the paint adheres properly and lasts as long as possible. Proper surface preparation can make the difference between a professional-looking finish and one that looks sloppy or fails prematurely. Skipping or rushing this step can lead to several issues, such as peeling paint, uneven coverage, and poor durability.
A well-prepared surface ensures that the paint bonds securely, providing a smooth, even finish. Whether you are working with drywall, wood, or concrete, thorough preparation is key to achieving the best results. Proper surface prep also minimizes the risk of imperfections, such as cracks or bumps, showing through the final coat of paint.
Common Mistakes in Surface Preparation
One of the most common mistakes in surface preparation is underestimating its importance. Many people believe that a quick wipe-down is sufficient, but this approach often leads to poor results. Below are some frequent errors and their potential consequences:
- Skipping Cleaning: Failing to clean the surface before painting can result in paint not adhering properly. Dust, grease, and dirt act as barriers between the paint and the surface, leading to peeling and flaking over time.
- Insufficient Sanding: Sanding is crucial for creating a smooth surface that paint can grip onto. If sanding is neglected or done improperly, the surface may be too rough, or old paint layers can cause an uneven texture, leading to a patchy finish.
- Ignoring Repairs: Small cracks, holes, or dents might seem insignificant, but they become more noticeable after painting. Ignoring these imperfections can result in a less polished appearance and may even cause structural issues down the line.
- Incorrect Priming: Using the wrong type of primer or skipping priming altogether can prevent paint from adhering evenly, especially on porous or previously painted surfaces. Priming also helps to block stains and seal the surface.
Essential Tools for Surface Preparation
Scrapers and Putty Knives
Types of Scrapers and Their Specific Uses
Scrapers are essential tools for removing old paint, wallpaper, or other debris from surfaces before painting. There are various types of scrapers, each designed for specific tasks:
- Flat Scrapers: Ideal for removing old paint or smoothing out surfaces.
- Contour Scrapers: Best for reaching into crevices or working on decorative surfaces with intricate designs.
- Razor Scrapers: Used for precision work, such as removing paint splatters on glass or tight corners.
Proper Technique for Using Putty Knives
Putty knives are versatile tools used for applying and smoothing filler, such as spackle or joint compound, into holes, cracks, or dents. Here’s how to use them effectively:
- Choose the Right Width: Narrow putty knives (1-2 inches) are ideal for small repairs, while wider knives (4-6 inches) work better for larger areas.
- Load the Knife Properly: Apply a small amount of filler to the edge of the knife and spread it over the repair area with even pressure.
- Smooth the Surface: Use the knife to smooth out the filler, wiping off excess material to ensure a flat, even finish.
Sanding Tools
Overview of Sanding Blocks, Sponges, and Electric Sanders
Sanding tools are crucial for creating a smooth surface that paint can adhere to. Different types of sanding tools are suited to various tasks:
- Sanding Blocks: These are simple, hand-held blocks that allow for precise control over the sanding process, ideal for small areas.
- Sanding Sponges: Flexible and easy to grip, sanding sponges can be used on flat surfaces and curves, making them versatile for different surfaces.
- Electric Sanders: For large surfaces, electric sanders (orbital, palm, or belt sanders) speed up the process and ensure an even finish.
Choosing the Right Grit for Your Surface
Selecting the correct grit of sandpaper is essential for achieving the desired smoothness:
- Coarse Grit (40-60): Suitable for removing old paint or heavy sanding.
- Medium Grit (80-120): Used for smoothing rough surfaces and minor imperfections.
- Fine Grit (150-220): Best for final sanding before applying primer or paint.
Cleaning Tools
Types of Cleaning Tools (Sponges, Cloths, Vacuums)
Cleaning is a critical step in surface preparation. Different tools are used for cleaning depending on the type and condition of the surface:
- Sponges: Used for wiping down surfaces with water or cleaning solutions, ideal for removing dust and dirt.
- Cloths: Microfiber cloths are excellent for picking up fine dust and debris.
- Vacuums: A vacuum cleaner with a brush attachment can be used to remove loose particles, especially after sanding.
Importance of Cleaning Before Painting
Proper cleaning ensures that the surface is free of dust, grease, and other contaminants that could prevent the paint from adhering properly. This step is essential to avoid issues like peeling or flaking paint.
Repair Tools
Tools for Repairing Holes, Cracks, and Dents
Before painting, it’s important to repair any imperfections in the surface. Common tools for this task include:
- Spackle Knives: Used to apply spackle or joint compound to fill small holes or cracks.
- Patch Kits: These kits often include a mesh or metal patch along with a filler material for larger holes.
- Caulking Guns: Used to apply caulk to seal gaps and cracks in surfaces like baseboards or trim.
Priming Tools
Brushes, Rollers, and Sprayers for Applying Primer
Priming is an essential step that helps paint adhere better and last longer. The tools used to apply primer can vary based on the surface and the primer type:
- Brushes: Ideal for small areas, edges, and corners where precision is required.
- Rollers: Best for covering large, flat surfaces quickly and evenly.
- Sprayers: Provide a smooth, even coat and are particularly useful for intricate surfaces or large areas.
Choosing the Right Primer Application Tool
- For Smooth Surfaces: Use a high-density foam roller or a sprayer for a uniform finish.
- For Textured Surfaces: A thicker nap roller or a brush with stiff bristles helps ensure complete coverage.
- For Hard-to-Reach Areas: A paint sprayer can deliver primer evenly in tight spots.
Tool Selection Guide Based on Surface Type
Tools for Preparing Drywall
Specific Tools and Tips for Drywall Preparation
Drywall is a common surface in many homes and requires careful preparation to ensure a smooth, flawless finish. Here are the essential tools and tips for preparing drywall:
- Drywall Knife: A broad knife (6-12 inches) is ideal for applying joint compound smoothly over seams and nails. It’s also useful for skimming the entire surface if needed.
- Sanding Block or Sponge: After applying joint compound, use a sanding block or sponge to smooth out any ridges or imperfections. A sanding sponge is particularly effective for corners and edges.
- Vacuum with a Brush Attachment: Use a vacuum to remove all the dust after sanding to ensure the surface is clean and ready for priming.
- Primer and Roller/Brush: Drywall tends to absorb paint unevenly, so applying a primer with a roller or brush is crucial to create a uniform surface before painting.
Tips:
- Always inspect the drywall for any dents, nail pops, or seams that need attention before you begin.
- When sanding, be gentle to avoid damaging the drywall surface.
- Use a primer specifically designed for drywall to seal the surface effectively.
Tools for Preparing Wood Surfaces
How to Prep Wood for Painting or Staining
Wood surfaces require specific tools and techniques to ensure they are ready for painting or staining. Proper preparation helps the finish adhere better and look more professional.
- Orbital Sander or Sanding Block: Sand the wood surface to smooth out any rough spots or old finishes. Start with a medium grit (80-120) and finish with a fine grit (150-220) to create a smooth surface.
- Wood Filler and Putty Knife: Fill any cracks, holes, or imperfections in the wood with a wood filler. Use a putty knife to apply it smoothly and level it with the surrounding surface.
- Tack Cloth: After sanding, use a tack cloth to remove all dust from the wood surface, ensuring a clean area ready for priming or staining.
- Primer or Conditioner: Depending on whether you’re painting or staining, apply a primer or wood conditioner to the surface. Use a brush or sprayer to ensure even coverage.
Tips:
- Always sand with the grain of the wood to avoid scratches.
- If staining, ensure the wood is clean and free of dust, as this can affect the stain’s absorption.
- Use a wood conditioner before staining to prevent blotchy results, especially on softwoods like pine.
Tools for Preparing Concrete Surfaces
Best Practices for Prepping Concrete Surfaces
Concrete surfaces are porous and often require more preparation than other materials to ensure paint or coatings adhere properly. Here are the tools and best practices for preparing concrete:
- Wire Brush or Grinder: Use a wire brush or a concrete grinder to remove any loose paint, dirt, or debris from the surface. This step is crucial for ensuring the new paint or coating adheres well.
- Pressure Washer: Clean the concrete surface thoroughly using a pressure washer to remove dirt, grime, and any chemical residues. Allow the surface to dry completely before proceeding.
- Concrete Patch Kit: Repair any cracks, holes, or imperfections using a concrete patch kit. Apply the patching material with a trowel and smooth it out for a level surface.
- Concrete Etcher or Acid Wash: If the concrete is smooth, consider using a concrete etcher or acid wash to roughen the surface slightly. This helps the paint or coating adhere better.
- Concrete Primer: Before applying any paint or coating, use a primer specifically designed for concrete surfaces. Apply it evenly with a roller or sprayer.
Tips:
- Ensure the concrete is completely dry before applying primer or paint to prevent moisture-related issues.
- For outdoor concrete surfaces, choose weather-resistant primers and paints.
- Always wear protective gear, especially when working with concrete etchers or acid washes.
Step-by-Step Guide to Using Surface Prep Tools
Scraping Off Old Paint or Wallpaper
Step-by-Step Instructions with Common Pitfalls to Avoid
Removing old paint or wallpaper is an essential part of surface preparation. Here’s a step-by-step guide to ensure you do it correctly:
- Gather the Right Tools:
- Tools Needed: Scraper, putty knife, wallpaper steamer (for wallpaper), drop cloth, and protective gear (gloves, goggles).
- Protect the Area:
- Lay Down Drop Cloths: Cover the floor and any furniture to protect them from debris.
- Turn Off Power: If working near electrical outlets, turn off the power to avoid accidents.
- Begin Scraping:
- For Old Paint: Hold the scraper at a 30-degree angle to the surface and gently push to lift the paint. Start from the edges and work your way inwards.
- For Wallpaper: Use a wallpaper steamer to loosen the adhesive. Start at a corner and gently peel away the wallpaper with a putty knife.
- Address Stubborn Spots:
- For Paint: If some areas are particularly stubborn, apply a chemical paint remover, following the manufacturer’s instructions, and then scrape again.
- For Wallpaper: For resistant wallpaper, use a scoring tool to perforate the surface, allowing the steam to penetrate better.
- Clean Up:
- Remove Debris: Collect and dispose of all scraped-off paint or wallpaper. Wipe down the surface to remove any residue.
Common Pitfalls to Avoid:
- Applying Too Much Pressure: Scraping too hard can damage the underlying surface, leading to more repair work later.
- Skipping Protection: Failing to protect surrounding areas can result in a mess that is difficult to clean up.
- Ignoring Adhesive Residue: After removing wallpaper, ensure all adhesive residue is cleaned off, as it can interfere with paint adhesion.
Sanding the Surface Smooth
Detailed Sanding Techniques for Different Surfaces
Sanding is crucial for creating a smooth, even surface that paint can adhere to. Here’s how to sand different surfaces effectively:
- Choose the Right Sandpaper:
- Drywall: Use fine-grit sandpaper (150-220) to smooth out joint compound and remove any imperfections.
- Wood: Start with medium-grit sandpaper (80-120) for rough surfaces, then finish with fine-grit (150-220) to prepare for painting or staining.
- Concrete: For concrete, use coarse-grit sandpaper (40-60) with an orbital sander to remove any rough patches, followed by a finer grit if needed.
- Start Sanding:
- Drywall: Use a sanding block or sponge to gently smooth the surface, paying attention to seams and joints. Move in a circular or back-and-forth motion.
- Wood: Sand along the grain of the wood to avoid scratches. For larger areas, consider using an orbital sander for a more even finish.
- Concrete: Sand in a consistent pattern, applying even pressure. For large areas, a concrete grinder may be necessary.
- Check Your Work:
- Feel the Surface: Run your hand over the sanded area to check for smoothness. Any rough patches should be addressed with additional sanding.
- Visual Inspection: Use a light to highlight any imperfections that may need more attention.
- Clean the Surface:
- Remove Dust: After sanding, use a vacuum with a brush attachment or a tack cloth to remove all dust and debris from the surface. This step is crucial for ensuring paint adhesion.
Common Pitfalls to Avoid:
- Skipping Grits: Skipping from a coarse to a fine grit without intermediate sanding can leave visible scratches.
- Over-Sanding: Sanding too much can thin out drywall or wood, causing dips or exposing joints.
- Not Cleaning After Sanding: Failing to remove sanding dust can cause paint to adhere poorly, leading to a rough finish.
Cleaning and Repairing the Surface
How to Effectively Clean and Repair Surfaces for Painting
Proper cleaning and repair are essential before applying paint. Here’s how to do it right:
- Initial Cleaning:
- Tools Needed: Vacuum, microfiber cloth, mild detergent, sponge.
- Procedure: Start by vacuuming the surface to remove loose dust and debris. Then, use a sponge and mild detergent solution to wash the surface, removing grease, grime, and dirt. Rinse with clean water and allow to dry completely.
- Inspect for Damage:
- Look for Imperfections: Check the surface for any holes, cracks, or dents that need repair.
- Mark Areas Needing Repair: Use a pencil to lightly mark areas that require attention.
- Repairing Imperfections:
- Small Holes and Cracks: Fill small holes and cracks with spackle or joint compound using a putty knife. Smooth it out and let it dry completely.
- Larger Damage: For larger holes, use a patch kit, applying the patch material and then covering it with joint compound or spackle. Smooth it out with a putty knife and sand once dry.
- Final Cleaning:
- Dust Removal: After repairs, lightly sand the patched areas to ensure smoothness. Wipe down the entire surface again with a tack cloth to remove any remaining dust.
Common Pitfalls to Avoid:
- Rushing Repairs: Failing to let spackle or joint compound dry completely before sanding or painting can lead to cracking or uneven surfaces.
- Using the Wrong Cleaner: Avoid harsh chemicals that can leave residues and interfere with paint adhesion.
- Overlooking Small Imperfections: Even tiny holes or cracks can become more noticeable after painting, so take the time to repair everything properly.
This step-by-step guide ensures that you use the right techniques and tools for each aspect of surface preparation, resulting in a smooth, professional finish.
Pro Tips for Efficient Surface Preparation
Time-Saving Tips for Surface Prep
How to Prep Surfaces Quickly Without Compromising Quality
Surface preparation is a time-intensive task, but with the right approach, you can save time without sacrificing quality. Here are some pro tips to streamline the process:
- Plan and Gather Tools in Advance:
- Preparation: Before starting, ensure you have all the necessary tools and materials ready. This prevents interruptions and keeps you focused.
- Organize Your Workspace: Arrange your tools in the order you’ll use them. This simple step can significantly reduce downtime.
- Use Multi-Functional Tools:
- Efficiency: Invest in tools that can perform multiple tasks, such as a multi-purpose scraper that also works as a putty knife. This reduces the need to switch tools frequently.
- Electric Sanding Tools: For large surfaces, an electric sander is faster and more efficient than sanding by hand. Choose a model that allows for quick grit changes.
- Work in Sections:
- Break Down the Project: Instead of tackling the entire surface at once, divide it into manageable sections. This helps maintain focus and ensures that each area is prepped thoroughly.
- Parallel Tasks: While waiting for one section to dry (e.g., after cleaning or applying filler), move on to prepping another section. This minimizes idle time.
- Use Quick-Drying Products:
- Fast-Drying Fillers and Primers: Opt for products labeled as “quick-drying” or “fast-cure.” These can significantly reduce waiting times between steps.
- Heat Guns: For stubborn paint or wallpaper removal, using a heat gun can speed up the process, softening materials for easier scraping.
- Prioritize Critical Areas:
- Focus on High-Traffic Zones: Spend extra time prepping areas that are more likely to be noticed or are subject to wear and tear, such as trim and corners.
- Skim Less Critical Areas: In less visible areas, a lighter touch may be sufficient, saving you time while still achieving a good result.
Tool Maintenance for Longevity
Tips on How to Maintain Your Tools for Extended Use
Proper maintenance of your surface preparation tools not only extends their lifespan but also ensures they perform efficiently on every project. Here’s how to keep them in top shape:
- Clean Tools After Each Use:
- Scrapers and Putty Knives: Wipe off any residual paint, filler, or adhesive immediately after use. For stubborn residue, soak the tools in warm soapy water and scrub with a brush.
- Sanding Tools: Tap out sanding blocks or sponges to remove excess dust. Clean electric sanders with compressed air to keep the motor and vents clear of debris.
- Store Tools Properly:
- Avoid Rust: Dry metal tools thoroughly before storing them to prevent rust. Consider applying a light coat of oil to scrapers and putty knives to protect them.
- Organize by Type: Store tools in a dry, organized space where they won’t be damaged. Use toolboxes or hanging racks to keep everything easily accessible.
- Regularly Inspect and Replace Worn Parts:
- Blades and Sandpaper: Replace dull scraper blades and worn-out sandpaper regularly. Dull tools not only make the job harder but can also damage surfaces.
- Check Electrical Cords: For electric tools, regularly inspect cords and plugs for wear or damage. Replace them as needed to ensure safety.
- Sharpen Tools as Needed:
- Scrapers and Putty Knives: Keep blades sharp to maintain effectiveness. A dull edge can cause unnecessary strain and produce uneven results.
- Sandpaper: Use the right grit and replace when it becomes smooth or clogged to maintain sanding efficiency.
- Invest in Quality Products:
- Quality Over Quantity: Higher-quality tools often last longer and perform better, making them a better investment in the long run. Consider brands known for durability and reliability.
Conclusion
Recap of Essential Tools
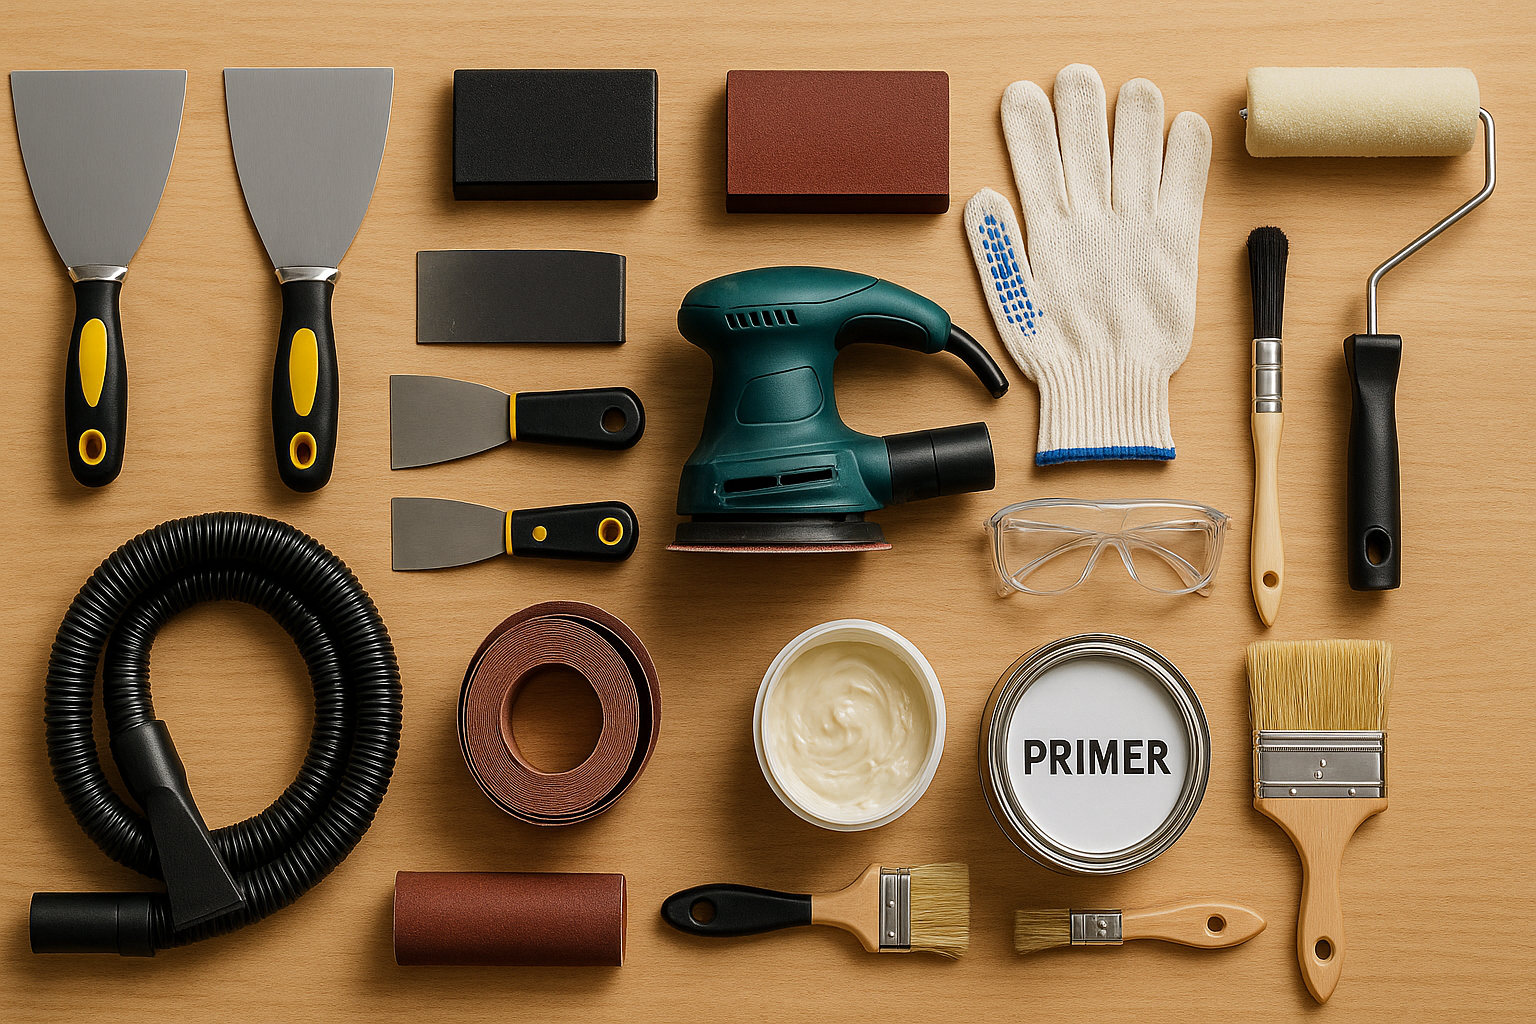
In preparing any surface for painting, a range of tools is essential to ensure a professional finish:
- Scrapers and Putty Knives: For removing old paint, wallpaper, and applying filler.
- Sanding Tools: From sanding blocks to electric sanders, these tools smooth out surfaces for optimal paint adhesion.
- Cleaning Tools: Sponges, vacuums, and tack cloths ensure a clean, debris-free surface.
- Repair Tools: For fixing holes, cracks, and dents before painting.
- Priming Tools: Brushes, rollers, and sprayers to apply primer evenly across different surfaces.
Final Tips for Surface Preparation Success
To achieve the best results in surface preparation, remember these final tips:
- Take Your Time: Rushing through surface prep often leads to mistakes that are visible after painting. Invest time upfront for a better finish.
- Follow the Right Order: Start with scraping, then move to sanding, cleaning, repairing, and priming. This sequence ensures each step builds on the last.
- Use the Right Tools: Each surface requires specific tools and techniques. Choose the correct ones to make the job easier and more effective.
- Keep Your Tools in Good Condition: Well-maintained tools perform better and last longer, saving you time and money in the long run.
- Stay Organized: Keep your workspace tidy and tools organized. This minimizes errors and makes the entire process more efficient.
With the right approach, surface preparation doesn’t have to be a chore. By following these tips and using the proper tools, you’ll be well on your way to achieving a flawless, professional-looking finish every time.
FAQs
What is the best tool for sanding large surfaces?
For sanding large surfaces, an orbital sander is the best tool. It covers a wide area quickly and provides a smooth, even finish. Orbital sanders are versatile and easy to use, making them ideal for prepping large walls, floors, or other extensive surfaces. For exceptionally large areas, such as entire rooms or outdoor projects, a belt sander may also be considered, but it requires more skill to avoid gouging the surface.
Can I skip priming if the surface is clean?
Even if a surface is clean, skipping priming is not recommended. Primer plays a crucial role in ensuring that paint adheres properly and lasts longer. It also seals porous surfaces, prevents stains from bleeding through, and helps create a uniform base for the topcoat. Skipping primer can lead to uneven paint coverage, peeling, and a less durable finish.
What’s the difference between putty knives and scrapers?
Putty knives and scrapers are similar but serve different purposes:
- Putty Knives: Primarily used for applying and smoothing fillers like spackle or joint compound. They have a flexible blade that allows for precise application and a smooth finish.
- Scrapers: Designed to remove materials such as old paint, wallpaper, or adhesive from surfaces. Scrapers have a stiffer blade compared to putty knives, which is better suited for scraping off debris.
How do I know if I’ve sanded enough?
You can tell you’ve sanded enough when the surface is smooth to the touch and free of any bumps, ridges, or rough patches. After sanding, run your hand over the surface to check for smoothness. Visually inspect the area under good lighting to ensure there are no visible imperfections. Additionally, the surface should have a consistent, even appearance without shiny spots, which indicates it is ready for priming or painting.
Which cleaning tools are best for removing grease from surfaces?
To remove grease from surfaces, the best cleaning tools are:
- Degreaser Spray and Sponge: Apply a degreaser spray specifically formulated for grease removal and use a sponge to scrub the surface.
- Microfiber Cloths: After scrubbing, use a microfiber cloth to wipe away the grease and cleaning solution. Microfiber is excellent at picking up residue and leaving the surface clean.
- Vinegar Solution: For a natural alternative, a solution of vinegar and water can help break down grease. Apply with a spray bottle and wipe with a cloth.
Using these tools ensures that the surface is free from grease, which is essential for proper paint adhesion.