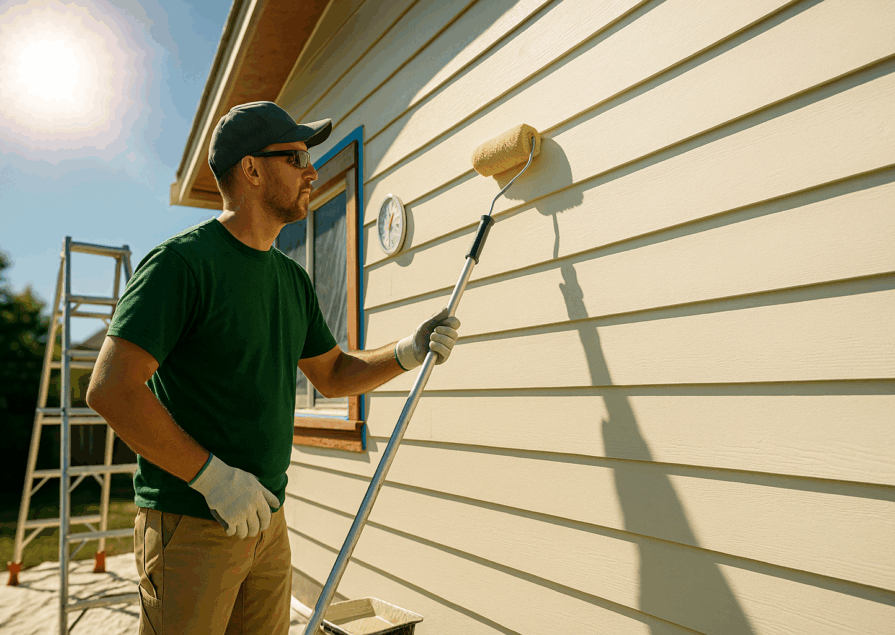
When it comes to painting, many people are eager to jump straight to the fun part: rolling on that fresh coat of colour. But here’s the scoop: the secret to a flawless paint job lies in the prep work. Yep, surface preparation is the unsung hero of the painting process. It’s like baking a cake—you wouldn’t skip out on preheating the oven or greasing the pan, right? The same goes for painting. Without proper prep, your paint job could end up looking like a hot mess. Let’s dive into why surface prep is crucial and how it can make or break your project.
Understanding Surface Preparation
What is Surface Preparation?
Surface preparation is the process of cleaning, repairing, and priming a surface before applying paint. It’s all about creating a smooth, clean canvas so the paint can adhere properly and last longer. Think of it as laying the groundwork for success.
Proper surface prep involves several key steps:
- Cleaning: Removing dirt, grease, and other contaminants.
- Repairing: Fixing any damages like cracks or holes.
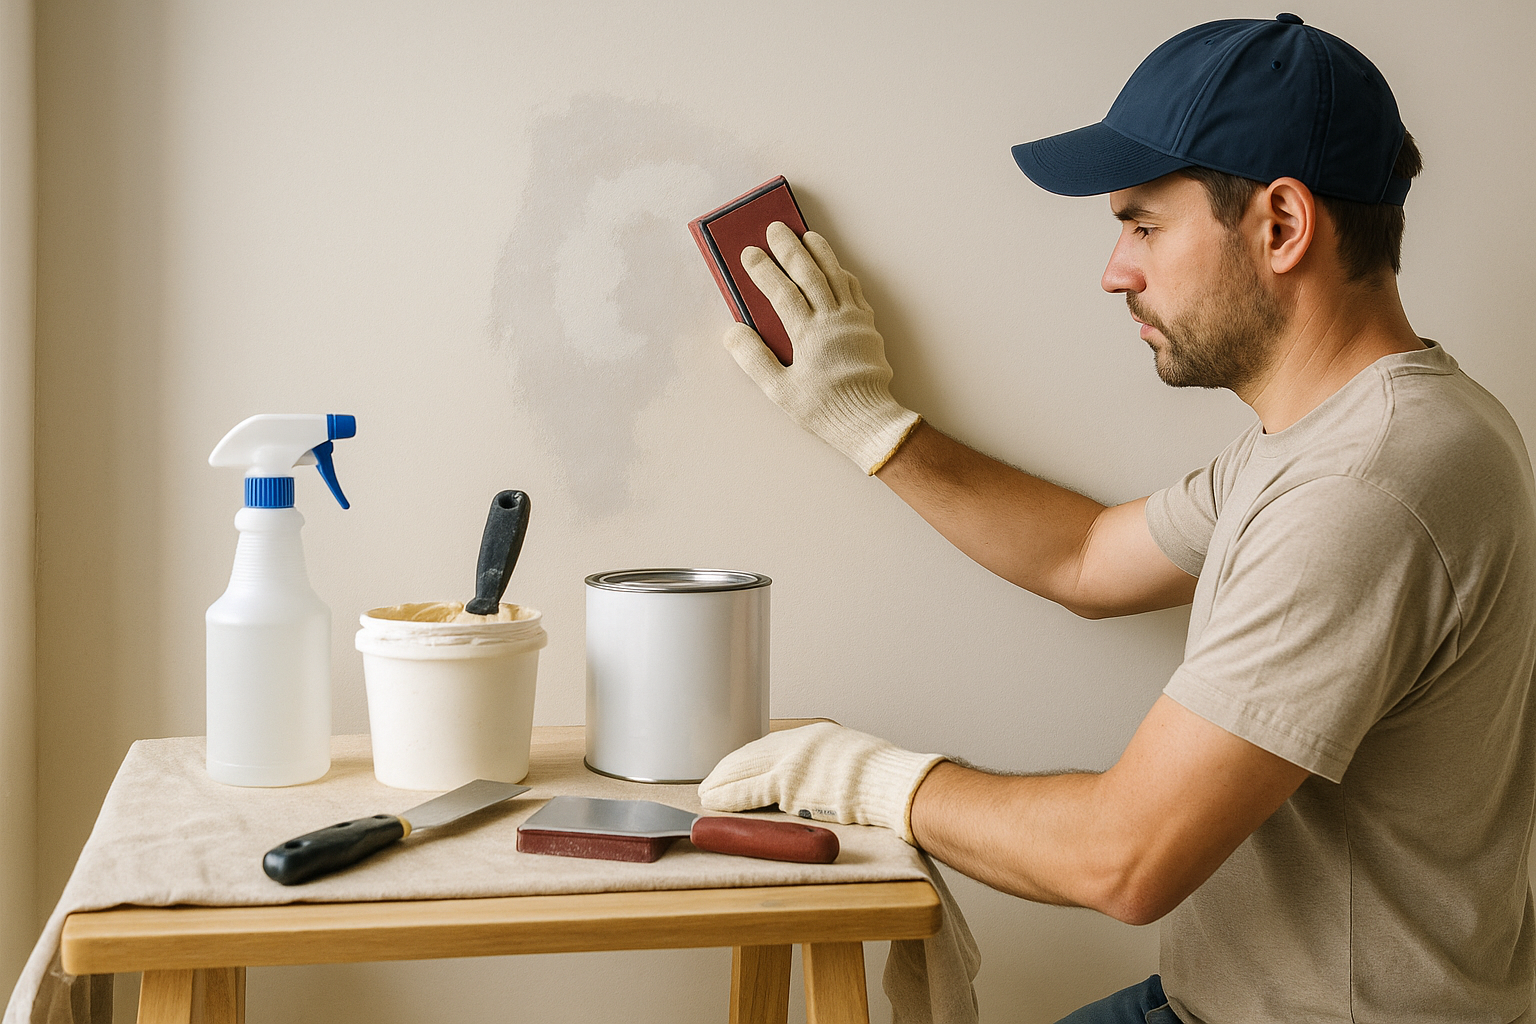
- Sanding: Smoothing out rough areas for a flawless finish.
- Priming: Applying a base coat to ensure better paint adhesion.
The Role of Surface Preparation in Painting
Surface preparation isn’t just about making your walls look pretty; it’s about ensuring your paint job stands the test of time. A well-prepared surface can prevent common paint problems like peeling, cracking, and bubbling. These issues often arise when paint doesn’t adhere properly due to a dirty or uneven surface.
Key Takeaway: Skipping surface prep is like building a house on a shaky foundation—it’s bound to fail sooner or later. By investing time in proper prep, you’re setting yourself up for success and saving yourself from costly repairs down the road.
Now that we understand what surface prep is and why it’s important, let’s move on to the benefits of proper surface prep. This next section will show you exactly how thorough prep work can transform your painting project.
Benefits of Proper Surface Prep
Enhanced Paint Adhesion
One of the biggest benefits of proper surface preparation is enhanced paint adhesion. When a surface is clean, smooth, and primed, paint sticks better and forms a stronger bond. This means your paint job will look more uniform and professional, with fewer streaks and brush marks.
Example: Imagine painting a dusty wall without cleaning it first. The dust particles will prevent the paint from sticking properly, leading to an uneven finish. But if you take the time to clean and prime the wall, the paint will adhere seamlessly, giving you a smooth, flawless look.
Data Insight: According to a study by the Paint Quality Institute, surfaces that are properly prepped before painting can have up to 60% better adhesion than those that aren’t. This highlights the importance of investing time in prep work for long-lasting results.
Bullet Points for Quick Reference:
- Clean surfaces = better paint adhesion.
- Proper prep reduces streaks and brush marks.
- Prepped surfaces can have up to 60% better adhesion.
Longevity of Paint Job
Proper surface prep not only improves paint adhesion but also extends the lifespan of your paint job. When paint adheres well, it’s less likely to peel, crack, or blister over time. This means your walls will stay looking fresh and vibrant for years to come, saving you time and money on frequent touch-ups and repaints.
Key Takeaway: A little effort upfront can save you a lot of hassle and expense in the long run. By properly preparing your surfaces, you’re ensuring that your paint job will stand up to daily wear and tear.
Improved Aesthetic Appeal
Let’s be real—nobody wants a paint job that looks amateurish. Proper surface prep can take your painting project from drab to fab by ensuring a smooth, even finish. When surfaces are clean, repaired, and primed, the paint goes on more smoothly and evenly, resulting in a professional-looking job.
Example: Think about painting a piece of furniture. If you skip the sanding and priming steps, you’ll end up with a rough, uneven finish. But if you take the time to sand and prime, your furniture will look like it just came out of a high-end showroom.
Bullet Points for Quick Reference:
- Proper prep ensures a smooth, even finish.
- Clean, repaired surfaces = professional-looking results.
- Well-prepped surfaces enhance the overall aesthetic appeal.
Now that we’ve covered the benefits of proper surface prep, let’s take a look at some common problems that can arise from poor prep work. Understanding these issues will help you avoid them and achieve the best possible results.
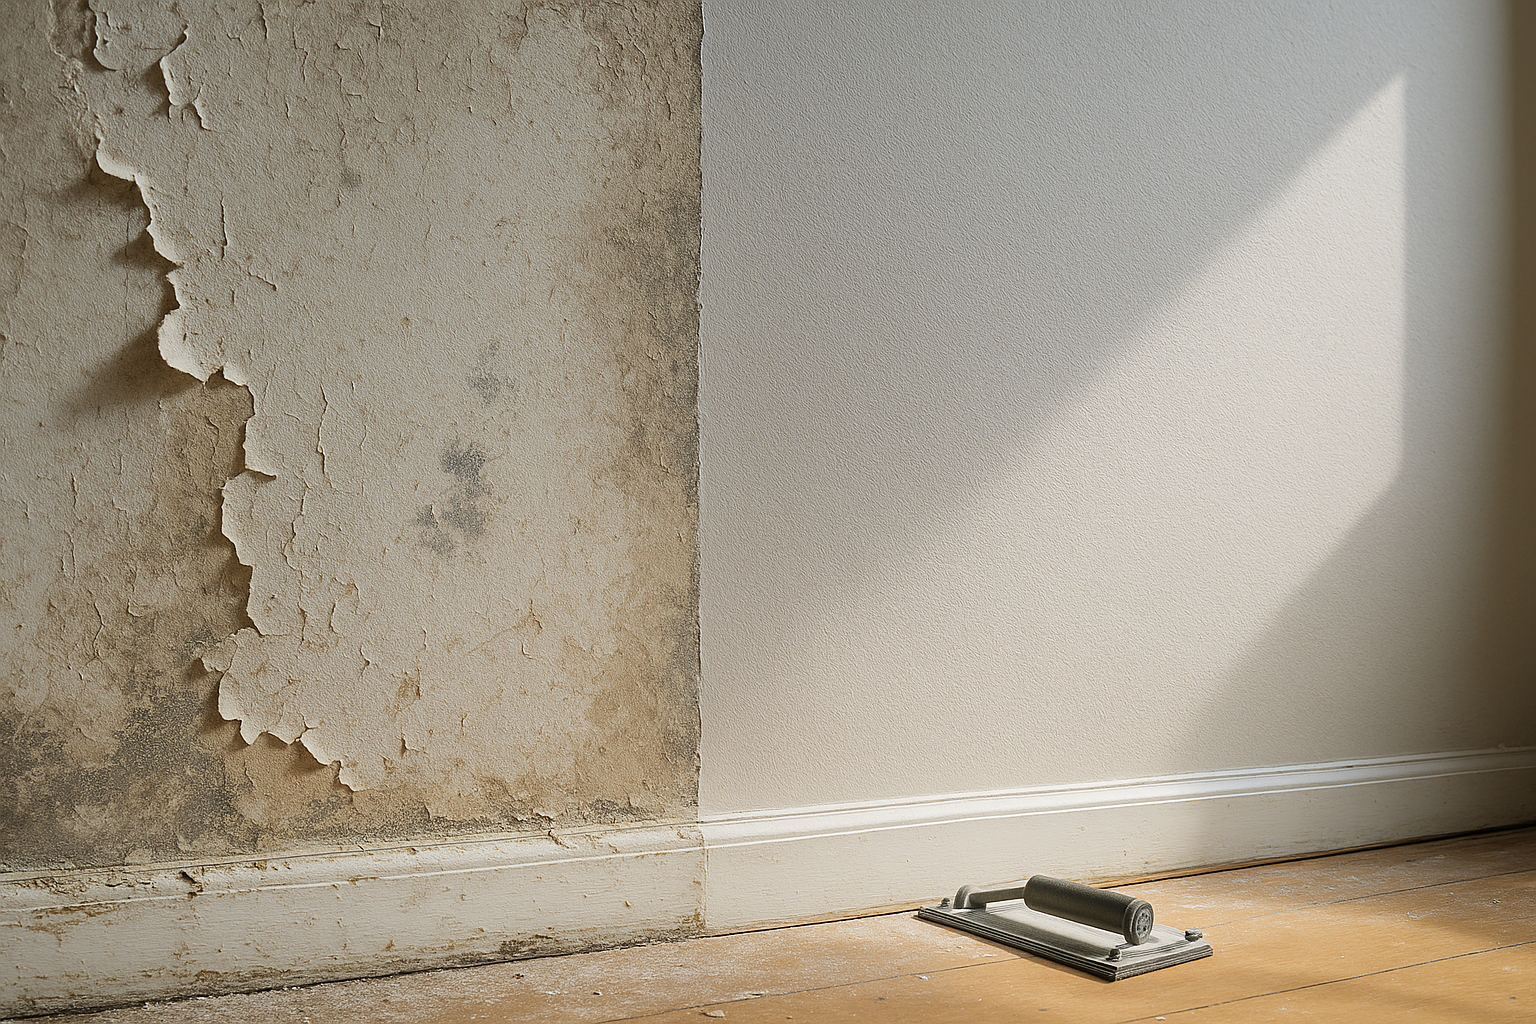
Common Problems Due to Poor Surface Prep
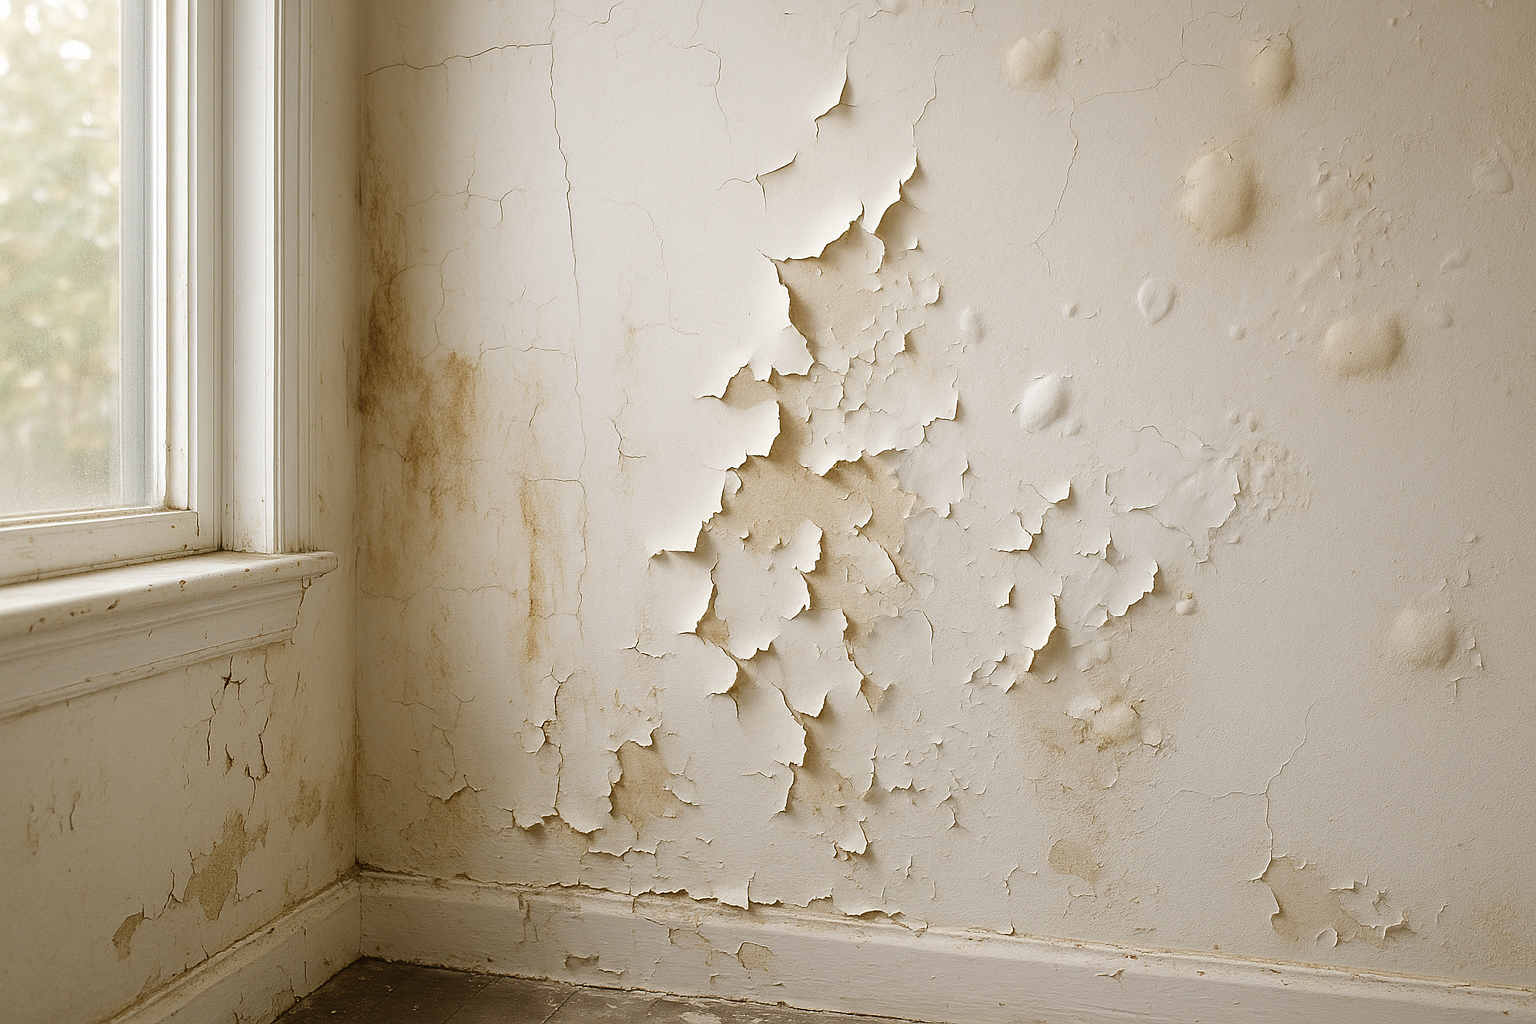
Peeling Paint
Peeling paint is one of the most common problems caused by inadequate surface prep. When paint doesn’t adhere properly, it can start to peel away from the surface, creating an unsightly and messy appearance. This often happens when surfaces are not cleaned thoroughly or when the wrong type of primer is used.
Example: Think about painting over a greasy kitchen wall without cleaning it first. The grease will prevent the paint from sticking, causing it to peel and flake off over time. By taking the time to clean and prime the wall properly, you can avoid this issue and ensure a durable finish.
Bullet Points for Quick Reference:
- Peeling paint is caused by poor adhesion.
- Common culprits: dirty surfaces, incorrect primer.
- Proper cleaning and priming can prevent peeling.
Cracking and Flaking
Another common problem due to poor surface prep is cracking and flaking. When paint is applied to a surface that hasn’t been properly sanded or primed, it can start to crack and flake off. This not only looks bad but can also lead to further damage to the underlying surface.
Example: Imagine painting over a rough, uneven surface without sanding it first. The paint will struggle to adhere, leading to cracks and flakes. By sanding the surface smooth and applying a primer, you can achieve a strong, durable finish that won’t crack or flake.
Bullet Points for Quick Reference:
- Cracking and flaking are caused by poor surface prep.
- Common culprits: rough, uneven surfaces, lack of primer.
- Sanding and priming can prevent cracking and flaking.
Data Insight: According to the Paint Quality Institute, surfaces that are properly sanded and primed before painting are up to 50% less likely to crack or flake. This underscores the importance of thorough prep work for long-lasting results.
Stains and Discoloration
Stains and discolouration are other common issues that can arise from inadequate surface prep. When surfaces are not properly cleaned and primed, stains and other imperfections can bleed through the paint, ruining the finish.
Example: Think about painting over a water-stained ceiling without using a stain-blocking primer. The stain will eventually seep through the paint, creating an unsightly discolouration. By using a stain-blocking primer, you can prevent this issue and ensure a clean, even finish.
Bullet Points for Quick Reference:
- Stains and discolouration are caused by poor surface prep.
- Common culprits: dirty surfaces, lack of stain-blocking primer.
- Proper cleaning and priming can prevent stains and discolouration.
Key Takeaway: Thorough surface prep is essential for achieving a flawless, long-lasting paint job. By cleaning, repairing, sanding, and priming your surfaces properly, you can avoid common paint problems like peeling, cracking, and discolouration.
Now that we’ve covered the common problems caused by poor surface prep, let’s move on to the steps for effective surface preparation. This next section will provide a detailed, step-by-step guide to ensure your surfaces are ready for painting.
Steps for Effective Surface Preparation
Cleaning the Surface
Proper surface preparation starts with cleaning. This step is crucial because dirt, grease, and other contaminants can prevent the paint from adhering properly. Here’s how to do it right:
Materials Needed:
- Mild detergent or TSP (trisodium phosphate)
- Sponge or cloth
- Water
- Bucket
- Cleaning solution (specific to the surface, if needed)
Techniques for Different Surfaces:
- Walls and Ceilings: Mix a solution of mild detergent or TSP with water. Use a sponge or cloth to wipe down the surfaces, removing any dirt, grease, or stains. Rinse with clean water and let it dry completely.
- Wood: Dust the surface with a dry cloth. For stubborn dirt or grease, use a mild detergent solution. Be sure to rinse and dry thoroughly to avoid water damage.
- Metal: Use a degreaser to remove any oil or grease. For rust, use a rust remover. Rinse with water and let it dry.
- Concrete: Sweep the surface to remove loose dirt. Use a concrete cleaner or a mixture of TSP and water for a deeper clean. Rinse thoroughly and let it dry.
Example: Think about prepping a kitchen wall. Kitchens are prone to grease buildup, so cleaning with a strong degreaser is necessary. This step ensures that the paint will adhere well and provide a smooth finish.
Bullet Points for Quick Reference:
- Use appropriate cleaning solutions for different surfaces.
- Always rinse with clean water and let the surface dry.
- Proper cleaning prevents paint from peeling and bubbling.
Repairing Damages
After cleaning, the next step is repairing any damages. This includes fixing cracks, holes, and other imperfections that can ruin the final look of your paint job.
Identifying Common Surface Damages:
- Cracks: Small hairline cracks to larger structural cracks.
- Holes: Nail holes, screw holes, and larger gouges.
- Dents: Indentations caused by impacts or pressure.
Fixing Cracks and Holes:
- Hairline Cracks: Use a spackling compound or a lightweight filler. Apply with a putty knife and smooth it out. Let it dry and sand it smooth.
- Larger Cracks: For bigger cracks, use a patching compound. Apply in layers, allowing each layer to dry before adding the next. Sand smooth after the final layer is dry.
- Small Holes: Fill with spackling compound or filler. Smooth with a putty knife and sand after it dries.
- Large Holes: Use a patch kit. Place the patch over the hole, apply the compound over the patch, smooth it out, and sand when dry.
Example: Imagine repairing a large hole in drywall. First, use a patch kit to cover the hole, then apply joint compound over the patch. Smooth it out and sand it once dry. This ensures the repaired area blends seamlessly with the rest of the wall.
Bullet Points for Quick Reference:
- Identify and repair all cracks, holes, and dents.
- Use appropriate materials for different types of damage.
- Sand repaired areas smooth for a seamless finish.
Key Takeaway: Repairing damages ensures a smooth, even surface for painting. This step is essential for achieving a professional-looking paint job.
Sanding the Surface
Sanding is a critical step in surface preparation. It smooths out rough areas and provides a good surface for the paint to adhere to.
Types of Sandpaper:
- Coarse (40-60 grit): For removing old paint or rough areas.
- Medium (80-120 grit): For general sanding and smoothing.
- Fine (150-180 grit): For final smoothing before painting.
Proper Sanding Techniques:
- Wood Surfaces: Sand in the direction of the grain. Start with medium grit and finish with fine grit.
- Drywall: Use a sanding sponge or sandpaper. Be gentle to avoid damaging the drywall.
- Metal: Use fine grit sandpaper. Sand until the surface is smooth and free of rust.
- Concrete: Use a power sander or a sanding block with coarse grit. Smooth the surface and remove any loose particles.
Example: When sanding a wooden surface, start with 80-grit sandpaper to remove any rough patches. Follow up with 150-grit sandpaper for a smooth finish. This process ensures the paint will adhere well and look professional.
Bullet Points for Quick Reference:
- Use the correct grit sandpaper for the job.
- Sand in the direction of the grain (for wood).
- Always finish with a fine grit for a smooth surface.
Priming the Surface
Priming is the final step in surface preparation. It creates a uniform base for the paint, ensuring better adhesion and a more vibrant finish.
Choosing the Right Primer:
- Latex Primer: Ideal for drywall and softwoods. Dries quickly and is easy to clean up.
- Oil-Based Primer: Best for wood, metal, and surfaces with stains. Provides excellent adhesion and stain-blocking properties.
- Shellac Primer: Excellent for blocking stains and odours. Dries quickly and is great for spot priming.
Application Methods:
- Brush: Good for small areas and edges.
- Roller: Best for large, flat surfaces.
- Sprayer: Ideal for large areas and detailed work. Provides a smooth, even coat.
Example: When priming a metal surface, choose an oil-based primer for best results. Apply with a brush for small areas or a sprayer for larger surfaces. This ensures the paint will adhere properly and provide a durable finish.
Bullet Points for Quick Reference:
- Select the right primer for the surface.
- Use appropriate application methods.
- Ensure the primer is fully dry before painting.
Key Takeaway: Priming is essential for achieving a professional-looking paint job. It enhances paint adhesion and ensures a smooth, vibrant finish.
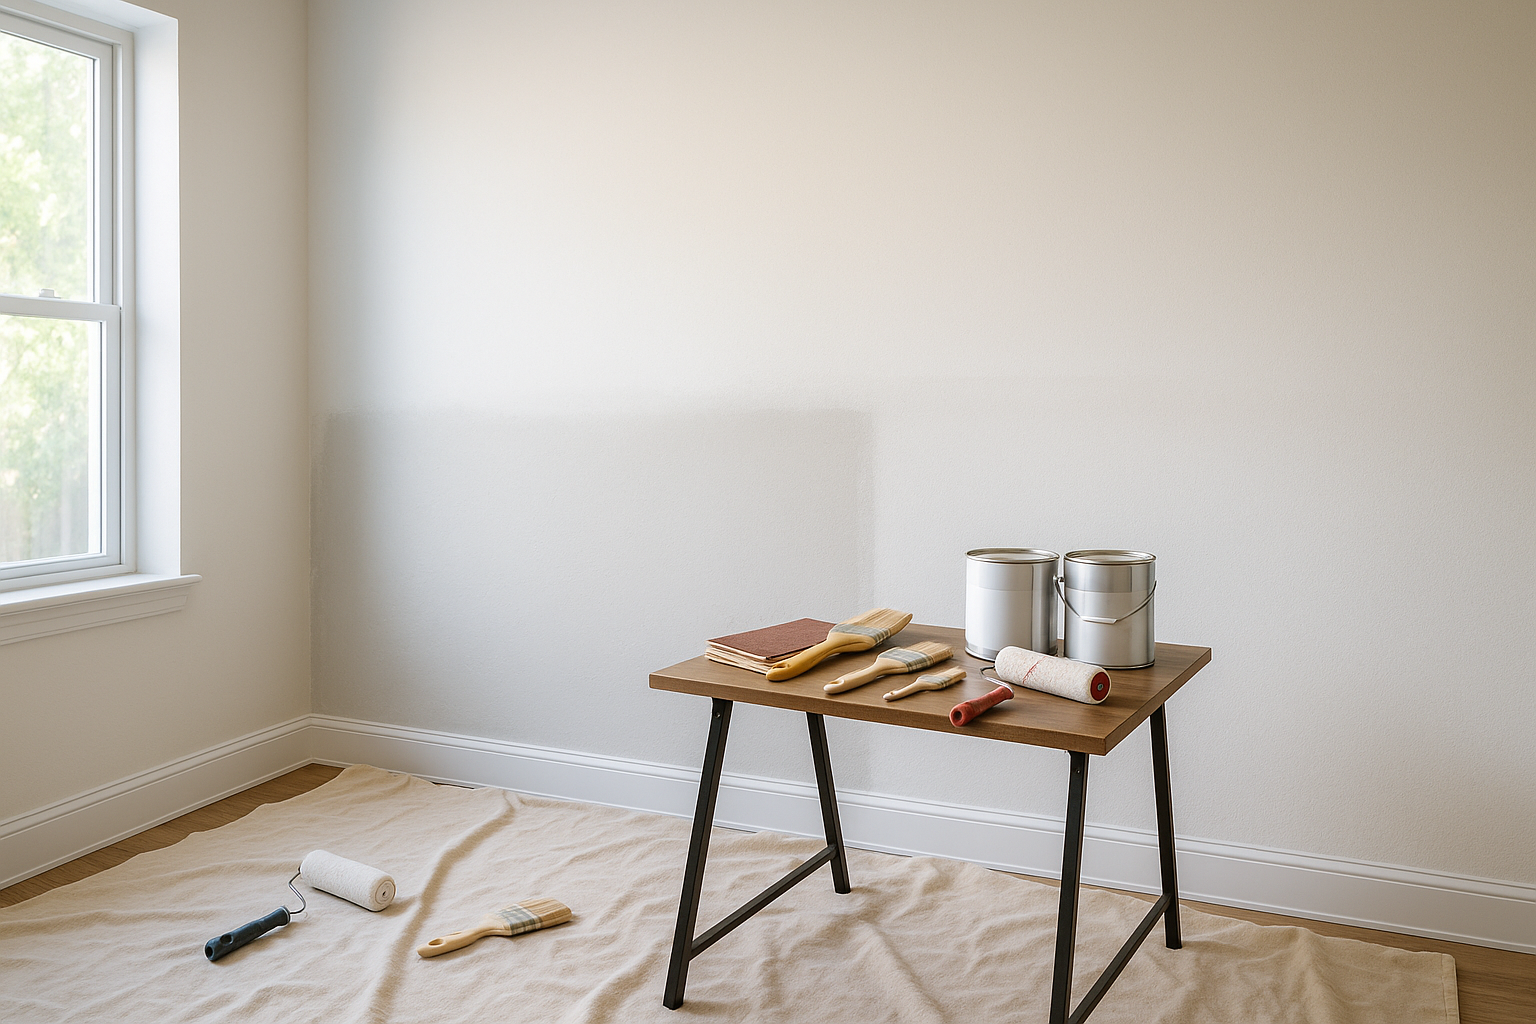
Tools and Materials for Surface Prep
Proper surface preparation requires the right tools and materials. Here’s a rundown of what you’ll need:
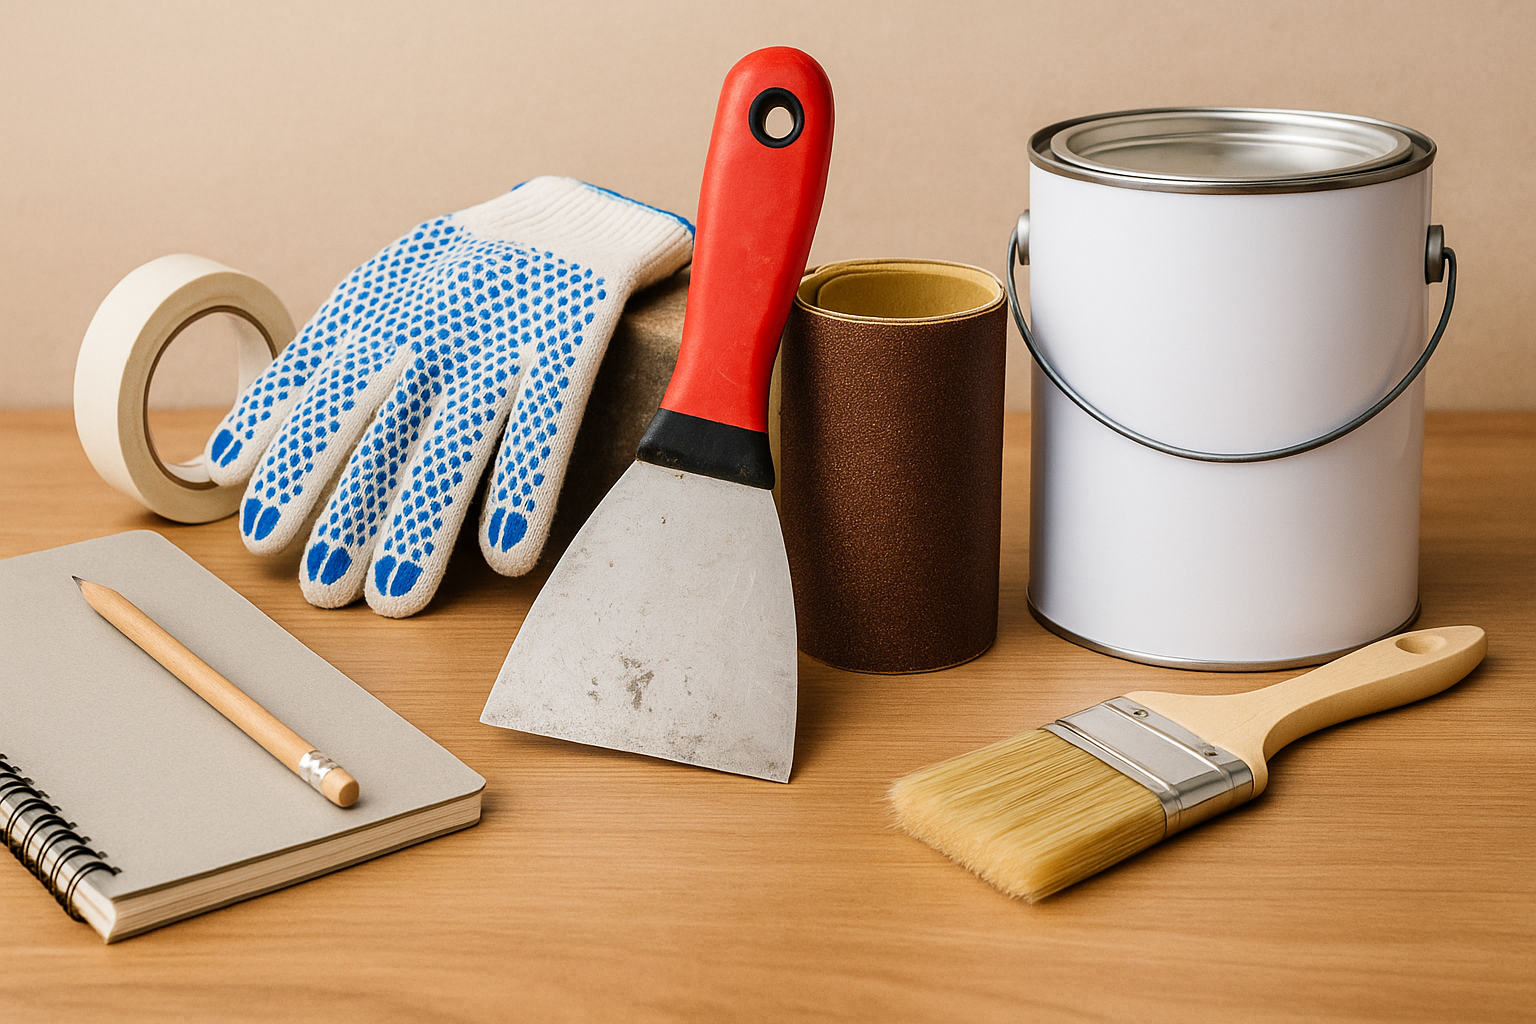
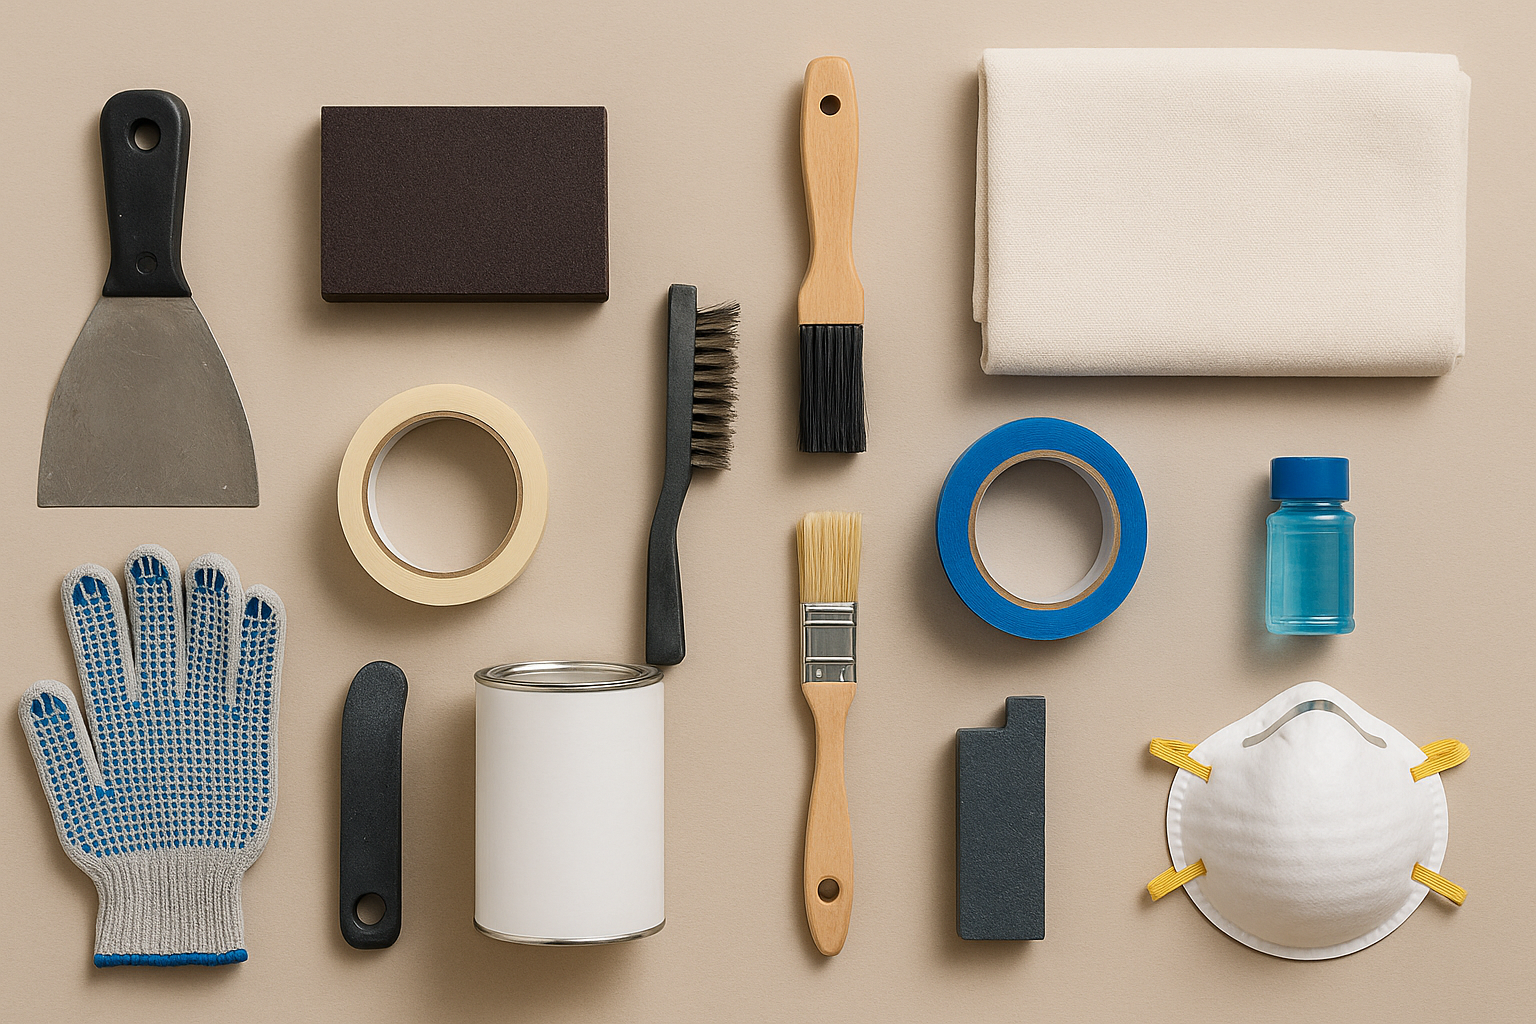
Essential Tools
- Sanding Blocks and Sandpaper: For smoothing surfaces.
- Putty Knives: For applying spackling compound and fillers.
- Scrapers: For removing old paint and debris.
- Cleaning Supplies: Sponges, cloths, buckets, and cleaning solutions.
- Priming Tools: Brushes, rollers, and sprayers.
- Protective Gear: Gloves, masks, and goggles.
Recommended Materials
- Spackling Compound and Fillers: For repairing cracks and holes.
- Primer: Latex, oil-based, or shellac, depending on the surface.
- Cleaning Solutions: Mild detergent, TSP, or surface-specific cleaners.
- Sandpaper: Various grits for different surfaces.
Example: For a comprehensive prep kit, include sanding blocks, a variety of sandpaper grits, putty knives, scrapers, cleaning supplies, and a good-quality primer. This ensures you have everything you need for effective surface preparation.
Bullet Points for Quick Reference:
- Invest in high-quality tools and materials.
- Use the right tools for each step of the prep process.
- Protective gear is essential for safety.
Key Takeaway: Having the right tools and materials makes surface preparation easier and more effective. Quality tools can significantly improve the outcome of your painting project.
Surface Prep for Different Types of Surfaces
Wood
Properly prepping wood surfaces involves cleaning, sanding, and priming to ensure a smooth, durable finish.
Cleaning and Sanding:
- Clean the Surface: Dust and wipe down with a damp cloth. For greasy surfaces, use a mild detergent solution.
- Sand the Surface: Start with medium grit (80-120) and finish with fine grit (150-180). Sand in the direction of the grain.
Priming Techniques:
- Choose the Right Primer: Latex primer for softwoods, oil-based primer for hardwoods.
- Apply Evenly: Use a brush or roller for small areas, a sprayer for larger surfaces.
Example: When prepping a wooden door, clean it thoroughly, sand it smooth, and apply an oil-based primer for best adhesion and durability.
Bullet Points for Quick Reference:
- Clean and sand in the direction of the grain.
- Use the appropriate primer for the type of wood.
- Apply primer evenly for a smooth finish.
Key Takeaway: Proper prep ensures that paint adheres well and lasts longer on wood surfaces.
Drywall
Prepping drywall involves cleaning, repairing, sanding, and priming to achieve a flawless finish.
Repair and Patching:
- Identify Damages: Look for cracks, holes, and dents.
- Apply Spackling Compound: Fill small holes and cracks with spackling compound. Use a patch kit for larger holes.
- Sand Smooth: Once the compound is dry, sand the patched areas smooth.
Sanding and Priming:
- Sand the Surface: Use a sanding sponge or fine-grit sandpaper (150-180) to smooth the surface.
- Prime the Surface: Use a latex primer for best results. Apply evenly with a roller or sprayer.
Example: When prepping drywall for painting, clean the surface, repair any damages, sand smooth, and apply a latex primer for a professional finish.
Bullet Points for Quick Reference:
- Repair all damages before sanding.
- Use fine-grit sandpaper for a smooth finish.
- Apply a latex primer for best results.
Key Takeaway: Properly prepped drywall provides a smooth, durable base for painting.
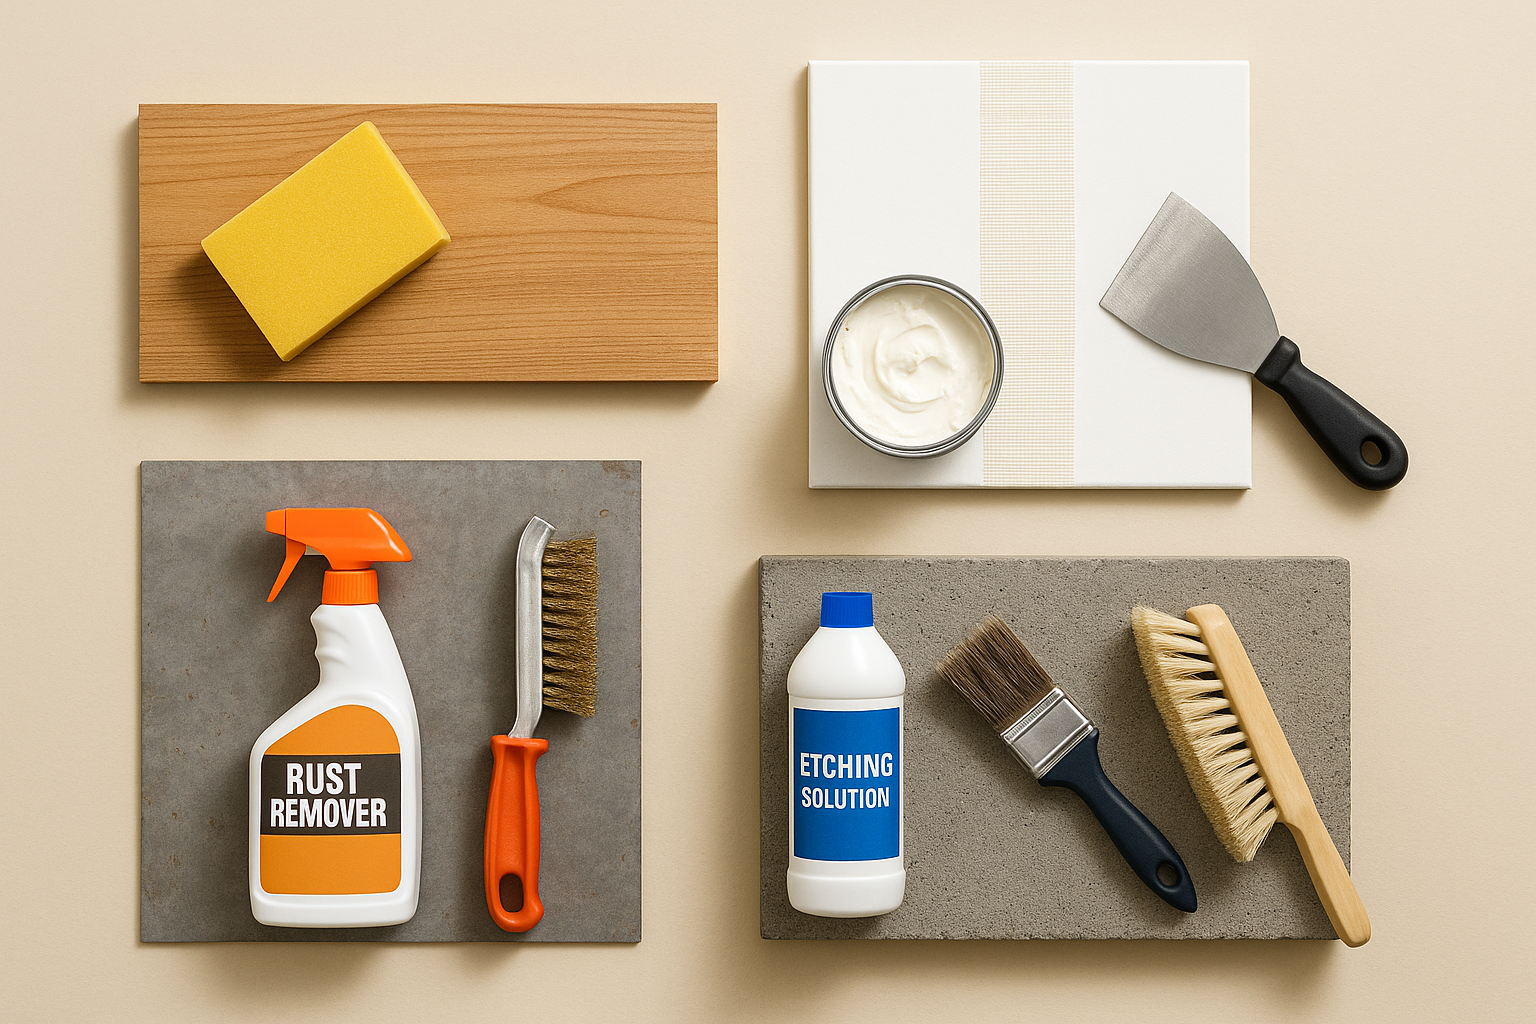
Metal
Prepping metal surfaces involves cleaning, sanding, and priming to ensure paint adheres properly and lasts longer.
Rust Removal:
- Clean the Surface: Use a degreaser to remove oil and grease.
- Remove Rust: Use a wire brush or sandpaper to remove rust. For severe rust, use a rust remover.
Priming Metal Surfaces:
- Choose an Oil-Based Primer: Oil-based primers provide excellent adhesion and rust protection.
- Apply Evenly: Use a brush for small areas, a sprayer for larger surfaces.
Example: When prepping a metal fence, clean it thoroughly, remove any rust, and apply an oil-based primer for best results.
Bullet Points for Quick Reference:
- Remove all rust before priming.
- Use an oil-based primer for metal surfaces.
- Apply primer evenly for a smooth finish.
Key Takeaway: Proper prep ensures paint adheres well and lasts longer on metal surfaces.
Concrete
Prepping concrete surfaces involves cleaning, etching, and priming to ensure paint adheres properly and lasts longer.
Cleaning and Etching:
- Sweep the Surface: Remove loose dirt and debris.
- Clean Thoroughly: Use a concrete cleaner or a mixture of TSP and water for a deeper clean.
- Etch the Surface: Use an etching solution to open up the pores of the concrete. Rinse thoroughly and let it dry.
Applying Primer to Concrete:
- Choose the Right Primer: Use a concrete primer for best results.
- Apply Evenly: Use a roller or sprayer for large surfaces.
Example: When prepping a concrete floor, clean and etch the surface, then apply a concrete primer for a durable finish.
Bullet Points for Quick Reference:
- Clean and etch the surface before priming.
- Use a concrete primer for best results.
- Apply primer evenly for a smooth finish.
Key Takeaway: Proper prep ensures paint adheres well and lasts longer on concrete surfaces.
Professional vs. DIY Surface Prep
Benefits of Hiring Professionals
Hiring professionals for surface preparation can offer numerous advantages, especially for larger or more complex projects.
- Expertise: Professionals have the knowledge and experience to identify and address various surface issues effectively. They know the best techniques and materials to use for each type of surface and condition.
Example: A professional painter can spot subtle signs of moisture damage or structural issues that an untrained eye might miss, ensuring that these problems are addressed before painting. - Efficiency: Professionals can complete surface preparation quickly and efficiently. They have access to specialized tools and equipment that can speed up the process without sacrificing quality.
Bullet Points for Quick Reference:- Professionals use advanced tools and techniques.
- They can complete prep work faster and more efficiently.
- Their expertise minimizes the risk of mistakes.
- Quality Results: With professionals, you can expect a higher standard of workmanship. They can ensure that surfaces are perfectly smooth, clean, and primed, resulting in a flawless paint job.
Key Takeaway: Hiring professionals can save you time and effort while ensuring the highest quality results.
Cost Analysis
Understanding the cost implications of professional vs. DIY surface preparation can help you make an informed decision.
- Professional Costs: Hiring professionals can be more expensive upfront. Costs vary based on the scope of the project, the condition of the surfaces, and regional labour rates. However, the investment can pay off in the long run by ensuring a durable and aesthetically pleasing paint job.
Data Insight: According to HomeAdvisor, the average cost for professional painting services, including surface prep, ranges from $2 to $6 per square foot. This includes labour, materials, and any necessary repairs. - DIY Costs: Doing surface prep yourself can be cheaper initially, as you’ll only need to purchase materials and basic tools. However, if mistakes are made, the cost of fixing them can add up quickly. Additionally, the time and effort required can be significant.
Example: A DIY project might seem cost-effective, but if you don’t properly sand and prime the surface, you could end up with peeling paint that needs to be redone, costing more in the long run.
Bullet Points for Quick Reference:
- Professional services: Higher upfront costs but potentially better long-term value.
- DIY: Lower initial costs but higher risk of errors and time investment.
- Consider the complexity of the project when deciding.
Key Takeaway: Weighing the costs and benefits of professional vs. DIY surface prep can help you choose the best option for your needs and budget.
DIY Tips for Homeowners
If you decide to tackle surface preparation yourself, here are some tips to help you achieve professional-quality results.
- Plan Ahead: Make sure you have all the necessary tools and materials before you start. This includes cleaning supplies, sandpaper, fillers, and primer.
Example: Create a checklist of everything you’ll need for your project. This will help you stay organized and ensure you don’t forget any important steps. - Take Your Time: Rushing through surface prep can lead to mistakes and poor results. Take your time to clean, repair, sand, and prime each surface thoroughly.
Bullet Points for Quick Reference:- Don’t rush the prep process.
- Follow each step methodically.
- Pay attention to detail for the best results.
- Use High-Quality Materials: Invest in good-quality fillers, primers, and tools. This can make a big difference in the final outcome of your paint job.
Key Takeaway: Using high-quality materials and taking your time can help you achieve a professional finish even when doing the prep work yourself.
Conclusion
In summary, proper surface preparation is the foundation of a successful paint job. Whether you choose to hire professionals or tackle the project yourself, investing time and effort into cleaning, repairing, sanding, and priming your surfaces will ensure a smooth, durable, and beautiful finish. Remember, the key to a flawless paint job lies in the prep work. So, don’t skip these crucial steps!
By following the guidelines and tips outlined in this article, you can achieve professional-quality results that will stand the test of time. Happy painting!
Frequently Asked Questions
- How long does surface preparation typically take? Surface preparation time varies depending on the condition of the surfaces and the size of the project. For a standard room, it can take anywhere from a few hours to a couple of days.
- What are some signs that surface prep was done incorrectly? Common signs of poor surface prep include peeling or bubbling paint, visible cracks or holes, and uneven paint coverage.
- Is surface prep different for interior vs. exterior painting? Yes, exterior surfaces often require more extensive prep due to exposure to the elements. This can include pressure washing, scraping, and using more durable primers.
- Can I paint over wallpaper without prepping the surface? It’s not recommended to paint directly over wallpaper. The best practice is to remove the wallpaper and properly prep the wall underneath.
- How do I prep a surface that has mould or mildew? Clean the surface with a solution of water and bleach (1 part bleach to 3 parts water) to kill the mould or mildew. Rinse thoroughly and allow it to dry completely before proceeding with repairs and priming.