Damaged wallpaper doesn’t always mean expensive replacement. Whether you’re dealing with tears, bubbles, peeling edges, or stains, most wallpaper damage can be repaired effectively with the right techniques and materials. This comprehensive guide will walk you through professional-quality repair methods that save money while restoring your walls to pristine condition.
Assessing Your Wallpaper Damage
Before diving into repairs, proper damage assessment determines your success rate and helps you choose the most effective repair strategy.
Common Types of Wallpaper Damage
Understanding the specific type of damage you’re facing is crucial for selecting the appropriate repair method:
- Tears and rips typically occur from furniture contact, pet scratches, or accidental impacts. These range from small surface scratches to complete punctures through the wallpaper backing.
- Air bubbles and blisters form when wallpaper loses adhesion to the wall surface. Small bubbles usually contain trapped air, while larger blisters may indicate moisture issues or insufficient initial adhesive application.
- Peeling edges and corners are common in high-humidity areas like bathrooms and kitchens. This damage often signals underlying adhesive failure or moisture penetration behind the wallpaper.
- Stains and discoloration can result from water damage, grease splatter, or general aging. Surface stains are easiest to address, while deep discoloration may require patch repairs.
- Missing sections occur when wallpaper pieces have been completely removed, leaving bare wall patches that require careful pattern matching during repair.
| Damage type | DIY difficulty | Typical repair time |
| Surface dust/soiling on washable vinyl | Easy | 5–10 min per m² |
| Scuffs/marks on scrubbable wallpaper | Easy | 10–15 min per wall |
| Seam lift (edge beginning to peel) | Moderate | 20–40 min per seam |
| Small air bubble (≤2 cm) | Easy | 10–20 min per bubble |
| Large air pocket (>2 cm) | Moderate | 30–60 min per bubble |
| Curled corners | Easy | 10–15 min per corner |
| Minor tear (≤5 cm) with pattern intact | Moderate | 30–45 min |
| Tear/gouge (>5 cm) requiring patch | Advanced | 60–120 min |
| Pattern misalignment at seam | Advanced | 1–2 hrs per affected seam |
| Shrinkage gap at seams | Moderate | 20–40 min per seam |
| Peeling due to failed primer/adhesion | Pro-only | 1–2 days (strip, prep, rehang) |
| Water stain on vinyl (no substrate damage) | Easy | 10–20 min (clean & dry) |
| Water-damaged paper backing/substrate | Pro-only | 0.5–1 day (remove, repair wall, rehang) |
| Mould/mildew (localized, non-structural) | Pro-only | 2–4 hrs remediation + dry time |
| Adhesive residue after panel removal | Easy | 30–60 min per wall |
| Blistering from humidity changes | Moderate | 20–40 min per blister |
| Seam edge discoloration | Moderate | 20–40 min (clean/spot treat) |
| Torn or missing pattern requiring inlay | Advanced | 1–3 hrs (scribe & inlay) |
When to Repair vs. Replace
Making the right decision between repair and replacement saves both time and money:
- Repair when: Damage covers less than 10% of the wall surface, the wallpaper is in otherwise good condition, you have matching material available, and the underlying wall structure is sound.
- Replace when: Damage is extensive (covering more than 25% of the wall), multiple damage types are present, the wallpaper is severely aged or faded, or underlying wall issues exist that require addressing.
- Consider partial replacement when: Damage is concentrated in one area, you can source matching wallpaper, and the repair would be highly visible in a prominent location.
Essential Tools and Materials for Wallpaper Repair
Success in wallpaper repair depends heavily on having the right tools and materials readily available.
Basic Repair Kit Components
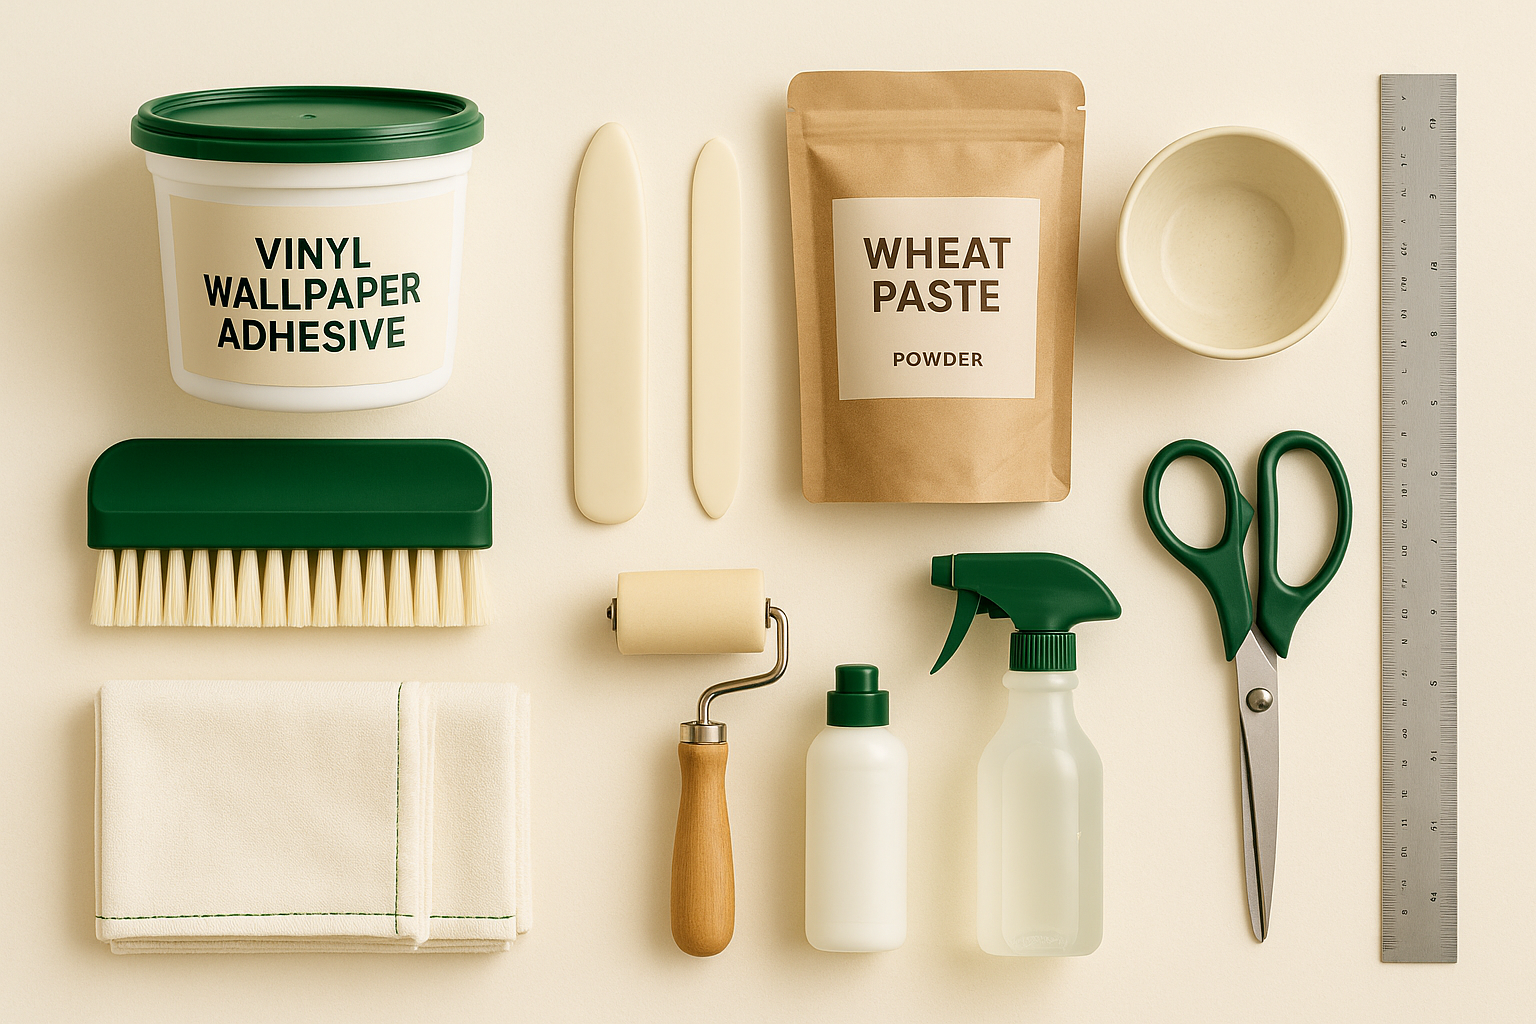
- Wallpaper adhesive comes in several varieties. Vinyl wallpaper adhesive works for most modern wallpapers, while wheat paste adhesive suits traditional paper wallpapers. Pre-mixed adhesives offer convenience, while powder adhesives provide stronger bonds for challenging repairs.
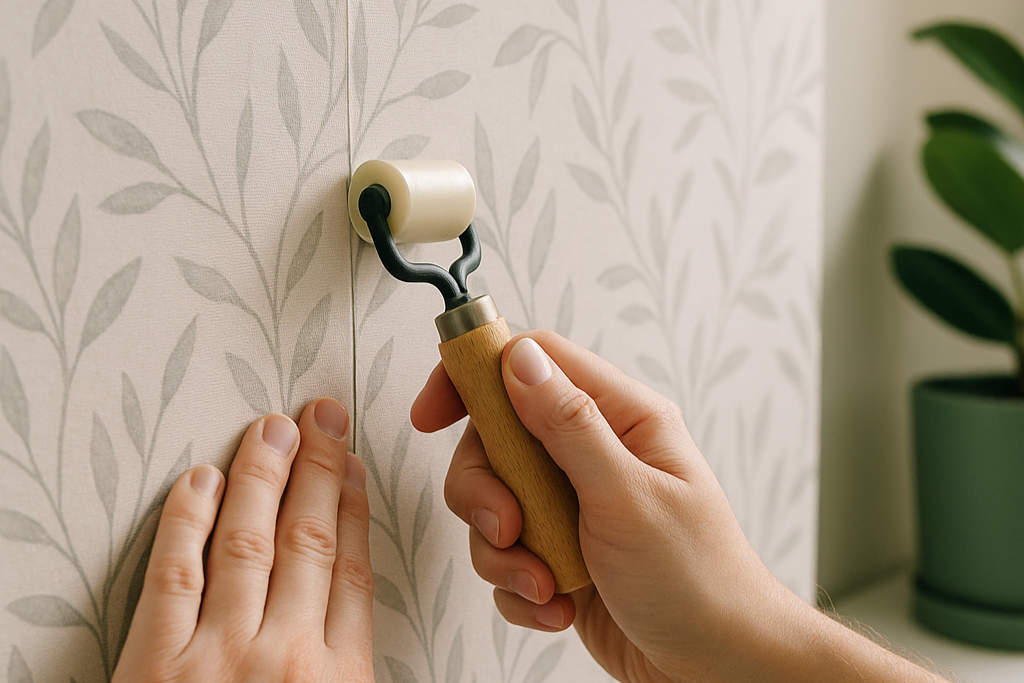
- Smoothing tools include plastic smoothing brushes for general use, bone folders for precise edge work, and seam rollers for achieving tight, invisible seams. Avoid metal tools that can damage wallpaper surfaces.
- Cutting implements should include sharp utility knives with replaceable blades, small scissors for detailed work, and metal straight edges for clean, precise cuts.
- Cleaning supplies encompass lint-free cloths, mild detergent solutions, and clean water for removing debris and excess adhesive during repairs.
Specialized Materials by Damage Type
- Patch repair materials include artist’s brushes for precise adhesive application, fine-grit sandpaper for edge preparation, and matching paint for touch-ups on painted walls beneath repairs.
- Seam rollers and brushes vary by wallpaper type. Soft rubber rollers work for delicate surfaces, while firmer rollers handle textured wallpapers. Natural bristle brushes prevent scratching during adhesive application.
- Colour-matching supplies include fabric dyes for minor colour adjustments, clear protective sprays for preserving repairs, and UV-resistant coatings for sun-exposed areas.
Wallpaper Adhesives: Types & Best Uses
| Adhesive type (common names) | What it’s made of | Best for (wallpaper) | Typical surfaces | Open time / slip* | Bond & removability | Cleanup / VOC | Pros | Cons | Not recommended |
|---|---|---|---|---|---|---|---|---|---|
| Wheat paste (starch-based) | Plant starches (wheat/rice) | Traditional paper, delicate hand-prints | Properly primed drywall, sealed plaster | Long / high | Light–medium bond; usually most strippable | Water clean-up; very low VOC | Very forgiving, minimal staining risk on natural fibres | Lower ultimate strength; slower set | Heavy vinyls; high-humidity rooms without ventilation |
| Cellulose / methylcellulose (“cold-water paste”) | Cellulose powder mixed with water | Paper, light vinyl-coated paper | Primed drywall, painted walls | Long / high | Light–medium; generally strippable | Water / very low VOC | Mix-on-demand, smooth rollability | Can dry slower; weaker on heavy materials | Solid vinyl, fabric-backed vinyl |
| Clear premixed (starch/acrylic blend) | Starch + PVA/acrylic emulsion | Most modern residential papers, light vinyl-coated | Primed drywall, painted & sealed surfaces | Medium / good | Medium–strong; usually strippable | Water / low VOC | Convenient, balanced tack, less staining than clay | Can soften delicate papers if over-wet | Non-porous substrates without primer |
| Non-woven (“paste-the-wall”) adhesive | High-solids acrylic/PVA, low water | Non-woven (fleece) wallpapers | Primed drywall, sound paint | Medium / good | Medium–strong; designed for dry-strip removal | Water / low VOC | Applies to wall (faster), clean removal | Costs more than standard clear | Heavy commercial vinyl |
| Clay-based (heavy duty) | Kaolin clay + PVA | Heavy wallpapers, grasscloth, foils, fabric-backed vinyl | Primed drywall, sealed plaster | Medium / fair | Strong; removal can be tougher | Water / low–moderate VOC | Very high grab, good for uneven walls | Can stain naturals if over-applied; heavier to spread | Unsealed or sensitive natural fibers without a stain test |
| Heavy-duty clear (commercial grade) | High-solids acrylic/PVA | Solid vinyl, fabric-backed vinyl, Type II/III commercial | Primed drywall, approved liners | Short–medium / moderate | Strong; removal typically requires stripping | Water / low–moderate VOC | Strong hold with less staining risk than clay | Less working time; harder to reposition | Delicate papers |
| Vinyl-over-vinyl (VOV) adhesive | Pressure-sensitive acrylic | Hanging over existing vinyl or other non-porous | Existing sound vinyl wallcovering, laminates | Short / low | Very strong; non-strippable | Water / low–moderate VOC | Only option that bonds reliably to vinyl | Minimal slip; hard to correct errors | New drywall; porous/painted walls (use primer + standard paste instead) |
| Border / extra-tack adhesive | High-tack acrylic | Borders & edges (especially over sealed paint or vinyl) | Painted walls, existing vinyl | Short / low | Strong; spot-use | Water / low–moderate VOC | Great for stubborn edges & bathrooms | Can telegraph if overused | Full-width hanging (use clear or heavy-duty instead) |
| Seam & repair adhesive (clear) | Thin acrylic/PVA | Re-bonding loose seams, bubbles, patches | Any finished installation | Very short / very low | Strong spot bond | Water / low VOC | Precise, dries clear | Not for full installations | Full-panel hanging |
| Pre-pasted activator (gel/water) | Wetting/activating agents | Pre-pasted wallpapers | Primed drywall | Medium / good | Medium; strippable (depends on paper) | Water / very low VOC | Clean; minimal mess | Lower tack; may need extra paste on tricky areas | Heavy or non-pasted wallcoverings |
Step-by-Step Repair Methods
These proven techniques address the most common wallpaper damage types with professional-quality results.
Fixing Air Bubbles and Blisters
Air bubbles are among the easiest wallpaper repairs when addressed promptly.
- For small bubbles (under 1 inch): Use a fine needle to puncture the bubble at its edge, not the center. Gently press out trapped air, then apply a tiny amount of adhesive using a small brush or syringe. Smooth the area with a plastic tool, working from the center outward.
- For large bubbles (over 1 inch): Make a small X-shaped cut in the bubble’s center using a sharp utility knife. Peel back the wallpaper flaps carefully, then clean any old adhesive from both the wall and wallpaper backing. Apply fresh adhesive evenly, then press the flaps back into position, ensuring perfect alignment.
- For moisture-related blisters: Address the underlying moisture source before repair. Allow the area to dry completely, which may take 24-48 hours. Follow the large bubble repair process, but use moisture-resistant adhesive to prevent recurrence.
- Prevention techniques include maintaining consistent indoor humidity between 30-50%, ensuring proper ventilation in moisture-prone areas, and addressing plumbing leaks immediately.
Repairing Tears and Rips
Tear repairs require patience and precision to achieve invisible results.
- Clean tear assessment begins with examining the tear direction and depth. Straight tears along pattern lines are easiest to repair invisibly, while irregular tears require more advanced techniques.
- Invisible patch technique works best for tears in patterned wallpapers. Cut a patch from leftover wallpaper that’s slightly larger than the damaged area, ensuring perfect pattern alignment. Place the patch over the tear and cut through both layers simultaneously, creating perfectly matched edges. Remove the damaged section, apply adhesive to the wall, and install the patch.
- Pattern alignment methods require careful measurement and marking. Use a level or straight edge to ensure pattern elements line up precisely. For complex patterns, temporarily tape the patch in position before cutting to verify alignment.
- Seam disguising strategies include feathering edges with fine sandpaper, using a seam roller to create tight bonds, and applying clear protective coating over repair seams to prevent future lifting.
Fixing Peeling Edges and Corners
Peeling repairs focus on restoring adhesion while addressing underlying causes.
- Moisture damage evaluation involves checking for dampness behind the wallpaper, identifying leak sources, and ensuring adequate drying time before repairs.
- Re-adhesion techniques start with carefully lifting the peeling section without extending the damage. Clean old adhesive residue from both surfaces using a damp cloth, then apply fresh adhesive sparingly to avoid squeeze-out.
- Edge reinforcement methods include using extra adhesive along edges prone to lifting, installing clear edge protection strips in high-traffic areas, and ensuring proper wall preparation before wallpaper installation.
- Corner-specific solutions address the unique challenges of inside and outside corners. Inside corners benefit from overlapping techniques, while outside corners require precise mitering and extra adhesive application.
Advanced Repair Techniques
Complex repairs require sophisticated approaches to achieve professional results.
Pattern Matching for Visible Repairs
Pattern matching separates amateur from professional-quality repairs.
- Understanding wallpaper repeat patterns involves measuring the distance between identical pattern elements. Most wallpapers have repeat measurements printed on the label, but manual measurement ensures accuracy for older wallpapers.
- Cutting and aligning techniques require marking pattern elements on both the patch and surrounding wallpaper. Use registration marks to ensure perfect alignment before making final cuts.
- Feathering edges for seamless blends involves gradually thinning patch edges with fine sandpaper, creating imperceptible transitions between old and new wallpaper sections.
Creating Invisible Patches
Invisible patches represent the pinnacle of wallpaper repair skill.
- Source material identification begins with finding leftover wallpaper from the original installation. If unavailable, carefully remove a small section from an inconspicuous area like inside a closet or behind furniture.
- Patch sizing and placement requires cutting patches slightly larger than the damage, then trimming to exact size during installation. Position patches to align with natural pattern breaks when possible.
- Advanced blending techniques include colour matching touch-ups, texture replication using specialized tools, and protective coating application to ensure longevity.
Dealing with Textured and Specialty Wallpapers
Specialty wallpapers require modified repair approaches.
- Grasscloth and fabric wallpaper repairs demand gentle handling and specialized adhesives. Use natural bristle brushes to avoid damaging fibres, and apply adhesive sparingly to prevent staining.
- Embossed pattern matching requires three-dimensional alignment consideration. Use flexible cutting tools that follow embossed contours, and ensure adequate drying time to prevent pattern flattening.
- Metallic and foil wallpaper challenges include preventing scratching during repair and matching metallic finishes. Use soft tools exclusively, and consider professional consultation for extensive metallic wallpaper repairs.
Troubleshooting Common Repair Problems
Even careful repairs can encounter challenges requiring problem-solving skills.
Misaligned Patterns
Prevention remains the best strategy for pattern alignment issues.
- Prevention strategies include double-checking measurements before cutting, using temporary positioning techniques, and maintaining adequate working time with slow-setting adhesives.
- Correction techniques for minor misalignments include gentle repositioning while adhesive remains workable, using steam to soften adhesive for major adjustments, and strategic trimming to improve alignment.
- When to start over becomes necessary when misalignment exceeds 1/8 inch, multiple pattern elements are affected, or correction attempts have damaged the wallpaper.
Visible Seams After Repair
Seam visibility indicates incomplete bonding or technique problems.
- Seam rolling techniques require appropriate pressure and timing. Roll seams 10-15 minutes after installation, using steady pressure without over-working the area.
- Edge blending methods include feathering techniques, colour touch-ups along seam lines, and protective coating application to seal edges.
- Colour matching solutions address slight colour variations between old and new wallpaper sections through careful tinting and protective UV coating application.
Wallpaper Repair: Troubleshooting Checklist
| Symptom | Likely cause(s) | Quick checks | Fix (summary) | Tools & materials | Time / difficulty | Prevent next time |
|---|---|---|---|---|---|---|
| Bubbles/air pockets (dry) | Trapped air; paste starved spots | Press bubble—does it feel airy (not wet)? | Pinprick with needle; inject seam/repair adhesive; smooth outwards | Pin/needle, syringe bottle, seam & repair adhesive, smoothing tool | 10–15 min / Easy | Use even paste, book properly, smooth from the center out |
| Blisters (wet) | Moisture trapped; non-porous substrate | Bubble feels “squishy” | Lift edge, vent with pin, warm gently, re-smooth; if persistent, lift panel and re-paste | Utility knife, hair dryer (low), clear premixed paste, smoother | 20–40 min / Med | Prime/size walls; control humidity (40–55% RH) |
| Peeling seams | Under-pasting; contamination at seam | Check for dry dust/paint at seam | Gently open seam, clean, apply seam adhesive, roll seam | Seam opener, lint-free cloth, seam adhesive, seam roller | 15–30 min / Easy | Paste slightly heavier at edges; wipe excess |
| Curling corners | Tension/shrinkage; inadequate paste | Look for dry corner/back | Lift corner, apply border/extra-tack adhesive, roll and hold with tape tab | Border adhesive, small brush, seam roller, low-tack tape | 10–20 min / Easy | Size walls; add extra paste at corners |
| Seam gaps / shrinkage lines | Overstretching; insufficient booking | Measure panel width vs. spec | If slight: use matching touch-up paint/marker; larger: add narrow splice | Touch-up paint, straightedge, knife, spare offcut | 15–60 min / Med | Don’t stretch; respect soak/book times |
| Pattern misaligned at seam | Out-of-plumb first drop; drift | Check plumb of first strip | Splice: overlap pattern match, cut double-cut seam, remove waste | Level, tape, straightedge, sharp blades | 30–60 min / Hard | Snap plumb line; recheck every 3–4 drops |
| Trapped dust/debris | Poor surface prep | Feel raised speck | Lift tiny area with micro-slit, remove speck, re-bond | Knife, tweezers, seam adhesive, burnisher | 10–15 min / Easy | Sand, vacuum, tack cloth, prime |
| Paste streaks / shiny residue | Paste not fully washed off | Oblique light shows sheen | Lightly re-wet, wipe with damp cloth; for dried streaks, use paste remover | Sponge, clean water, paste remover, microfiber | 10–25 min / Easy | Wipe as you go; frequent water changes |
| Stains/bleed-through (tannin, nicotine, marker) | Contaminants; water-soluble inks | Stain reappears after cleaning | Lift small area; spot-seal substrate with stain-blocking primer; rehang | Shellac/oil stain blocker, brush, extra paste | 45–90 min / Med | Prime/size with stain blocker before hanging |
| Lifting around switches/trim | Low tack on sealed paint; movement | Edge lifts when pressed | Lift edge, clean dust, apply border adhesive, roll firmly | Border adhesive, roller, cloth | 10–20 min / Easy | De-gloss & prime trim areas; extra paste at edges |
| Loose inside/outside corners | Movement; tension; under-paste | Check for gap or curl | For inside: cut relief, paste both sides, roll; outside: wrap with overlap or trim & cap | Knife, clear/heavy-duty paste, corner roller | 20–40 min / Med | Use corner strips; extra paste; avoid overstretch |
| Tears, cuts, punctures | Installation damage | Clean edges align? | If clean: butt edges with repair adhesive; if missing piece: patch-match from spare | Knife, straightedge, repair adhesive, spare offcut | 15–45 min / Med | Keep sharp blades; protect with drop cloths |
| Mould/mildew spots | High humidity; leaks | Musty odour, black/green spots | Remove affected piece; treat wall; dry; re-prime with mould-resistant primer; rehang | PPE, mildew wash, dehumidifier, primer, paste | 1–3 hrs (+dry) / Med | Fix moisture source; maintain RH <55% |
| Delamination from unprimed wall | Paste bonding to paint/drywall paper | Peels with paint or gypsum | Stop pulling; score, prime with penetrating sealer; use liner; rehang | Gardz-type sealer, liner paper, paste | 2–4 hrs (+dry) / Hard | Always size/prime; test area first |
| Vinyl-over-vinyl failure | Wrong adhesive (used standard paste) | Peels right off existing vinyl | Remove panel; sand/scuff; use VOV adhesive; rehang | VOV adhesive, sanding pads, cleaner | 45–90 min / Med | Only VOV over sound vinyl—or strip and prep |
| Edge shading on naturals (grasscloth) | Over-wetting; clay bleed; lighting | Darkened edges | Minimize moisture; if severe, replace panel; test alternate adhesive | Clay or clear paste (tested), spare roll | 30–60 min / Hard | Test for staining; paste sparingly; handle edges |
| Texture telegraphing through | Inadequate skim/prime | See texture pattern | Remove strip; skim coat; sand; prime; rehang | Joint compound, sander, primer, paste | 3–6 hrs (+dry) / Hard | Smooth walls (Level 4/5) and prime |
| Bubbles over fresh latex paint | Incompatible base; not cured | Paint under lifts | Stop; perforate; seal with penetrating primer; dry; rehang | Perforation tool, sealer, paste | 2–4 hrs (+dry) / Hard | Let paint cure; use wallpaper primer |
| Water splash damage at seam | Water wicking; poor seal | Seam whitens/curls | Dry thoroughly; re-bond with seam adhesive; touch up | Seam adhesive, roller, fan | 20–40 min / Easy | Caulk tops of backsplashes; wipe splashes fast |
| Pre-pasted not bonding | Under-activated; cold water | Peels back during set | Re-activate with warm water/activator; add thin coat of clear paste | Warm water tray, activator gel, clear paste | 15–30 min / Easy | Follow activator time; room 18–24 °C |
Recurring Damage Issues
Persistent problems indicate underlying issues requiring comprehensive solutions.
- Identifying underlying causes involves moisture testing, structural inspection, and environmental factor assessment.
- Moisture and adhesion problems often stem from inadequate wall preparation, incompatible adhesive selection, or ongoing moisture issues.
- Environmental factor solutions include humidity control systems, improved ventilation, and protective barriers in problem areas.
Preventing Future Wallpaper Damage
Prevention strategies prove more cost-effective than repeated repairs.
Environmental Controls
- Humidity management maintains indoor levels between 30-50% using dehumidifiers, humidifiers, or HVAC system controls as needed.
- Temperature considerations include avoiding extreme temperature fluctuations that cause expansion and contraction stress on wallpaper installations.
- Ventilation requirements ensure adequate air circulation, particularly in bathrooms, kitchens, and other high-moisture areas.
Maintenance Best Practices
- Regular inspection schedules should occur monthly, focusing on high-stress areas like corners, edges, and high-traffic zones.
- Cleaning techniques that prevent damage include gentle dusting with soft brushes, spot cleaning with appropriate cleaners, and avoiding excessive moisture during cleaning.
- Early intervention strategies address minor issues before they become major problems, saving both time and money.
When to Call Professional Help
Recognizing repair limitations prevents costly mistakes and ensures quality results.
Damage Beyond DIY Scope
- Extensive water damage often requires professional assessment of underlying wall conditions and potential mould issues.
- Structural wall issues including cracks, settling damage, or surface irregularities require professional evaluation before wallpaper repair attempts.
- Historical or valuable wallpapers merit professional conservation techniques to preserve value and appearance.
Cost Analysis: DIY vs. Professional
- Time investment calculations should include learning time, material acquisition, and potential mistake correction when comparing DIY versus professional repair costs.
- Material costs comparison encompasses tools, adhesives, replacement wallpaper, and potential wall preparation materials.
- Quality outcome expectations differ significantly between DIY and professional repairs, particularly for complex pattern matching and specialty wallpaper types.
Cost Analysis: DIY vs. Professional (Wallpaper Repair) — CAD
| Scenario | DIY: materials | DIY: one-time tools (if first time) | DIY time | Professional: typical total | Notes / break-even |
|---|---|---|---|---|---|
| Re-bond 1–3 seams | $15–$30 | $25–$45 | 0.3–1 hr | $150–$250 | DIY wins unless you’d need a paid call-out anyway. |
| Secure 2–4 curling corners | $15–$25 | $10–$25 | 0.3–1 hr | $175–$300 | Add a corner roller for best results. |
| Fix 3–6 bubbles/blisters | $15–$35 | $10–$25 | 0.5–1 hr | $175–$300 | If bubbles feel “wet,” ventilation/primer issues may require pro. |
| Small patch (tear ≤ 2″) — spare paper on hand | $15–$30 | $20–$35 | 0.5–1.5 hr | $200–$350 | DIY is economical with a good offcut. |
| Small patch (tear ≤ 2″) — need new roll | $75–$180 | $20–$35 | 0.5–1.5 hr | $260–$450 | Cost hinges on buying a whole roll for a tiny area. |
| Replace one panel/drop (up to 9’ high) | $95–$195 | $45–$75 | 2–4 hr | $360–$750 | Pro saves time; DIY cheaper if you already own tools. |
| Rehang feature wall (≈12’ × 9’) | $220–$530 | $60–$120 | 6–10 hr | $970–$1,930 | Pro recommended for complex patterns/foils/grasscloth. |
| Rehang small room (≈10’ × 12’) | $360–$1,020 | $60–$140 | 10–18 hr | $1,860–$4,020 | DIY only if confident with layout, cuts, and seams. |
Conclusion and Key Takeaways
Successful wallpaper repair combines proper damage assessment, appropriate tool selection, and careful technique execution. Most homeowners can handle basic repairs like small tears, bubbles, and peeling edges with confidence using the methods outlined in this guide.
Critical success factors include taking time for proper preparation, using quality materials, and knowing when to seek professional help. Prevention through environmental control and regular maintenance prevents most damage types from occurring.
Essential prevention tips focus on humidity control, gentle cleaning practices, and prompt attention to minor issues before they escalate. Resource recommendations include maintaining repair supplies, keeping leftover wallpaper for future repairs, and developing relationships with professional wallpaper installers for complex projects.
Remember that patience and practice improve repair skills over time. Start with less visible areas to build confidence before tackling prominent wall sections, and don’t hesitate to consult professionals for valuable or challenging wallpaper types.
Frequently Asked Questions
How long should I wait before painting over a repaired wallpaper section?
Wait at least 48-72 hours after completing wallpaper repairs before applying paint. The adhesive needs adequate curing time to create a stable surface for paint adhesion. For large repairs or high-humidity areas, extend this to one week.
Before painting, lightly sand any raised edges or adhesive residue with 220-grit sandpaper, then apply a high-quality primer designed for wallpaper surfaces. This prevents wallpaper patterns from bleeding through paint and ensures uniform coverage. Use an oil-based or shellac primer for best results, especially over bold patterns or metallic wallpapers.
Can I use regular craft glue instead of wallpaper adhesive for small repairs?
Regular craft glue is not recommended for wallpaper repairs, even small ones. Craft glues lack the specific properties needed for wallpaper applications: they don’t provide adequate working time for positioning, may not bond properly to wallpaper backing materials, and can become brittle over time, leading to repair failure.
Instead, purchase small tubes of wallpaper repair adhesive or seam adhesive specifically designed for minor repairs. These products remain flexible after drying, resist moisture better than craft glues, and provide the repositioning time needed for precise alignment. The minimal cost difference ensures reliable, long-lasting repairs.
Will my homeowner’s insurance cover wallpaper damage from plumbing leaks?
Homeowner’s insurance coverage for wallpaper damage depends on the cause and your specific policy terms. Sudden, accidental water damage from burst pipes or appliance malfunctions is typically covered under standard policies, including wallpaper replacement costs.
However, damage from gradual leaks, poor maintenance, or flooding requires separate coverage. Document all damage with photos before making repairs, keep receipts for materials and labour, and contact your insurance company immediately after discovering water damage. Some policies require professional restoration services rather than DIY repairs to maintain coverage validity.
Review your policy’s “other structures” and “personal property” sections for specific wallpaper coverage details, and consider scheduling valuable or custom wallpapers as separate items for full replacement cost coverage.
How do I find matching wallpaper for repairs if my pattern is discontinued?
Finding discontinued wallpaper requires creative sourcing strategies. Start by checking the manufacturer’s website or contacting them directly – some companies maintain limited stock of discontinued patterns or can suggest similar alternatives.
Online marketplaces like eBay, Facebook Marketplace, and specialized wallpaper resale sites often have leftover rolls from completed projects. Search using the manufacturer name, pattern name, and any product numbers from your original wallpaper.
Architectural salvage stores and consignment shops sometimes carry unused wallpaper from estate sales or renovation projects. Professional wallpaper installers may have leftover rolls from past jobs and often maintain networks for sourcing discontinued patterns.
Digital printing services can reproduce small sections of discontinued wallpaper for patch repairs. While not perfect for large areas, this works well for small repairs where exact pattern matching is crucial.
Local Facebook groups and neighbourhood apps like Nextdoor can connect you with residents who may have leftover wallpaper from similar vintage installations.
Is it safe to repair wallpaper that might contain asbestos in older homes?
Exercise extreme caution with wallpaper in homes built before 1980, as some wallpapers and their adhesives contained asbestos fibres. Never sand, scrape, or create dust when working with potentially asbestos-containing wallpaper.
Safe repair approaches for suspected asbestos wallpaper include wet methods only – keep all surfaces damp during repair to prevent fibre release. For small repairs like bubble fixes or edge reattachment, use minimal disturbance techniques and work in well-ventilated areas while wearing N95 masks.
Professional testing costs $200-400 but provides definitive answers about asbestos presence. Many environmental testing companies offer same-day results for wallpaper samples.
When asbestos is confirmed, hire certified asbestos abatement professionals for any repairs beyond minor bubble fixes. Disturbing asbestos-containing materials without proper equipment and training poses serious health risks.
Encapsulation strategies involve covering damaged asbestos wallpaper with new wallpaper or paint rather than removal, which eliminates fibre release risks while addressing aesthetic concerns. Consult with asbestos professionals before choosing this approach to ensure proper implementation.