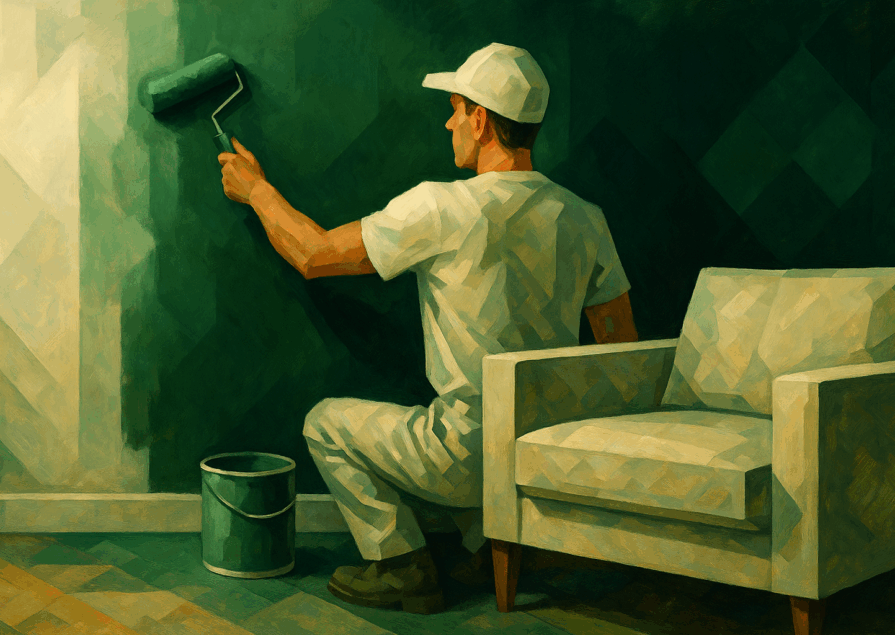
Painting in cold weather comes with unique challenges that can impact the adhesion, drying time, and overall finish of your project. Unlike warm-weather painting, where paint flows smoothly and dries efficiently, low temperatures can slow down drying, cause cracking, and lead to poor adhesion, making it crucial to adjust your approach.
Why Painting in Cold Weather Requires Special Techniques
Most paints are designed to perform best at temperatures above 50°F (10°C). When temperatures drop below this threshold, several issues can arise:
- Paint thickens, making it harder to apply smoothly.
- Extended drying times increase the risk of dust, debris, or moisture ruining the finish.
- Poor adhesion can lead to peeling, cracking, or an uneven coat.
- Humidity and condensation can cause blistering and bubbling.
Using cold-weather-rated paints, adjusting application methods, and ensuring proper drying conditions are essential to achieving a durable, professional-quality finish in colder temperatures.
Key Challenges Painters Face in Low Temperatures
When painting in cold weather, you may encounter the following obstacles:
- Paint Takes Longer to Dry
- Cold air slows down evaporation, delaying drying and curing times.
- Paint may remain tacky longer, increasing the risk of smudges and imperfections.
- Poor Adhesion and Peeling Issues
- Cold surfaces can cause paint to fail to bond properly.
- Moisture buildup can lead to peeling or flaking after drying.
- Uneven Coats and Brush Marks
- Thickened paint can result in visible brush strokes and roller marks.
- Difficulty spreading paint evenly can create an inconsistent finish.
- Condensation and Humidity Concerns
- Temperature fluctuations can cause condensation on surfaces.
- Excess humidity can lead to bubbling, cracking, or patchy drying.
By addressing these challenges with proper preparation, product selection, and drying techniques, you can achieve a long-lasting, professional finish, even in cold weather.
Who This Guide Is For
This guide is designed for:
- DIY Painters looking to refresh their home’s interior or exterior during colder months.
- Professional Painters working on commercial or residential projects that require year-round painting.
- Homeowners and Property Managers wanting to ensure the best results when painting in winter conditions.
Whether you’re painting a house exterior, indoor walls, or furniture, this guide provides practical tips and expert advice to help you navigate cold-weather painting successfully.
Understanding the Challenges of Cold-Weather Painting
Painting in cold weather presents unique challenges that can affect the application, drying process, and durability of the paint. Without the right approach, cold temperatures and humidity can lead to poor results, requiring costly fixes down the line. Understanding these challenges is the first step toward achieving a smooth and long-lasting paint job.
Why Temperature and Humidity Matter for Paint Adhesion
Paint needs the right temperature and humidity levels to properly adhere, dry, and cure. Most paints are formulated to work best within a temperature range of 50°F to 85°F (10°C to 30°C). When temperatures drop below this range:
- Paint thickens, making it harder to spread evenly.
- Evaporation slows down, extending drying and curing times.
- Adhesion weakens, increasing the risk of peeling or flaking.
Humidity is another critical factor. In cold weather, high humidity or condensation can cause moisture buildup on surfaces, preventing paint from bonding properly. This can lead to bubbling, streaking, or premature peeling.
Some specialty paints and primers are designed for colder conditions, with formulations that allow for better adhesion and quicker drying at lower temperatures. However, even with these products, temperature and humidity management is key to a successful paint job.
Common Issues When Painting in Cold Weather
1. Extended Drying Times
Cold weather slows the paint’s ability to dry properly. In warm conditions, the paint’s solvents evaporate quickly, allowing it to dry within hours. However, in low temperatures (below 50°F/10°C):
- Paint stays wet longer, increasing the risk of dust, dirt, or debris sticking to it.
- Recoat times increase, leading to delays in completing the project.
- Oil-based paints thicken, making application more difficult.
Solution: Use cold-weather-rated paints and allow extra drying time between coats. Heaters and fans can also help accelerate the drying process.
2. Poor Adhesion and Peeling
When painting in cold weather, poor adhesion is a major risk. If the paint doesn’t bond properly to the surface, it can peel, flake, or chip prematurely. This is often caused by:
- Surfaces being too cold or damp, preventing the paint from sticking.
- Condensation forming, especially in the early morning or late evening.
- Incorrect primer or paint choice, not formulated for cold temperatures.
Solution: Make sure surfaces are completely dry and use a high-quality primer designed for cold-weather painting. Keep the painted area as warm as possible to aid adhesion.
3. Cracking, Bubbling, and Uneven Finishes
Painting in cold weather can result in textural defects that impact the final look of your project. Some common problems include:
- Cracking – If the paint contracts too quickly due to temperature changes, it can crack or develop hairline fractures.
- Bubbling – If trapped moisture or air expands under the paint layer, bubbles can form, ruining the smooth finish.
- Uneven Coats – Cold paint thickens, making it difficult to spread smoothly, leading to roller marks, brush strokes, and patchy areas.
Solution: Apply thinner coats and work in consistent, moderate temperatures whenever possible. Keep the area ventilated but avoid drafts that might cause temperature fluctuations.
Ideal Temperature and Weather Conditions for Painting
Painting in cold weather requires careful attention to temperature and humidity to ensure proper application, adhesion, and drying. Using the right conditions will prevent common issues like peeling, cracking, and extended drying times. Below, we’ll explore the ideal temperature range, the impact of humidity, and the best time of day to paint in cold weather.
Minimum and Maximum Temperatures for Painting
Different types of paint have specific temperature thresholds that determine how well they perform. Here’s a general guideline:
| Paint Type | Minimum Temperature | Ideal Temperature Range |
| Latex (Water-Based) Paint | 50°F (10°C) | 50°F – 85°F (10°C – 30°C) |
| Oil-Based Paint | 40°F (4°C) | 40°F – 90°F (4°C – 32°C) |
| Cold-Weather Formulated Paint | 35°F (1.5°C) | 35°F – 70°F (1.5°C – 21°C) |
- If temperatures drop below the minimum threshold, paint may not dry properly, leading to poor adhesion, cracking, or peeling.
- Paint applied above the maximum temperature range (such as in direct sun or excessive heat) may dry too quickly, resulting in brush marks or an uneven finish.
- Cold-weather paints are specifically designed for low temperatures, making them the best choice when painting in winter or cold environments.
How Humidity Affects Paint Application and Drying
Humidity plays a crucial role in how well paint adheres and dries. When humidity levels are too high or too low, it can cause problems such as bubbling, blistering, or extended drying times.
- Ideal humidity for painting:40% – 70%
- Problems caused by high humidity (>70%):
- Slower drying times – Excess moisture in the air prevents paint from curing properly.
- Bubbling and blistering – Trapped moisture can cause paint to lift off the surface.
- Condensation issues – If moisture forms on the surface, the paint may not adhere properly.
- Problems caused by low humidity (<40%):
- Paint dries too fast, leading to brush strokes and uneven finishes.
- Paint may crack or peel due to insufficient bonding with the surface.
Solution: Use a dehumidifier or heater indoors to maintain stable conditions. When painting outdoors, check the weather forecast to avoid high humidity periods, rain, or frost.
Best Time of Day to Paint in Cold Weather
Timing is critical when painting in cold weather. Temperature fluctuations between day and night can impact how well paint dries and adheres.
- Best time to paint:Late morning to early afternoon
- This allows surfaces to warm up naturally and ensures that paint has enough daylight hours to begin drying before temperatures drop at night.
- Avoid painting early in the morning when surfaces may still be covered in dew or frost.
- Stop painting a few hours before sunset to allow enough drying time before the temperature drops overnight.
- Worst time to paint:Early morning or late evening
- Surfaces are cold, and moisture levels are higher.
- Paint may not dry before temperatures drop overnight, leading to poor adhesion and cracking.
Choosing the Right Paint and Supplies for Cold-Weather Painting
Painting in cold weather requires specialized paint, primers, and tools to ensure proper adhesion, smooth application, and long-lasting results. Using the wrong materials can lead to peeling, cracking, and extended drying times. This section will help you select the best products and supplies for painting in low temperatures.
Selecting the Best Paint for Low Temperatures
Not all paints are designed to withstand cold weather. Standard latex and oil-based paints struggle to dry properly in low temperatures, but some specially formulated cold-weather paints perform well even in near-freezing conditions.
| Paint Type | Best For | Minimum Temperature | Key Benefits |
| Latex (Water-Based) Cold-Weather Paint | Interior & exterior surfaces | 35°F (1.5°C) | Faster drying, lower VOCs, easy cleanup |
| Oil-Based Cold-Weather Paint | High-durability exterior surfaces | 40°F (4°C) | Superior adhesion, longer working time |
| Acrylic-Enriched Latex Paint | Trim, doors, and exteriors | 35°F (1.5°C) | Flexible, resistant to cracking in cold |
| Cold-Weather Epoxy Paint | Garage floors, industrial use | 40°F (4°C) | Hard, durable finish, great for moisture resistance |
Tips for Choosing Cold-Weather Paint:
- Look for “low-temperature application” or “cold-weather formula” labels.
- Choose acrylic-latex over traditional latex as it resists temperature fluctuations better.
- Oil-based paints work well in cold conditions but require longer drying times.
The Right Primers for Cold Conditions
A high-quality primer is essential in cold weather to improve adhesion, block moisture, and provide a stable base for paint. The wrong primer can cause paint to peel, crack, or fail to bond properly.
Best Cold-Weather Primers:
- Acrylic-Based Primers – Work well in fluctuating temperatures and resist cracking.
- Oil-Based Primers – Ideal for exterior surfaces and sealing porous surfaces in cold weather.
- Bonding Primers – Improve adhesion for surfaces exposed to extreme cold.
Tip: Choose a primer with a low-temperature rating of at least 35°F (1.5°C) for best results.
Must-Have Tools for Painting in Cold Weather
Using the right tools can make cold-weather painting easier and ensure a smooth, professional-quality finish.
Essential Tools:
- High-Quality Synthetic Brushes & Rollers – Designed for thicker paint consistency.
- Paint Heater or Warming Box – Keeps paint at an optimal temperature.
- Insulated Paint Tray – Prevents paint from thickening too quickly.
- Foam Rollers – Help distribute paint more evenly in cold conditions.
- Portable Heaters & Fans – Speed up drying and reduce moisture buildup.
Proper Paint Storage to Prevent Thickening or Freezing
Cold weather can cause paint to thicken, separate, or freeze, making it difficult to apply. Proper storage ensures paint maintains its consistency and performance.
How to Store Paint in Cold Weather:
- Keep paint indoors at 50-70°F (10-21°C) before and after use.
- Avoid storing paint in unheated garages or sheds where temperatures drop below freezing.
- Use a paint heater or warming bucket to maintain optimal temperature during application.
- If paint thickens, stir thoroughly and warm it up slightly before use.
- Check for spoilage – If paint has clumps, smells bad, or won’t mix properly, it may be unusable.
Surface Preparation in Cold Weather
Proper surface preparation is critical when painting in cold weather. If surfaces are not clean, dry, and free of ice or condensation, paint may fail to adhere properly, leading to peeling, cracking, or bubbling. Unlike warm-weather painting, where surfaces dry quickly, cold temperatures trap moisture and make preparation more challenging. This section covers the essential steps to prepare surfaces effectively in cold weather to ensure a smooth, long-lasting paint job.
Cleaning and Drying the Surface to Prevent Moisture Traps
Moisture is one of the biggest challenges when painting in cold weather. If paint is applied over a damp surface, it won’t adhere properly, increasing the risk of peeling and blistering.
Best Practices for Cleaning Surfaces in Cold Weather:
- Remove dirt, grease, and mildew – Use a mild detergent solution or a trisodium phosphate (TSP) cleaner to eliminate surface contaminants.
- Use a dry cloth or towel to absorb excess moisture after cleaning.
- Avoid power washing in freezing temperatures, as water can take too long to dry.
- Sand and smooth the surface to improve paint adhesion.
Pro Tip: If you must wash exterior surfaces, do it at least 24 hours in advance to allow drying time. Use heated air blowers or fans to accelerate drying.
Removing Ice, Snow, and Condensation Before Painting
In cold weather, frost, condensation, and snow can accumulate on surfaces overnight, making it impossible for paint to adhere properly. Before you start painting, check for hidden moisture and take steps to eliminate frost and condensation.
Steps to Ensure a Dry Surface:
- Inspect for hidden moisture – Run your hand over the surface or use a moisture meter to check for damp areas.
- Remove ice and snow manually – Use a plastic scraper or brush to clear any frozen residue.
- Dry surfaces completely – Use rags, fans, or absorbent towels to wipe down damp areas.
- Prevent condensation buildup – If painting outdoors, wait until mid-morning when temperatures rise and condensation evaporates. If painting indoors, use a dehumidifier to reduce moisture in the air.
Pro Tip: If temperatures drop below freezing overnight, inspect surfaces again in the morning before painting, as condensation may have formed.
Using Heaters, Fans, and Coverings for Surface Prep
Cold surfaces reduce paint adhesion and slow drying times, so it’s essential to warm up the area before painting. Using heaters, fans, and protective coverings can help create better painting conditions.
Best Practices for Warming Surfaces:
- Use portable heaters to gently warm surfaces before and during painting. Keep them at a safe distance to avoid overheating.
- Position fans or air circulators to prevent moisture buildup and speed up drying.
- Cover exterior surfaces overnight to prevent frost accumulation. Tarps or plastic sheets can keep surfaces dry and ready for painting the next day.
- For interior painting, use space heaters or infrared lamps to maintain consistent room temperature.
Pro Tip: If using heaters, ensure proper ventilation to prevent fume buildup, especially when painting indoors.
By following these cold-weather surface preparation techniques, you can ensure a dry, stable base for your paint, leading to a smooth, professional-quality finish that lasts.
Best Techniques for Applying Paint in Cold Temperatures
Painting in cold weather requires adjustments in technique to ensure smooth application, proper adhesion, and even coverage. Since low temperatures affect paint consistency and drying time, following optimized painting methods will help you achieve a professional, long-lasting finish.
Adjusting Your Painting Speed and Layer Thickness
Cold temperatures cause paint to thicken, making it harder to spread smoothly. To compensate, you need to adjust your application speed and layer thickness.
Best Practices for Cold-Weather Painting:
- Apply thinner coats – Cold air slows drying time, so thin coats dry faster and adhere better than thick layers.
- Extend drying time between coats – Allow extra time for each layer to dry before applying the next one (refer to manufacturer guidelines for cold-weather recoat times).
- Use slow, steady strokes – Work methodically to avoid streaks and uneven patches caused by thicker paint.
- Work in smaller sections – This prevents paint from getting too thick as it sits in the tray or bucket.
- Keep paint warm – Store paint indoors or use a warming box to maintain a usable consistency during application.
Pro Tip: If paint feels too thick, stir it well and avoid adding too much water or thinner, as this can weaken adhesion.
Using Proper Brush, Roller, and Spray Techniques
Cold-weather painting requires different application tools and techniques to prevent visible brush strokes, roller marks, and uneven coverage.
Brush Techniques for Cold Weather:
Use high-quality synthetic bristle brushes – These hold paint better and work well in thickened paint.
Apply long, even strokes – Avoid excessive pressure, as it can cause streaking.
Keep brushes flexible – Store them at room temperature before painting to prevent stiffness in cold air.
Roller Techniques for Cold Weather:
Choose a high-nap roller (3/8″ to 3/4″) – This helps distribute thicker paint evenly.
Roll in a “W” or “M” pattern – This technique spreads paint smoothly without lines or streaks.
Reload frequently – Avoid rolling over partially dried areas, which can lift the paint and create uneven patches.
Spray Techniques for Cold Weather:
Use a heated sprayer if possible – Cold air thickens paint, making standard sprayers struggle.
Maintain consistent pressure – Adjust the spray gun to accommodate thicker paint viscosity.
Hold the sprayer 10-12 inches from the surface – Spraying too close can cause drips and pooling in colder conditions.
Pro Tip: If using a paint sprayer, keep the paint container warm by placing it in a bucket of warm water to maintain flow consistency.
How to Maintain Even Coats in Cold Weather
One of the biggest challenges in cold-weather painting is achieving an even finish. Thickened paint can cause visible roller lines, uneven texture, and patchy coverage.
Key Techniques for an Even Coat:
- Start with a properly primed surface – This helps paint bond evenly and prevents absorption inconsistencies.
- Overlap strokes slightly – Avoid hard edges by blending each stroke into the next one.
- Use the “feathering” technique – Lightly go over painted areas with a dry brush or roller to smooth out excess thickness.
- Check for uneven areas in different lighting – Use a work light or natural daylight to inspect for patchy coverage before moving on.
- Keep paint at the right consistency – If the paint is too thick, warm it slightly or use a manufacturer-approved additive to improve flow.
Pro Tip: Avoid touching up too soon—let the paint fully dry before assessing whether a second coat is needed to prevent lifting and uneven texture.
Drying and Curing Paint in Cold Weather
One of the biggest challenges of painting in cold weather is ensuring proper drying and curing. Cold temperatures slow evaporation, extend drying times, and increase the risk of paint defects such as bubbling, cracking, or peeling. Understanding how temperature affects paint drying and using proven techniques to speed up the process will help you achieve a smooth, durable finish.
Understanding How Cold Temperatures Affect Paint Drying
When paint dries, it undergoes two main processes:
- Evaporation – The water or solvent in the paint evaporates, allowing it to dry to the touch.
- Curing – The paint fully hardens as chemical bonds form, ensuring a durable and long-lasting finish.
In warm temperatures, these processes happen quickly. However, in cold weather:
- Evaporation slows down → Paint stays wet for longer.
- Curing takes much longer → Paint may remain soft or tacky for days instead of hours.
- Condensation can form → Moisture buildup can prevent proper adhesion and lead to defects.
- Paint thickens → Making it harder to spread evenly and causing visible brush strokes or roller marks.
Pro Tip: Always check the manufacturer’s recommended temperature range for drying and curing. Many paints require a minimum of 50°F (10°C) to dry properly.
Techniques to Speed Up Drying Time in Low Temperatures
Since cold weather naturally slows down drying, taking proactive measures can help accelerate the process.
| Temperature | Typical Drying Time (Latex Paint) | Typical Curing Time |
| 70°F (21°C) | 1-2 hours | 7 days |
| 50°F (10°C) | 4-6 hours | 14 days |
| 35°F (1.5°C) | 12+ hours | 30+ days |
Best Ways to Speed Up Paint Drying in Cold Weather:
- Use Heaters or Space Warmers – Keep the area between 50-70°F (10-21°C) to help paint dry at a normal rate.
- Improve Air Circulation with Fans – This helps moisture evaporate faster and prevents paint from staying tacky for too long.
- Use a Dehumidifier – If painting indoors, lower humidity to 40-50% to create optimal drying conditions.
- Increase Ventilation – Open windows or use exhaust fans to remove excess moisture from the air.
- Choose Fast-Drying Paint Formulas – Some cold-weather paints have additives that allow them to dry quicker in low temperatures.
Pro Tip: Avoid painting when humidity is above 70%, as moisture in the air can slow drying and cause bubbling.
How Long to Wait Between Coats for Best Results
Applying a second coat too soon can trap moisture, leading to peeling or bubbling. Since cold temperatures slow drying, you’ll need to extend the recoat time compared to normal conditions.
| Paint Type | Recommended Wait Time Between Coats (70°F / 21°C) | Recommended Wait Time Between Coats (50°F / 10°C or Lower) |
| Latex Paint | 4 hours | 12+ hours |
| Oil-Based Paint | 6-8 hours | 24 hours |
| Cold-Weather Formulated Paint | 2-3 hours | 8-10 hours |
Pro Tip: Check for tackiness before recoating—if the paint feels sticky or soft, wait longer before applying the next layer.
Preventing Paint Bubbling, Cracking, and Peeling During Drying
Cold weather increases the risk of paint defects, including bubbling, cracking, and peeling. These issues occur when paint dries unevenly or fails to bond properly to the surface.
How to Prevent Common Paint Defects in Cold Weather:
- Bubbling (Blistering):
- Cause: Moisture trapped under the paint surface.
- Solution: Ensure the surface is completely dry before painting. Use a primer for better adhesion.
- Cracking & Flaking:
- Cause: Paint applied too thickly in cold conditions.
- Solution: Apply thin, even coats and let them fully dry before adding a second layer.
- Peeling:
- Cause: Poor adhesion due to condensation or cold surfaces.
- Solution: Warm up the surface before painting and use a high-quality bonding primer.
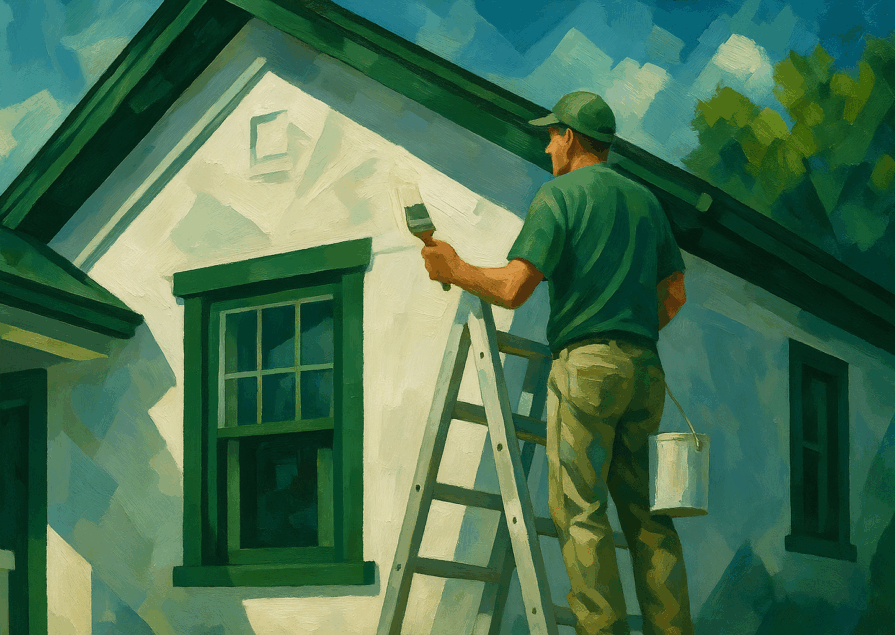
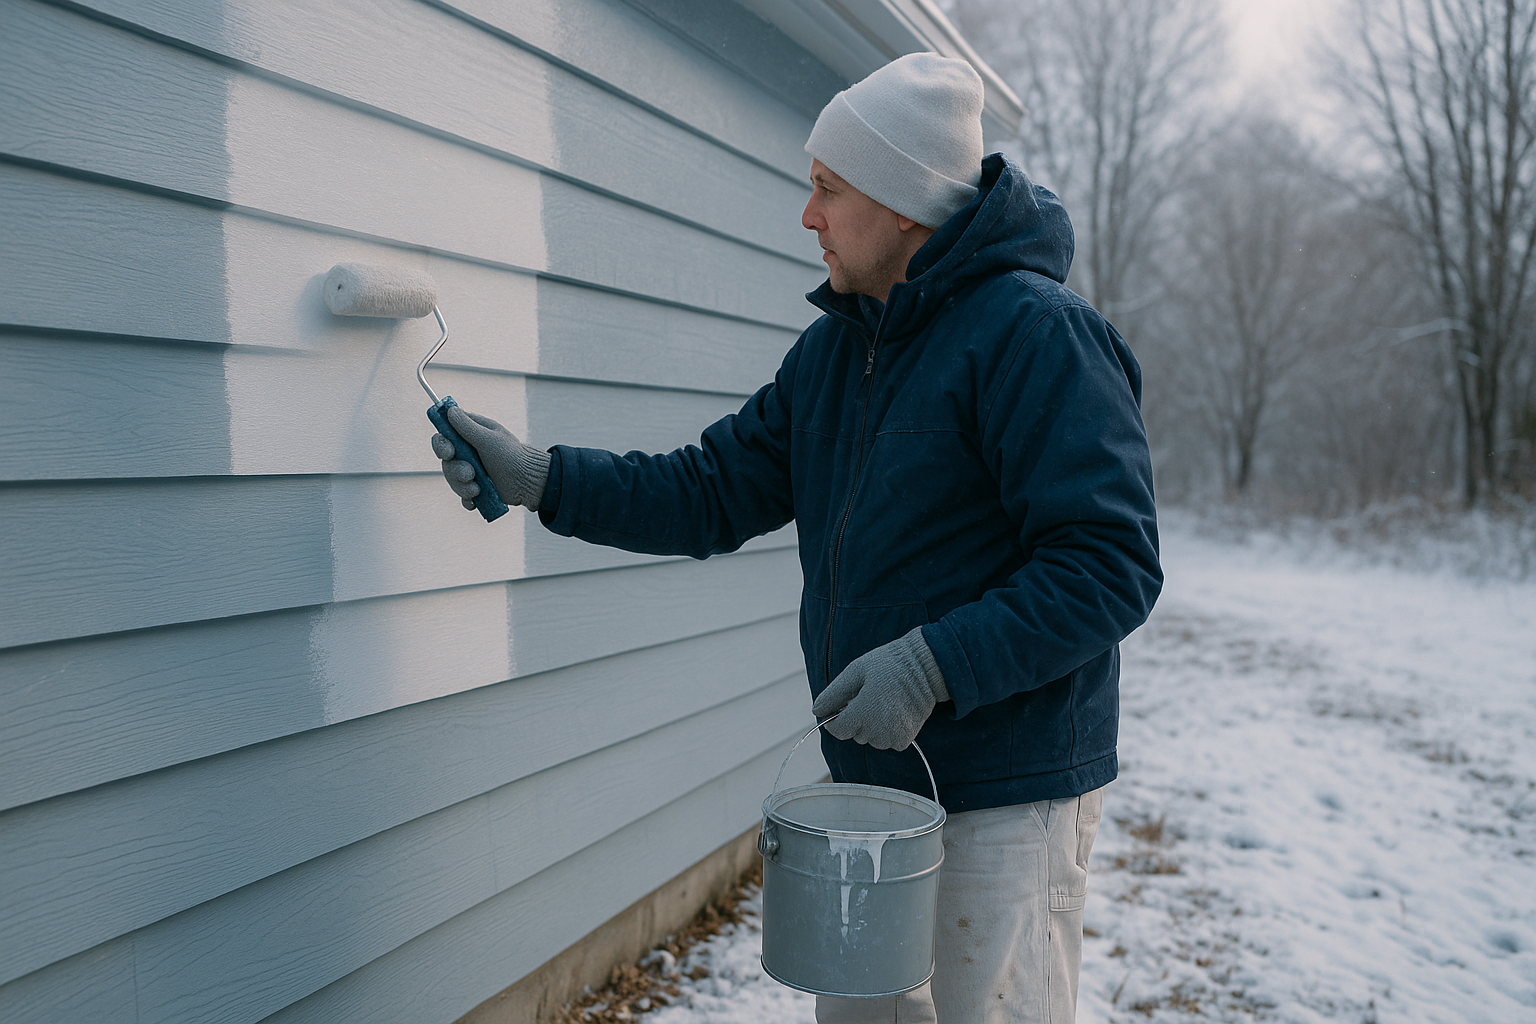
Exterior vs. Interior Painting in Cold Weather
Painting in cold weather requires different strategies and considerations depending on whether you are working indoors or outdoors. Exterior surfaces face wind, snow, and moisture challenges, while interior projects must balance temperature control with proper ventilation. Understanding these key differences will help you choose the right paint, avoid common mistakes, and ensure a smooth, lasting finish.
Key Differences in Paint Selection for Interior vs. Exterior Surfaces
Cold weather affects paint adhesion, drying times, and durability differently for interior and exterior surfaces. Choosing the right paint formula is essential to achieving the best results.
| Factor | Interior Painting | Exterior Painting |
| Temperature Control | Easier to maintain | Harder to control |
| Paint Type | Latex-based, fast-drying | Cold-weather exterior paint, slow-drying |
| Drying Challenges | Humidity, lack of ventilation | Wind, moisture, fluctuating temperatures |
| Common Risks | Fumes from low ventilation | Peeling, cracking from frost or moisture |
Best Paint Choices for Cold-Weather Painting:
- Interior: Use low-VOC latex paint for faster drying and minimal fumes.
- Exterior: Choose cold-weather formulated exterior paint with a minimum application temperature of 35°F (1.5°C) or lower.
Pro Tip: If painting both interior and exterior surfaces, allow more drying time for the exterior due to temperature fluctuations.
Managing Wind, Snow, and Moisture for Outdoor Painting
Exterior painting in cold weather is more challenging because of unpredictable weather conditions like wind, snow, and moisture buildup. These factors can cause uneven drying, paint streaks, or adhesion issues.
How to Manage Outdoor Painting Challenges:
- Check the weather forecast – Avoid painting if rain, snow, or freezing temperatures are expected within 24-48 hours.
- Start painting during peak temperatures – The best time to paint outdoors in cold weather is late morning to early afternoon, when surfaces have warmed up from the night’s cold.
- Use wind barriers – High winds can dry paint unevenly and blow debris onto wet surfaces. Use tarps or temporary barriers to shield your painting area.
- Watch for surface moisture – Frost, condensation, or wet surfaces can prevent proper adhesion. Use a moisture meter or dry cloth to check before painting.
- Apply thin coats – This prevents cracking and peeling caused by paint drying unevenly in fluctuating temperatures.
Pro Tip: Don’t paint too late in the day—temperatures drop quickly at sunset, increasing the risk of condensation forming on fresh paint.
Controlling Indoor Airflow and Ventilation When Painting in Winter
When painting indoors in cold weather, proper airflow is crucial to prevent paint fumes from accumulating and ensure even drying. However, opening windows or doors for ventilation can lower the indoor temperature, slowing the drying process.
How to Balance Ventilation and Temperature:
- Use exhaust fans and air purifiers – These help remove fumes without dramatically lowering room temperature.
- Slightly crack a window or door – Avoid creating strong drafts that can dry paint too quickly and unevenly.
- Use a space heater – Maintain a consistent room temperature (50-70°F / 10-21°C) without placing heat sources too close to painted areas.
- Avoid using ceiling fans – They can cause uneven drying and dust contamination. Instead, use floor fans for gentle air circulation.
- Choose low-VOC or water-based paints – These reduce strong fumes and are safer for enclosed spaces.
Pro Tip: Keep painted rooms closed off from high-traffic areas to minimize dust and debris from settling on wet paint.
Troubleshooting Cold-Weather Painting Problems
Painting in cold weather comes with unique challenges, from thickened paint to adhesion issues. If not addressed properly, these problems can result in an uneven finish, cracking, or peeling. Below are solutions to fix and prevent common cold-weather painting problems.
What to Do If Your Paint Becomes Too Thick or Freezes
Cold temperatures can cause paint to thicken, separate, or even freeze, making it difficult to apply. Paint that has frozen and thawed multiple times may become unusable, so proper storage and handling are essential.
How to Fix Thickened or Frozen Paint:
- Store paint in a temperature-controlled environment – Keep it between 50-70°F (10-21°C) before use.
- Warm up thickened paint slowly – Place the sealed can in a bucket of warm (not hot) water and stir thoroughly.
- Never use a heat gun or microwave to warm paint – Rapid heating can break down its chemical structure.
- If the paint has frozen, check its consistency – Stir well; if it remains lumpy, stringy, or won’t mix smoothly, it may be unusable.
- Use paint conditioners – For latex paint, Floetrol can improve flow without thinning too much; for oil-based paints, use Penetrol.
Pro Tip: Always test a small patch before applying thickened or previously frozen paint to ensure proper adhesion and finish.
Fixing Uneven Coats and Brush Strokes in Cold Conditions
Cold weather affects how paint flows and levels, making it more difficult to achieve a smooth, even finish. Thickened paint and slow drying times often lead to visible brush strokes or roller marks.
How to Fix Uneven Paint in Cold Weather:
- Use high-quality synthetic brushes and foam rollers – They handle thicker paint better.
- Apply thinner coats – Thick paint takes longer to dry and is harder to spread evenly.
- Maintain a steady application speed – Painting too fast can leave streaks, while going too slow can create thick, uneven patches.
- Lightly sand dried brush strokes before adding another coat – Use fine-grit sandpaper (220-grit) for a smoother finish.
- Keep paint warm before application – Slightly warming paint (without overheating) improves its flow and leveling properties.
Pro Tip: Use a work light to check for uneven spots before the paint dries completely.
Preventing and Fixing Peeling and Adhesion Issues
Paint applied in cold, damp, or improperly prepared conditions is more likely to peel, crack, or fail to bond.
How to Prevent Peeling and Adhesion Issues:
- Ensure surfaces are completely dry – Moisture under the paint layer can cause blistering and peeling.
- Use a cold-weather bonding primer – This improves adhesion on cold, porous, or weathered surfaces.
- Warm up the painting surface if needed – Use heaters or direct sunlight to bring the temperature above minimum application levels.
- Apply thin coats and let them fully dry – Rushing the process leads to layer separation and peeling.
- Seal edges and corners properly – These areas are more prone to peeling in harsh weather conditions.
Pro Tip: If peeling occurs, scrape off the damaged area, sand it smooth, prime it again, and repaint in better conditions.
Safety Precautions for Cold-Weather Painting
Painting in cold weather not only presents technical challenges but also requires extra safety measures, especially when working outdoors or using solvent-based paints indoors.
How to Stay Warm and Comfortable While Painting Outdoors
Painting in cold temperatures for extended periods can be physically demanding. Proper clothing and preparation help prevent discomfort and cold-related health risks.
Best Practices for Staying Warm While Painting Outdoors:
- Wear thermal layers and insulated gloves – Keeping your hands warm ensures better brush and roller control.
- Use a hat and breathable face mask – Protects against wind and paint fumes.
- Take breaks indoors – Avoid prolonged exposure in freezing temperatures.
- Move frequently – Standing in one spot for too long can reduce circulation and cause stiffness.
- Stay hydrated and eat energy-rich snacks – Cold weather can drain energy quickly.
Pro Tip: Avoid wearing loose scarves or long sleeves that can accidentally touch wet paint.
Proper Ventilation When Using Oil-Based Paints Indoors
Oil-based paints release strong fumes that can cause dizziness, headaches, and respiratory issues if inhaled for long periods. Since opening windows in cold weather may not be ideal, take extra precautions to ensure proper airflow.
How to Ventilate Indoors While Keeping Warm:
- Use exhaust fans or air purifiers – They remove fumes without drastically lowering room temperature.
- Slightly open a window on opposite sides of the room – This creates a gentle cross-ventilation effect.
- Place a box fan facing outward near an open window – Helps push paint fumes outside without making the room too cold.
- Wear a respirator mask – Choose a NIOSH-approved mask with organic vapor filters when using oil-based paints.
- Limit time spent in the freshly painted room – Allow 24-48 hours before regular use.
Pro Tip: Use low-VOC or water-based alternatives whenever possible to reduce fume exposure indoors.
Handling Paint and Solvents Safely in Cold Weather
Cold-weather painting often involves heating devices, flammable materials, and prolonged exposure to chemicals, increasing safety risks. Proper handling of paint, solvents, and tools minimizes hazards.
Essential Safety Tips for Cold-Weather Painting:
- Store paint and solvents away from heat sources – Avoid placing them near space heaters or open flames, as many are flammable.
- Keep a fire extinguisher nearby – Especially if working in enclosed areas with solvent-based products.
- Wear protective gloves and goggles – Prevents skin irritation and accidental splashes.
- Dispose of rags and brushes properly – Oil-soaked rags can spontaneously combust if left in a pile. Store them in a metal container with a sealed lid.
- Keep children and pets away from the work area – Paint fumes and chemicals can be harmful to small children and animals.
Pro Tip: If working in a garage or basement, keep the door slightly open to allow fresh air to circulate.
Conclusion
Painting in cold weather presents unique challenges, but with the right approach, you can achieve a smooth, durable, and professional-quality finish despite the temperature drop. By choosing the right products, preparing surfaces properly, and adjusting your painting techniques, you can prevent common cold-weather issues like poor adhesion, extended drying times, and peeling.
Key Takeaways for Painting in Cold Weather:
- Use cold-weather paint and primers – Look for products designed to perform in temperatures as low as 35°F (1.5°C).
- Prepare surfaces properly – Ensure they are clean, dry, and free from frost or condensation.
- Apply thin coats and extend drying time – Cold weather slows drying, so wait longer between coats to avoid trapping moisture.
- Optimize drying conditions – Use heaters, fans, or dehumidifiers to maintain proper temperature and airflow.
- Follow safety precautions – Wear proper gear, ensure adequate ventilation, and store paints and solvents safely.
With careful planning and patience, you can achieve a professional and long-lasting paint job, even in cold weather.
FAQs
Can you paint in freezing temperatures?
It is not recommended to paint in freezing conditions (below 32°F/0°C) as most paints will fail to dry and properly adhere. However, specialized cold-weather paints can be used in temperatures as low as 35°F (1.5°C). Always check the manufacturer’s recommendations before painting.
How do I know if my paint is too cold to use?
If paint has thickened, separated, or become clumpy, it may be too cold. Let it warm up to room temperature (50-70°F / 10-21°C) and stir thoroughly. If the consistency does not return to normal, it may have permanently degraded and should not be used.
What happens if you apply paint below the recommended temperature?
Painting in temperatures lower than the manufacturer’s recommendation can cause:
- Extended drying times, leading to tacky or sticky surfaces.
- Poor adhesion, increasing the risk of peeling or flaking.
- Cracking and bubbling, as the paint cannot bond properly to the surface.
- Uneven coverage, as thickened paint does not spread smoothly.
Should I use a heat gun or hairdryer to speed up drying?
It’s best to avoid direct heat sources like heat guns or hairdryers, as they can cause uneven drying, blistering, or cracking. Instead, use space heaters or fans to maintain a consistent temperature in the room. For exterior jobs, schedule painting during the warmest part of the day and allow extra drying time.
Does cold weather affect the longevity of the paint job?
Yes, if paint is applied in improper conditions, it may not cure correctly, leading to early peeling, cracking, or fading. However, if you follow best practices, such as using cold-weather paint, preparing surfaces correctly, and allowing adequate drying time, your paint job will be just as durable as one done in ideal conditions.