Understanding Wet Weather Painting Challenges
How Moisture Affects Paint Performance
Moisture is the primary variable that can compromise the success of an exterior or even interior paint job during wet weather. When surfaces retain water or the air is saturated with humidity, it can interfere with the paint’s ability to properly bond and cure.
Paint adhesion science in humid conditions
Paint needs a dry, clean, and porous surface to adhere well. In wet weather, even surfaces that appear dry can hold moisture just beneath the surface—especially wood, masonry, and concrete. This trapped moisture can prevent paint from properly penetrating or sticking, leading to early peeling, blistering, or uneven finishes.
Temperature and humidity interaction effects
The ideal temperature for painting typically falls between 10°C and 30°C (50°F–86°F), with relative humidity below 70%. When temperatures drop or humidity rises:
- Dry time increases, risking contamination or wash-off.
- Paint film fails to cure properly, affecting durability.
- Dew formation on surfaces (especially in the early morning or evening) can make even recently painted areas damp again.
Common Wet Weather Painting Mistakes
Rushing the drying process
Trying to speed up drying using artificial heat or applying paint too soon between coats can trap moisture, causing bubbling or soft finishes. Always follow manufacturer guidelines and adjust for ambient humidity.
Inadequate surface preparation
Skipping a thorough inspection or failing to dry out a surface completely before painting is a frequent issue. Proper cleaning and moisture checks using a moisture meter help avoid compromised adhesion.
Wrong paint selection
Standard paints aren’t formulated for moisture resistance. Using the wrong type—especially interior paint outdoors or oil-based paint on damp surfaces—can cause long-term damage. Always choose weather-adapted or moisture-tolerant formulas labeled for exterior use in variable conditions. Acrylic latex paints, for example, perform better than oil-based ones in damp or humid climates.
Pre-Painting Weather Assessment
Weather Monitoring Tools and Apps
Before picking up a brush, professional painters rely on precise weather tracking to plan safe and effective application windows. Real-time data helps avoid costly delays and failed paint jobs.
Recommended tools and apps include:
- The Weather Network / Weather.com – Reliable hourly and 10-day forecasts
- AccuWeather – Detailed humidity and precipitation tracking
- Windy – Great for wind speed/direction forecasts (critical for spraying)
- RadarScope or MyRadar – For tracking fast-moving storm systems in real-time
- PaintCheck Pro (Pro painters only) – Specialty app that includes substrate moisture detection and integrates weather forecasts
Critical Weather Thresholds for Painting
Different paint types have specific weather limitations. Painting outside these ranges significantly increases the risk of poor adhesion, blistering, or uneven finishes.
| Paint Type | Min Temp (°C/°F) | Max Humidity (%) | Max Wind Speed (km/h / mph) | Notes |
| Acrylic Latex | 10°C / 50°F | 70% | 16 km/h / 10 mph | Ideal for damp conditions, fast-drying |
| Oil-Based | 5°C / 41°F | 60% | 10 km/h / 6 mph | Requires longer dry time, poor in high humidity |
| Elastomeric Coatings | 7°C / 45°F | 65% | 13 km/h / 8 mph | Must cure without rain exposure for 24–48 hrs |
| Stains and Sealers | 10°C / 50°F | 50–60% | 10 km/h / 6 mph | Surface must be completely dry and porous |
Tip: Always check the product label or technical data sheet—manufacturers may have slightly different recommendations.
24-Hour Weather Planning Strategy
Professional painters often plan jobs around a full-day forecast, not just hourly conditions. Here’s how to build a 24-hour plan:
- Night Before: Check for dew or overnight rainfall that could leave surfaces damp in the morning.
- Morning Of: Confirm no upcoming showers and check humidity levels are trending down.
- During Painting: Monitor temperature and sun/shade exposure to prevent flash drying or inconsistent finishes.
- Post-Application: Ensure no rain or dew is forecasted for at least 4–8 hours, depending on product used. For oil-based paints, allow up to 24 hours for full cure time.
Pro Tip: For humid climates, schedule painting between late morning and early afternoon when temperatures are stable and surfaces have dried from morning condensation.
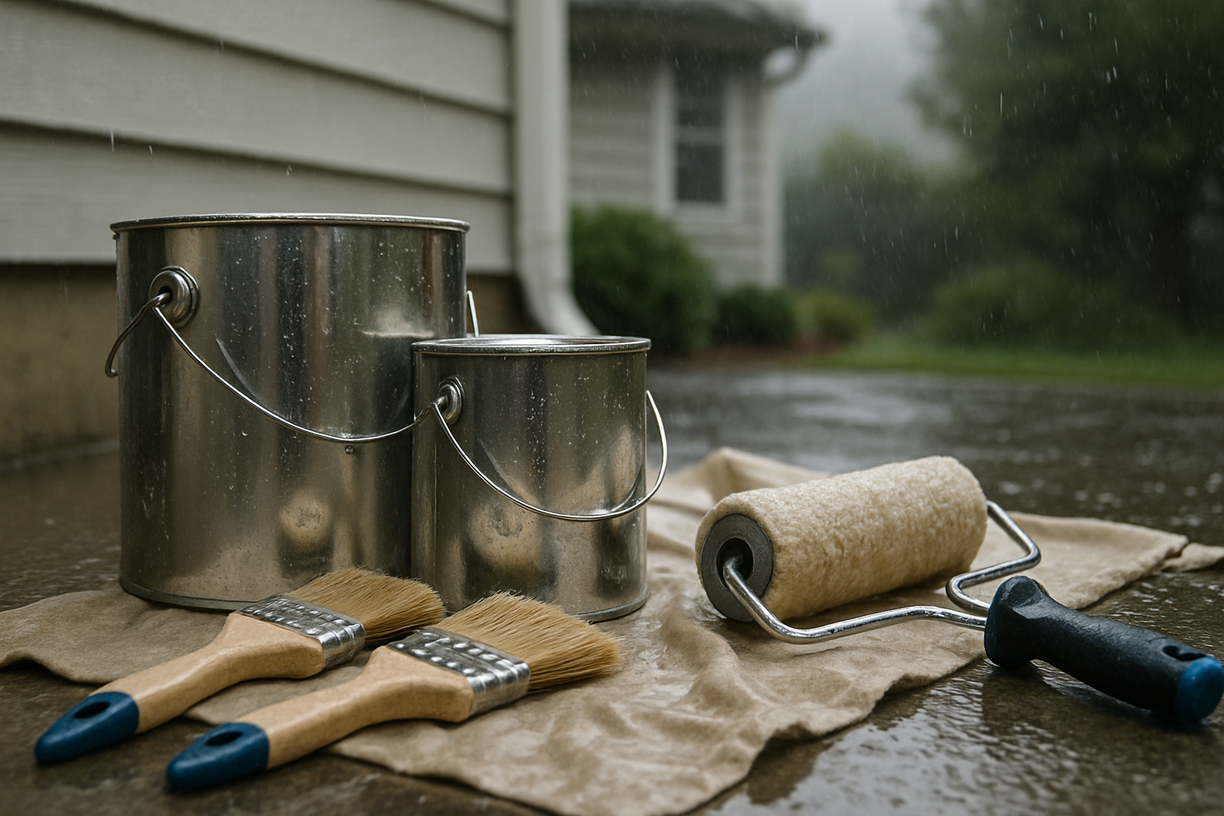
Essential Wet Weather Painting Equipment
Moisture Protection Gear Checklist
Painting in damp or rainy conditions requires more than just paint and brushes—it demands a carefully prepared setup that protects both the project and the people doing the work.
Tarps and plastic sheeting specifications
High-quality, waterproof tarps are essential for protecting work areas from rain or wet ground. Look for:
- Heavy-duty polyethylene tarps (8–10 mil thick) for durability
- UV-resistant and mildew-proof coatings for outdoor reliability
- Secure grommets and weights to anchor coverings against wind
Plastic sheeting (4–6 mil) can also be used to tent specific surfaces or to create temporary rain shelters during brief showers.
Dehumidifiers and fans
Speeding up drying times between coats is key in humid conditions:
- Industrial dehumidifiers help reduce ambient moisture inside enclosed areas like garages or sheds.
- High-velocity fans circulate air over surfaces, aiding evaporation without overheating paint.
Personal protective equipment (PPE)
Wet weather introduces slip risks and exposure to contaminated surfaces. Essential gear includes:
- Waterproof gloves and non-slip boots
- Breathable rain jackets with ventilation
- Safety goggles and filtered masks for enclosed, damp environments
Specialized Tools for Humid Conditions
Moisture meters and hygrometers
Before painting, test the surface moisture content. Most paints require it to be below 15%.
- Pin-type moisture meters give accurate readings in wood, drywall, and concrete
- Digital hygrometers help monitor ambient humidity throughout the project
Heat guns and drying accelerators
Used to spot-dry stubborn damp patches, heat guns must be used cautiously to avoid surface damage. Drying accelerators (chemical additives) are available for some paints to shorten cure times—but only use manufacturer-approved ones.
Non-slip safety equipment
Humidity often leads to slick surfaces, so safety cannot be overlooked:
- Anti-slip drop cloths or traction mats help stabilize ladders and work zones
- Rubber-soled footwear provides added grip in moist environments
- Wet-rated electrical cords and tools prevent dangerous shock risks when operating fans or heat tools outdoors
Pro Tip: Always test your gear setup on a small area before scaling to the full job to ensure optimal safety and paint performance.
Surface Preparation in Wet Conditions
Moisture Detection and Testing
Before any paint touches the surface, accurate moisture detection is critical. Painting over damp substrates can lead to peeling, bubbling, or premature failure—especially on wood, drywall, and masonry.
- Use pin or pinless moisture meters to measure the moisture content. Most surfaces should read below 15% before priming or painting.
- For broader environmental insights, use a digital hygrometer to monitor ambient humidity near the work area.
- Check hidden moisture by probing behind trims, under overhangs, or in shaded areas where drying is slower.
Tip: Always test multiple areas across the surface—moisture can be uneven, especially after rain or overnight dew.
Drying Techniques for Damp Surfaces
Getting surfaces dry enough to paint—without causing heat damage or contamination—is both a science and an art in wet weather conditions.
Heat application methods
- Use infrared heaters or low-temp heat guns to warm and dry small areas, especially edges and trim.
- Avoid overly high heat on wood or vinyl siding, which may cause warping or melting.
Ventilation strategies
- Position high-velocity fans to promote cross-ventilation across damp surfaces.
- Open windows and doors (when safe) to let natural airflow assist the drying process.
- In closed environments, pair fans with a dehumidifier for efficient drying.
Chemical drying agents
- Certain solvent-based primers or drying additives can assist with minor surface moisture but should be used cautiously and in accordance with product specs.
- Avoid overuse, as some agents can alter the paint’s adhesion characteristics.
Cleaning and Priming Wet Weather Protocol
Preparing the surface is especially important in damp conditions, where contaminants like mildew and pollen cling more stubbornly. Follow this protocol:
- Clean thoroughly with a mildew-resistant cleaner, especially in shaded or north-facing areas.
- Rinse with minimal water, then squeegee or towel off any standing moisture to accelerate drying.
- Use a moisture meter to confirm that the surface has reached a safe dryness level.
- Apply a stain-blocking, moisture-tolerant primer—ideally one that’s breathable and designed for humid climates.
- Let primer cure fully before painting. Watch for rising humidity that may slow cure times.
Reminder: Never assume a surface is dry just because it feels that way to the touch—always test with a meter to be sure.
Paint Selection for Challenging Weather
Choosing the right paint is one of the most important decisions when working in wet or humid conditions. Not all products perform equally—some are formulated to resist moisture, while others will fail rapidly if applied in the wrong climate.
Best Paint Types for High Humidity
Certain paints are engineered specifically for environments where moisture is a constant factor. These products offer better adhesion, breathability, and mold resistance compared to standard formulations.
| Paint Type | Humidity Tolerance | Best Use Cases | Key Benefits |
| Acrylic Latex (Exterior) | High (up to 85%) | Siding, trim, wood, stucco | Fast-drying, mildew-resistant, flexible |
| Elastomeric Coatings | Moderate to High | Masonry, concrete, stucco | Waterproof seal, excellent adhesion |
| Alkyd-Modified Acrylics | Medium to High | Doors, trim, high-traffic exterior areas | Hard finish, better adhesion in humidity |
| 100% Acrylic Paint | Very High | Humid climates and marine areas | Superior durability, breathable membrane |
| Oil-Based Paints | Low (under 60%) | Metal, certain wood surfaces (dry only) | Strong finish but poor performance in humidity |
Tip: Always check the label for “moisture-tolerant” or “designed for high-humidity” to ensure compatibility with your conditions.
Additives and Conditioners for Wet Weather
Additives can improve a paint’s flow, drying time, and resistance to moisture—especially useful in unpredictable climates.
- Paint conditioners (like Floetrol for latex or Penetrol for oil) enhance flow and leveling in damp air without compromising finish.
- Anti-mildew additives prevent mold and fungal growth in persistently humid areas—ideal for shaded exteriors or basements.
- Dry-time accelerators can be used sparingly to reduce exposure to post-application moisture, but only when permitted by the manufacturer.
Note: Never mix random additives without checking compatibility with your chosen paint brand.
Primer Selection for Moisture-Rich Environments
The right primer is critical—it serves as the foundation for adhesion and long-term durability.
Look for:
- Moisture-blocking primers – Ideal for surfaces prone to water infiltration (e.g., concrete, brick, or weather-exposed wood)
- Stain-blocking, breathable primers – Prevent water stains from bleeding through while allowing moisture vapor to escape
- Mildew-resistant formulations – Essential for areas with poor ventilation or frequent rain exposure
Popular options include:
- Zinsser® Bulls Eye 1-2-3 Plus (for humid surfaces)
- KILZ® Premium High-Hide (for mildew resistance)
- Sherwin-Williams Loxon® Concrete & Masonry Primer (for damp masonry)
Pro Tip: Never skip priming in wet weather—even if the paint is labeled “self-priming.” The extra layer adds vital protection and performance stability.
Application Techniques for Wet Weather
Applying paint in wet or humid conditions requires modified techniques to ensure a smooth, durable finish. From brush strokes to spray pressure, every detail matters when humidity is high or surfaces are marginally dry.
Modified Brush and Roller Techniques
In wet weather, paint behaves differently—it can become thicker, dry slower, or develop surface imperfections like streaks and bubbles. Adjusting your manual techniques can help counteract these effects.
- Use high-quality synthetic brushes that resist water absorption and offer better control with latex paints.
- Opt for microfiber or short-nap rollers (¼”–⅜”) to avoid over-absorption and minimize splatter in humid conditions.
- Apply thinner coats and allow longer drying times between layers. Thick coats trap moisture and lead to bubbling.
- Brush in shorter, controlled strokes to reduce dripping and encourage even application.
Avoid overworking the paint—constant rolling or brushing can pull partially dried paint, leading to a tacky, uneven finish.
Spray Painting in Humid Conditions
Spraying offers speed and uniformity, but humidity and moisture demand adjustments to ensure optimal performance.
Equipment adjustments:
- Use airless sprayers with fine-tuned tip sizes to reduce overspray and control paint flow.
- Attach a moisture filter or air dryer to your spray gun setup to prevent water contamination in compressed air systems.
Pressure and pattern modifications:
- Lower pressure slightly to avoid atomizing moisture into the paint.
- Adjust the spray pattern for a tighter fan to reduce airborne dispersion in damp air.
- Maintain a consistent 12-inch spray distance and move steadily to prevent pooling or streaks.
Pro Tip: Back-brushing after spraying can help the paint bond better to moist or uneven surfaces.
Managing Paint Consistency and Flow
Humidity can thicken paint or delay evaporation. Managing viscosity is critical for even coverage and reduced dry-time issues.
- Store paint indoors overnight to maintain optimal temperature and consistency.
- If paint thickens, use approved paint conditioners—not water—especially in humid environments. (e.g., Floetrol for latex, Penetrol for oil-based)
- Stir regularly during use to keep pigments and solvents evenly mixed.
Avoid over-thinning. Too much additive can weaken the paint film, leading to adhesion issues or early wear—especially in rain-prone environments.
Safety Protocols for Wet Weather Painting
Working in wet or humid conditions introduces a range of hazards that go beyond paint performance. Moisture increases the risk of electrical accidents, slips, and poor air quality. Following proper safety protocols is essential to protect both the crew and the job site.
Electrical Safety with Moisture Present
Painting often involves powered equipment like sprayers, fans, or heaters—which becomes especially dangerous when moisture is present.
Key electrical safety practices include:
- Use only GFCI-protected outlets and extension cords rated for outdoor or wet use.
- Inspect cords and tools for fraying or damage before each use. Replace any compromised gear immediately.
- Keep all power sources elevated off the ground and protected from direct water exposure.
- Never operate electrical tools with wet hands or while standing on a wet surface.
Pro Tip: Use battery-operated tools where possible to reduce exposure to electrical currents in damp areas.
Slip and Fall Prevention
Wet surfaces—especially on ladders, scaffolds, and patios—become treacherous quickly. Preventing falls requires both surface management and personal safety gear.
Surface treatment for walkways:
- Lay down anti-slip mats or treated drop cloths in high-traffic areas.
- Clear moss, algae, and mud from walkways and work platforms before starting.
- Use grit additive or temporary traction strips on ramps and inclined surfaces.
Proper footwear and equipment:
- Wear non-slip, waterproof boots with deep treads for maximum grip.
- Use ladder stabilizers and check for solid footing before each use.
- Make sure scaffolding is leveled and secured, especially on soft or muddy ground.
Slips are the #1 cause of worksite injury in wet conditions—don’t cut corners here.
Ventilation and Air Quality Management
Wet weather painting often happens in enclosed or semi-enclosed areas to avoid rain exposure, but this introduces ventilation challenges.
- Use box fans or industrial ventilators to promote airflow and expel fumes, especially when using oil-based products.
- Open windows and doors strategically to prevent VOC buildup while minimizing exposure to outside moisture.
- Wear NIOSH-approved respirators in confined spaces where airflow is limited or chemical exposure is high.
Warning: Never use propane or fuel-powered heaters in closed areas without proper ventilation—they produce carbon monoxide.
Drying and Curing Management
Managing drying and curing in wet weather is crucial to achieving a strong, long-lasting finish. Moisture, humidity, and temperature can all interfere with paint performance long after application—so proactive strategies are essential to protect your work.
Accelerating Dry Time Safely
While it’s tempting to rush the drying process, the key is to speed things up without compromising paint integrity. The goal is to create an ideal microclimate around the painted surface.
| Drying Factor | Impact | Safe Acceleration Method |
| High humidity | Slows solvent/water evaporation | Use dehumidifiers and cross-ventilation |
| Low temperature | Delays film formation | Apply safe heat with IR lamps or heaters |
| Lack of airflow | Causes uneven drying and blotching | Use fans to circulate air continuously |
| Thick paint application | Increases risk of trapping moisture | Apply thinner coats with longer intervals |
Tip: Always follow the paint manufacturer’s recommended dry time and curing window, adjusting for climate conditions.
Monitoring Cure Progress
Dry paint does not always mean cured paint. Full curing is what ensures durability, resistance, and adhesion.
Visual inspection techniques:
- Look for signs of cloudiness, wrinkling, or discoloration, which may indicate moisture entrapment.
- Confirm that sheen is consistent across surfaces—uneven gloss can signal improper drying.
Touch tests and timing:
- Perform a gentle fingertip test in an inconspicuous area. The paint should feel dry and firm, not tacky.
- For latex paints, expect a full cure in 7–14 days; oil-based paints may take up to 30 days depending on humidity.
Avoid cleaning, sealing, or exposing the paint to heavy wear until fully cured, even if it feels dry to the touch.
Protecting Wet Paint from Additional Moisture
Wet paint remains vulnerable to rain, condensation, and physical damage. Protection during this stage can make or break the final result.
- Use plastic sheeting, pop-up canopies, or temporary enclosures to shield painted surfaces if unexpected rain is forecasted.
- Avoid painting too late in the day, especially on exterior jobs, as evening dew can interfere with curing.
- Mark and tape off wet areas clearly to prevent accidental contact or rework.
Pro Tip: For exterior jobs, apply paint only when there’s at least a 4–6 hour dry window before the next rain or high humidity cycle.
Emergency Protocols and Contingency Planning
Even the best-laid painting plans can be disrupted by sudden weather shifts or equipment failure. A proactive contingency plan ensures your crew can respond quickly, minimize damage, and protect both work quality and safety.
Sudden Weather Change Response
A sudden downpour, gust of wind, or unexpected humidity spike can ruin fresh paint within minutes. Having a clear response plan helps reduce panic and preserve work already completed.
Key response steps include:
- Stop painting immediately if conditions fall outside safe thresholds (e.g., rain starts, wind exceeds 20 km/h).
- Cover freshly painted surfaces using pre-positioned tarps or plastic sheeting—without letting the cover touch the wet surface.
- Move exposed equipment to a dry, sheltered location to prevent water damage or electric hazards.
- Document the interruption (time, weather condition, affected areas) to inform quality checks and scheduling.
Tip: Assign a team member as the designated “weather watch” lead for every job to track radar and make real-time decisions.
Protecting Partially Completed Work
When a project is interrupted mid-process, damage control becomes the priority.
- For wet surfaces, avoid wiping or touching unless absolutely necessary. Allow the surface to dry fully before evaluating.
- If edges or corners were exposed, gently feather out any visible drips once dry and plan to sand/repaint as needed.
- Use low-adhesive painter’s tape to secure coverings without disturbing the painted area.
Advanced Tip: Use breathable protective sheeting or mesh rain shelters to reduce condensation while still shielding against moisture.
Equipment Breakdown Solutions
In remote or weather-sensitive jobs, a single equipment failure can delay the project by days. Prepare a backup plan to stay on track.
Strategies include:
- Always bring backup rollers, brushes, and extension poles, even when spraying is the primary method.
- Store duplicate nozzles, filters, and hoses for sprayers to quickly swap damaged components.
- Keep a manual tool kit and emergency power bank or generator on-site for electric tool recovery.
- If power tools fail during critical drying or prep, transition to manual drying (fans or open-air airflow) and manually apply coatings with brushes or rollers.
Pro Tip: Keep a laminated “emergency equipment checklist” in each work truck to ensure preparedness for unexpected tool failures.
Post-Application Care and Maintenance
Once the paint has been applied, the job isn’t over—especially in wet weather conditions. Ensuring that the paint cures properly and that no defects arise during the drying period is critical to achieving a durable, professional result. Careful inspection and timely touch-ups can save time, money, and client frustration.
Quality Control Inspection Checklist
Perform a comprehensive inspection 12–24 hours after painting—when surfaces are dry to the touch but still curing.
Look for the following common post-application issues:
- Blistering or bubbling: Often caused by moisture trapped beneath the surface
- Streaks or sags: Typically due to high humidity or over-application
- Discoloration or uneven sheen: A sign of dew or rain exposure before proper drying
- Cracking or peeling edges: Indicates surface moisture or poor adhesion
Inspection tips:
- View surfaces from multiple angles and under natural light.
- Use a flashlight or work light to spot sheen inconsistencies on low-sheen paints.
- Document any problem areas with photos and notes for your crew or client records.
Pro Tip: Perform a follow-up inspection 3–5 days later if humidity remained high after painting, as some defects can appear during extended cure periods.
Touch-Up Strategies for Weather-Damaged Areas
If areas have been compromised by moisture, don’t rush to repaint. Proper repair ensures the new coat blends and lasts.
Step-by-step touch-up plan:
- Let the surface dry completely. Use a moisture meter to confirm it’s paint-ready (<15% moisture).
- Lightly sand affected areas to feather out blistered, sagged, or peeled sections.
- Clean the area of dust, mildew, or contaminants before reapplication.
- Re-prime exposed substrate using a moisture-resistant primer to re-seal the area.
- Apply thin, even touch-up coats, blending outward slightly from the damage zone for a seamless finish.
Pro Tip: Use the same applicator type (brush, roller, or sprayer) used during the original job to match texture and finish as closely as possible.
Troubleshooting Common Wet Weather Paint Problems
Painting in wet or humid conditions increases the risk of performance issues—even with proper prep and high-quality materials. Knowing how to troubleshoot common problems allows you to take swift corrective action before minor issues become major setbacks.
Fixing Adhesion Failures
Adhesion failure often appears as peeling, flaking, or bubbling paint—usually due to moisture trapped beneath the surface or improper surface prep.
Repair Process:
- Scrape off all loose or flaking paint using a putty knife or paint scraper.
- Sand the affected area to smooth edges and roughen the surface for better bonding.
- Test for moisture using a meter before reapplying any products.
- Prime with a high-adhesion or moisture-blocking primer.
- Repaint in thin, controlled coats, following full dry-time recommendations.
Pro Tip: If adhesion failure is widespread, it may be necessary to strip and restart the entire section to avoid patchy results.
Dealing with Slow Drying Issues
High humidity can dramatically slow down drying times, leading to smudging, dirt pickup, and curing problems.
Solutions:
- Increase air movement using fans (placed diagonally for cross-ventilation).
- Use dehumidifiers in enclosed spaces to reduce ambient moisture.
- Apply heat cautiously—use infrared heaters or warm-air blowers to gently raise the temperature without overheating the paint.
Avoid closing up painted rooms or sealing off airflow during the drying process. Trapped air will stall evaporation.
Moisture Damage Prevention and Repair
If fresh paint is exposed to rain, dew, or condensation before it’s fully cured, staining, streaking, and surface softness may occur.
How to handle it:
- Let the surface dry completely before assessing the damage.
- If the finish is only cosmetically affected, light sanding and a fresh topcoat may suffice.
- If bubbling, blistering, or streaking occurs, sand, prime, and repaint the damaged sections as needed.
- Use breathable paints and primers for moisture-prone areas in the future to minimize long-term issues.
Professional vs. DIY Considerations
Wet weather painting isn’t just about having the right gear—it’s also about experience and judgment. Knowing when to bring in a professional can save you from costly do-overs.
When to Call Professional Painters
Call in the pros when:
- The project involves high-risk exterior surfaces (e.g., multi-story homes, wood siding, masonry).
- You’re working against tight timelines or unpredictable weather windows.
- Previous issues (e.g., chronic peeling or moisture intrusion) suggest structural concerns.
- You lack the tools to safely dry or ventilate enclosed or semi-exposed areas.
Professional painters have access to commercial-grade equipment and specialty paints formulated for moisture-heavy conditions.
Insurance and Warranty Implications
DIY painting during wet conditions can void warranties or lead to uncovered damages—especially for larger or commercial properties.
- Manufacturer warranties on paint products may be voided if environmental guidelines are not followed (e.g., humidity levels, temperature).
- Home insurance policies may not cover water intrusion or damage caused by improper exterior coatings.
- Professional painters often include workmanship warranties and carry liability insurance for unexpected issues.
Bottom line: If the stakes are high—financially or structurally—it pays to hire a certified, insured professional.
FAQs
FAQ 1: Can I paint over surfaces that were recently rained on if they appear dry?
No. Even if a surface feels dry, it may still hold internal moisture that can interfere with paint adhesion. Use a moisture meter to confirm the surface is below 15% moisture content before applying primer or paint. Rushing this step often leads to peeling or blistering.
FAQ 2: What’s the maximum number of days I can leave primer exposed to wet weather before it needs recoating?
Most primers should be top-coated within 7 to 14 days, depending on the product and conditions. If exposed to rain or extended moisture, the primer may degrade or lose adhesion. Always check the technical data sheet from the manufacturer for maximum exposure windows in moist environments.
FAQ 3: Will using a paint conditioner void my paint manufacturer’s warranty?
It might. While many manufacturers approve specific conditioners (like Floetrol or Penetrol), using unapproved additives or exceeding recommended ratios can void warranties. To stay covered, always check your paint’s label or call the manufacturer for compatibility confirmation.
FAQ 4: How do I calculate the additional material costs when painting in wet weather conditions?
Factor in the cost of:
- Additives and conditioners to adjust paint flow and drying time
- Extra primer and paint for re-coating damaged areas
- Moisture protection gear like tarps, canopies, or ventilation equipment
- Labor for extended dry times or weather-related delays
A safe estimate is to add 10–20% to your material and labor costs when planning a wet weather project.
FAQ 5: Can I use regular interior paint outside if I add wet weather additives?
No. Additives can improve performance, but they can’t convert interior paint into a weatherproof exterior product. Interior paints lack UV resistance, mildew protection, and flexibility needed for outdoor exposure—even with additives. Always use paints specifically labeled for exterior use in wet or variable weather conditions.