Popcorn Ceiling Removal Cost in Vancouver (2026): Removal vs Skim Coat Pricing
If you want a smooth, level 5 ceiling in Vancouver, you are usually deciding between scraping the texture off or skim coating over it. In 2026, most homeowners land somewhere between $6 to $12+ per sq ft for a professional, finished result (prep, dust control, repairs, prime, and paint), with asbestos and painted texture being the biggest price multipliers.
Quick take: If your popcorn is unpainted and tests clear, removal is often the lower-cost route. If it is painted, on concrete, has multiple coats, or is suspected asbestos, a skim-coat plan can be cleaner and more predictable.
- Typical Vancouver pricing ranges by method and ceiling size
- What changes quotes the most (asbestos, paint, height, access, repairs)
- Real room examples so you can sanity-check contractor estimates
- A simple estimator to ballpark your budget before you book site visits
Ranges assume a professional finish and include more than just scraping. Minimal “scrape only” work can be cheaper, but it usually leaves you paying later for patching, sanding, and repainting.
Get a ceiling assessment and a plan, not a guess
We confirm the substrate, check for paint and adhesion issues, and map out the cleanest route to a smooth ceiling. You get a clear scope and a fixed-price quote after a site visit.
Table of contents
- Quick pricing table: removal vs skim coat
- Mini estimator: rough budget in 30 seconds
- What is included in a professional quote
- Removal vs skim coat: how each method works
- What drives cost up or down in Vancouver
- Real example budgets: condo vs house
- How quoting works and what to ask contractors
- How to reduce cost without lowering the finish
- FAQ
- Related guides
Quick answer: what popcorn ceiling removal costs in Vancouver in 2026
When people search “popcorn ceiling removal cost”, they are usually imagining a smooth ceiling that is ready to live under, not just a scraped surface. That means containment, careful removal or skim coating, sanding to a level 5 look, then priming and painting. For that finished outcome, Vancouver pricing usually clusters into the ranges below.
| Option | Best for | Typical finished price (CAD) | Timeline | Mess risk |
|---|---|---|---|---|
| Remove and refinish | Unpainted texture, drywall substrate, easy access, asbestos tested clear | $6 to $10 per sq ft | 2 to 4 working days | Medium |
| Skim coat over texture | Painted popcorn, minor texture, concrete ceilings, faster “no scraping” preference | $8 to $12+ per sq ft | 3 to 5 working days | Low to medium |
| Asbestos abatement and refinish | Confirmed asbestos, or high likelihood based on age and texture type | $12 to $25+ per sq ft (plus testing) | Varies by containment and clearance | Low if done properly |
These ranges reflect common Canadian and Vancouver-area estimates for professional projects, where costs vary by paint, height, repairs, and asbestos procedures. Always confirm what “per sq ft” includes: some quotes exclude repairs, skim, primer, or painting.
Mini estimator: rough budget in 30 seconds
This quick calculator is designed for planning, not for contracting. It assumes a smooth, painted ceiling and uses common Vancouver-style multipliers (painted texture, height, access, and asbestos steps). Use it to sanity-check quotes and decide whether you should bundle rooms into one project.
$0
If your home was built before the late 1970s, you should test before disturbing a popcorn ceiling. It is also common for later homes to have asbestos in certain products, so “age” alone is not a guarantee.
What you are actually paying for in a professional quote
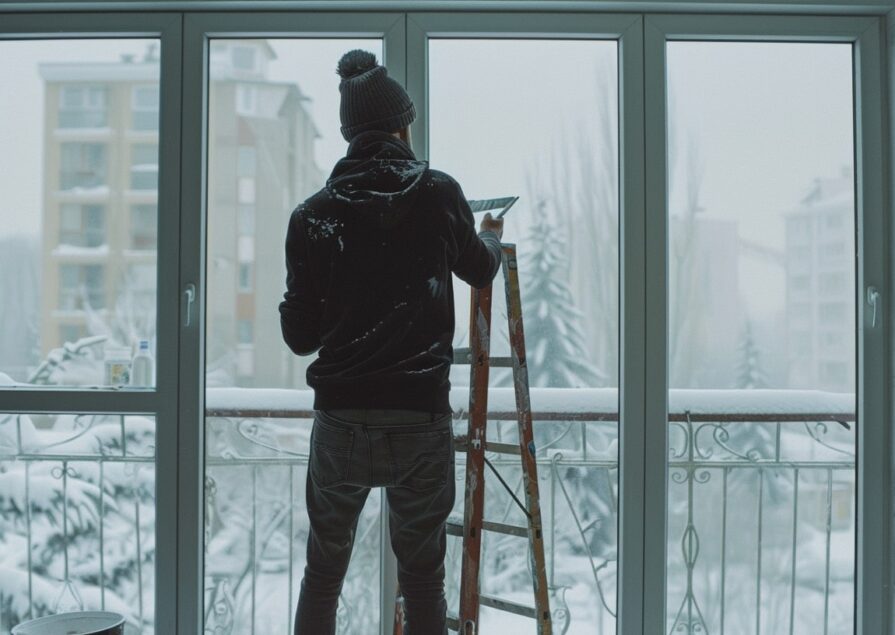
Popcorn ceiling pricing gets confusing because the finish level matters. A contractor can scrape the texture off cheaply, but if they leave torn drywall paper, gouges, and roller marks in the new paint, you still have an ugly ceiling. A finished ceiling costs more because it includes the work you cannot see: surface prep, dust control, repairs, and quality sanding.
In Vancouver homes, especially condos with bright window light and recessed lighting, ceilings show flaws fast. That is why “level 5” gets mentioned so often. In plain terms, level 5 means a uniform surface with no visible seams or patches under normal lighting. Getting there takes time and skilled finishing.
A typical full-scope quote includes
- Protection and containment: floors covered, walls and cabinets masked, vents sealed, doors taped, and negative air or HEPA filtration when needed.
- Safe testing steps: if the ceiling is old, or if the texture resembles older acoustic finishes, sampling and lab testing before work begins.
- Removal or skim plan: scraping and bagging, or bonding primer plus multi-coat skim on top, depending on substrate and paint.
- Repairs: patching damaged drywall, addressing water staining, fixing popped screws, and smoothing transitions at corners and bulkheads.
- Sanding and dust control: dustless sanding tools where practical, plus meticulous cleanup to keep the home livable.
- Prime and paint: one sealer coat and two finish coats of ceiling paint, with clean cut lines at walls and trims.
- Final inspection and cleanup: remove masking, wipe down surfaces, HEPA vacuum, and walk-through so you can approve the finish.
If a quote skips several of these items, it may look cheaper but can turn into change orders, delays, or disappointing results. When you compare estimates, compare scope first, then price.
Planning a smooth-ceiling upgrade in a condo or house?
We handle the full process: test, protect, remove or skim, sand, prime, paint, and clean. You get one accountable team and a finish built for Vancouver’s bright natural light.
Removal vs skim coat: which is the better value?
There is no universal winner. The cheaper option depends on what is on your ceiling right now. Popcorn texture behaves very differently if it is unpainted (often water-soluble) versus painted (often harder, bonded, and prone to tearing the drywall face). Substrate matters too: drywall, plaster, and concrete each need different prep to achieve a smooth surface that will not crack or flake.
Option 1: Remove the popcorn and refinish
Removal usually means wetting the texture and scraping it off in sections, then repairing the ceiling to restore a smooth plane. In older homes, this can expose taped seams, old repairs, and nail pops that the popcorn was hiding. A good crew expects that and prices for it.
- Pros: can be lower cost on unpainted texture, less compound buildup, clean final profile at crown and fixtures.
- Cons: can get messy, can tear drywall if painted, and often reveals more repairs than you expected.
- Best for: unpainted acoustic ceilings that test clear, with standard height and reasonable room access.
Option 2: Skim coat over the texture
Skim coating is a finishing strategy: you apply a bonding primer (when needed), then multiple coats of joint compound to bury the texture and create a smooth plane. On many Vancouver condo ceilings, especially concrete, skimming is the most practical route because scraping is either impossible or produces poor adhesion.
- Pros: often cleaner, avoids aggressive scraping on painted texture, and can be the more predictable path to level 5.
- Cons: more labor in finishing and sanding, and it is unforgiving under strong light if rushed.
- Best for: painted popcorn, lightly textured ceilings, concrete substrates, or projects where dust control is a priority.
A quick decision guide
| If your ceiling is… | Often the better route | Why |
|---|---|---|
| Unpainted, soft texture on drywall | Removal | Scrapes off faster and you skim only what needs it. |
| Painted popcorn, especially multiple coats | Skim coat | Scraping can shred drywall paper and increase repair time. |
| Concrete condo ceiling | Skim coat | Scraping is often not feasible; bonding and skimming is the norm. |
| Confirmed asbestos | Abatement plan | Requires licensed abatement procedures and controlled disposal. |
| Vaulted, high, or detailed ceiling lines | Either, priced higher | Height and access increase labor and scaffolding needs. |
What drives popcorn ceiling removal cost up or down in Vancouver
Most quotes are built from a base rate per square foot, then adjusted for risk and time. The biggest differences between a low quote and a high quote are usually not “company markup”. They are real time sinks: paint, height, containment, repairs, and strata rules.
1) Asbestos risk and required procedures
If asbestos is confirmed, the work is not a normal drywall finishing job. It is an abatement job with containment, specialized PPE, negative air, and controlled waste handling. In British Columbia, asbestos abatement contractors must be licensed and workers need mandatory training and certificates. Disposal rules also matter, because asbestos waste has to be delivered and buried properly at approved facilities.
Even when asbestos is not confirmed, many homeowners still choose to test. Testing can feel like an extra cost, but it can prevent unsafe work and expensive disposal surprises. If you are doing DIY disposal, the City of Vancouver notes testing can cost roughly $25 to $100 and can help you avoid burial fees when material tests negative.
2) Painted texture and adhesion problems
Paint changes everything. Unpainted popcorn often softens with water and releases. Painted popcorn tends to bond, resist wetting, and pull the drywall face when scraped. That leads to more patching and more skim coats. Multiple coats of paint, especially glossy paints, can require extra steps: scoring, aggressive scraping, or a skim plan that starts with a bonding primer.
3) Ceiling height, bulkheads, and architectural detail
Standard 8-foot ceilings are the baseline. As soon as you are working above 9 feet, labor slows down and safety requirements increase. Vaulted ceilings often require scaffolding, extended set-up time, and longer finishing runs. Bulkheads, coffered details, and crown molding add edges that have to be protected and later cut cleanly when painted.
4) Access, furniture, and lived-in homes
Popcorn ceiling work is easier in an empty room. In a lived-in home, crews spend real time moving and wrapping furniture, sealing doorways, protecting floors, and managing ventilation. That time is part of the quote. If you can clear the room yourself and remove fragile items, you can often reduce prep time and lower your estimate without sacrificing the finish.
5) Repairs hidden by texture
Popcorn ceilings were often applied to hide imperfect seams. Once you remove texture or start skimming, you might uncover tape ridges, old patches, water stains, hairline cracks, or nail pops. These repairs are normal, but they take time. If a contractor promises a perfect ceiling at a bargain price without allowing for repairs, you should expect shortcuts or change orders.
6) Finish expectations under Vancouver lighting
A smooth ceiling looks different under different conditions. A hallway with one light fixture is forgiving. A condo living room with floor-to-ceiling windows and recessed lights is not. If your goal is a premium level 5 finish that holds up under raking light, you are paying for more careful skim coats and more disciplined sanding.
7) Painting scope and cut lines
Some quotes include painting, some do not. Painting is not just rolling white on a ceiling. Clean lines at the wall intersection, uniform sheen, and stain blocking primer are often required. If the walls are being repainted too, you can sometimes bundle ceilings and walls and reduce the per-room cost because masking overlaps.
Real example budgets: what Vancouver homeowners often pay
Use these examples as budgeting anchors. They assume a smooth, painted ceiling and average room complexity. Your quote can land above or below depending on paint, access, repairs, and asbestos procedures. Minimum charges also matter: small ceilings can have higher per-square-foot pricing because set-up is fixed time.
Example A: 1-bedroom condo living room (300 sq ft)
- Unpainted popcorn, remove and refinish: $1,800 to $3,000
- Painted popcorn, skim coat: $2,400 to $3,600
- Premium finish under strong light: add 10% to 25%
Condo constraints can add cost: elevator protection, limited work hours, and stricter dust control. Concrete ceilings also push you toward skim coating and specialty primers.
Example B: Typical bedroom (120 to 160 sq ft)
- Finished removal route: $900 to $1,600
- Finished skim route: $1,100 to $2,000
Bedrooms often hit a minimum charge. If you have multiple bedrooms, bundling them into one scope is usually the best way to reduce your per-room cost.
Example C: Townhome main floor (800 sq ft across multiple rooms)
- Remove and refinish (mostly unpainted): $4,800 to $8,000
- Skim coat over mixed textures: $6,400 to $9,600
Multi-room projects can be efficient because prep overlaps. The crew masks once, runs sanding and compound cycles in batches, then paints at the end. This is where professional projects can feel surprisingly cost-effective per square foot.
Example D: Whole house ceilings (1,200 to 1,800 sq ft)
- Non-asbestos, mostly straightforward: $7,200 to $18,000+
- High ceilings, lots of detail, or repairs: higher, often 20% to 50% more
- Confirmed asbestos: scope and testing dictate, often significantly higher
For whole-house scopes, sequence matters. Many homeowners do ceilings before wall painting or flooring. That is usually the right call because ceiling finishing generates dust and because ceilings set the visual “cleanliness” for the rest of the project.
How quoting works and what to ask before you choose a contractor
In Vancouver, reputable contractors prefer to quote after a site visit. That is because a ceiling can look identical from the floor and still behave completely differently when work begins. A good estimator checks the things that actually change cost: paint, substrate, repairs, and access.
Questions that quickly reveal scope quality
- What exactly is included: is it removal only, or removal plus skim, prime, and paint?
- How do you handle asbestos risk: do you recommend testing, and how do you proceed if a test is positive?
- How many skim coats and sanding passes: what finish level are they targeting?
- What dust control do you use: HEPA vacs, dustless sanding, sealed vents, and cleanup steps.
- Who does the work: in-house crew vs subcontractors, and who is accountable for the finish.
- What is the timeline: multi-coat drying time matters; rushed schedules often show in the final ceiling.
- What is excluded: fixture removal, repainting walls, stain blocking, and repairs above a certain threshold.
A practical “apples to apples” checklist for comparing quotes
- Square footage measured the same way (flat area only vs including bulkheads)
- Protection scope (floors, walls, cabinets, HVAC vents)
- Repair allowances (water stains, cracks, tape ridges)
- Primer type (bonding sealer where needed, stain block if required)
- Paint coats and product line
- Cleanup standard (HEPA, wipe-down, disposal)
- Warranty and workmanship guarantee
How to reduce cost without lowering the finish
There are smart ways to lower your project price that do not involve accepting a worse ceiling. The goal is to reduce wasted labor, not to cut critical finishing steps.
Bundle rooms and consolidate setup time
Containment and protection take time. If you only do one small bedroom, you pay that set-up cost once. If you do three bedrooms plus a hallway, that same set-up time is spread across more square footage, so your per-room cost usually drops.
Clear the room and remove fragile items
If you can move furniture, remove artwork, and clear closets near the ceiling line, you can reduce prep hours. Ask your contractor what they want removed to keep the scope safe and efficient.
Decide how perfect “perfect” needs to be
A premium level 5 finish is worth it in big, bright spaces. In a laundry room, it might not be necessary. Let the light and the room’s purpose guide your finish level. You are not cutting corners, you are matching the finish to the space.
Time the project logically with other upgrades
Ceilings are best done before wall painting and before new floors if possible. If you are repainting anyway, bundling ceiling work with interior painting can reduce masking duplication and simplify scheduling.
Avoid DIY if asbestos is possible
DIY can look cheaper, but popcorn removal is messy and can be risky. If your ceiling might contain asbestos, do not scrape it. Testing first is the lowest-cost way to make a safe decision. Even when asbestos is not present, many homeowners underestimate the finishing work needed to make a ceiling truly smooth.
FAQ: popcorn ceiling removal and skim coating in Vancouver
Is popcorn ceiling removal priced per square foot or per room?
Both. Many contractors start with a per-square-foot rate, then apply minimum charges for small rooms because set-up, protection, and cleanup take fixed time. If you have several rooms, bundling them often reduces the effective per-room cost.
Is it cheaper to remove popcorn or to skim coat it?
If the texture is unpainted and tests clear, removal plus light skim is often cheaper. If the texture is painted, on concrete, or prone to tearing the drywall face, skim coating can be more predictable and sometimes cheaper once you include repairs.
How do I know if my popcorn ceiling might contain asbestos?
Age is a clue but not proof. Many acoustic textures used in older eras can contain asbestos. The safest approach is to take a sample and send it to an accredited lab before disturbing the ceiling. If it is confirmed, you need licensed abatement procedures.
Can you skim coat over asbestos popcorn instead of removing it?
This is a site-specific decision that depends on the ceiling condition, local requirements, and whether the texture is stable and can be safely encapsulated. If asbestos is present, do not disturb it without professional guidance and the correct licensing and containment steps.
How long does a smooth-ceiling project take?
Many projects take 3 to 5 working days because joint compound needs time between coats, and sanding cycles are staged to keep the surface flat. Larger projects can run longer, and asbestos procedures can add time for containment and clearance steps.
Will my home be dusty after popcorn removal?
A good crew reduces dust with containment, sealing vents, using HEPA filtration, and cleaning thoroughly at the end of each day. Some dust is unavoidable with sanding, but professional dust control keeps it manageable and prevents it from spreading through the home.
Do I need to repaint my walls when I redo the ceiling?
Not always, but it is common. Ceilings often require cutting a fresh line at the top of the wall, and minor scuffs can happen during protection and masking removal. If your walls are due for repainting, bundling can be efficient.
What should be included in a “good” quote?
Protection, the removal or skim method, repairs, sanding, primer, paint coats, cleanup, and clear exclusions. Ask for the finish level they are targeting and how they handle asbestos risk. If the scope is vague, the final cost and quality can be unpredictable.
Want a smooth ceiling without the stress?
Book a free estimate. We will assess paint, substrate, lighting, and any asbestos risk, then recommend the cleanest route to a level 5 finish. No surprises.